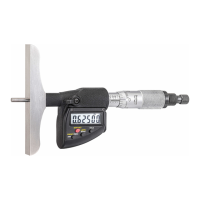
749.1 User Guide 6 Ver 1.0
The L. S. Starrett Company 6/8/2023
2.0 Setting PRESET
The Preset button allows you to program any reading into the
display at any position of the spindle. It is used to establish the correct
zero point of tools that exceed one inch or 25 mm range.
For example: In a 8-9” rod setup, the number 8.00000 would be
added in the Preset.
To install a preset value:
1. First; move the thimble to zero the tool, and then use the Spindle
lock to keep it from moving. Press the ZERO button to zero the
electronics.
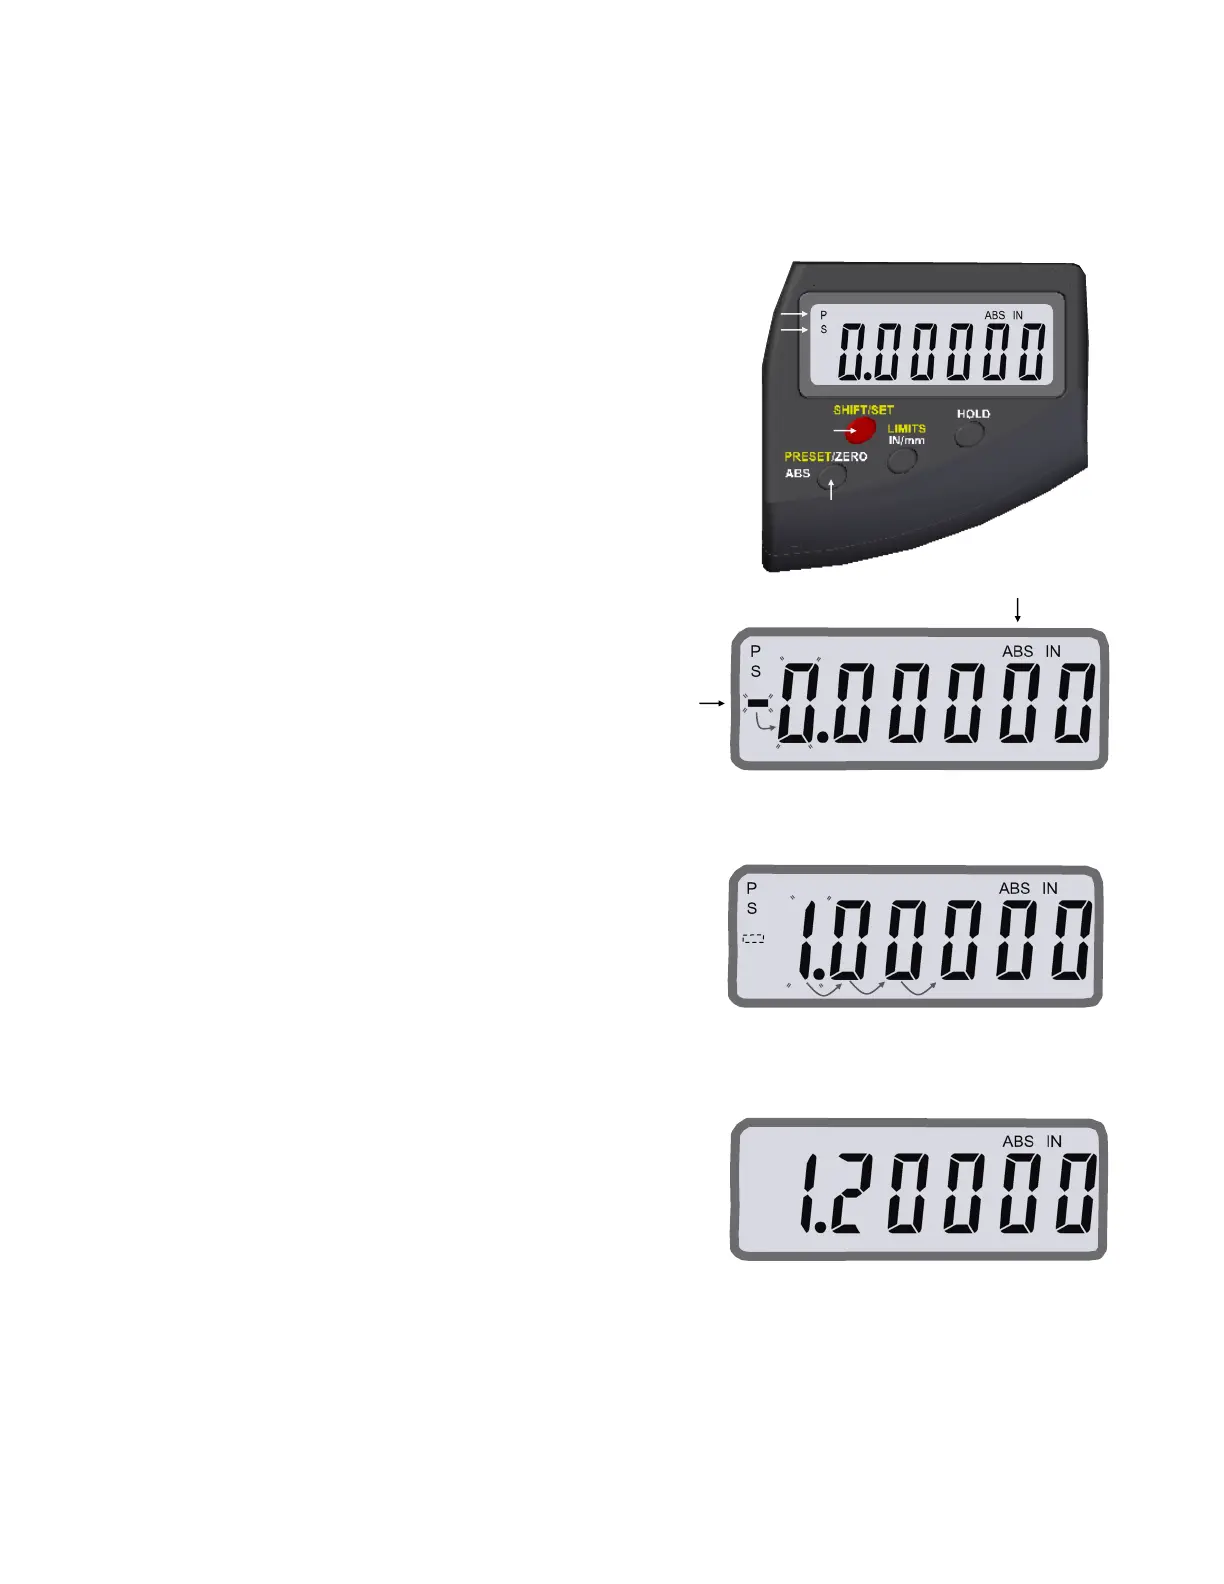
2. Push the SHIFT/SET button to get into the secondary button
functions, an “S” will show on the top left of the display, Fig.5.
3. Press the PRESET button and a “P” will appear above the “S”, and
it will be blinking. “ABS” will be displayed as well.
4. There maybe a previous preset number displayed or “0.00000”.
5. The negative sign will be blinking. Press the PRESET button to
toggle the negative sign to positive (no sign) or vise versa, Fig.6.
6. Press the SET button to move to the first digit position, which will
start flashing, Fig.6.
7. Press the PRESET button to change the number in the position
that is flashing. Each press advances the number from 0-9. Stop
when the number is correct, Fig.7.
8. Press the SET button to move to the next position, and press the
PRESET button to install a number In the that position if needed.
9. Continue to use the SET button to advance from position
to position,Fig.7.
10. After all the numbers are installed, Press the SET button again and
the display will flash between “Shift” and “Preset”.
11. Press the PRESET button to install the new preset number and the
“S” and “P” will not be shown on the display, Fig.8. The preset
number and ABS will be displayed. The preset number is
connected with ABS mode.
12. When you need to use the preset number again; zero the tool
(See no. 1. above) then press and hold the ABS button for
2 seconds to enable ABS mode. The preset number will be
displayed.
Fig.8
Fig.6
Fig.7
Fig.3
Section 2 Functions
Fig.5
 Loading...