6932200010
22
The causes may be:
− The cutting speed is too low
− Insufficient cutting current
− Incorrect torch angle
− The cutting current is too high
− Torch components are worn.
− Travel speed is too slow
CUTTING IN AUTOMATIC MODE
-Turn the switch (8) to automatic position
-Make the cut, when you reach the end of the
work-piece the arc switches off and then switches
on again automatically. (perforated sheet mode)
CUTTING IN MANUAL MODE
- Turn the switch (8) to manual position.
- Make the cut, when you reach the end of the cut
the arc switches off. Switch on by pressing the
torch button to start cutting
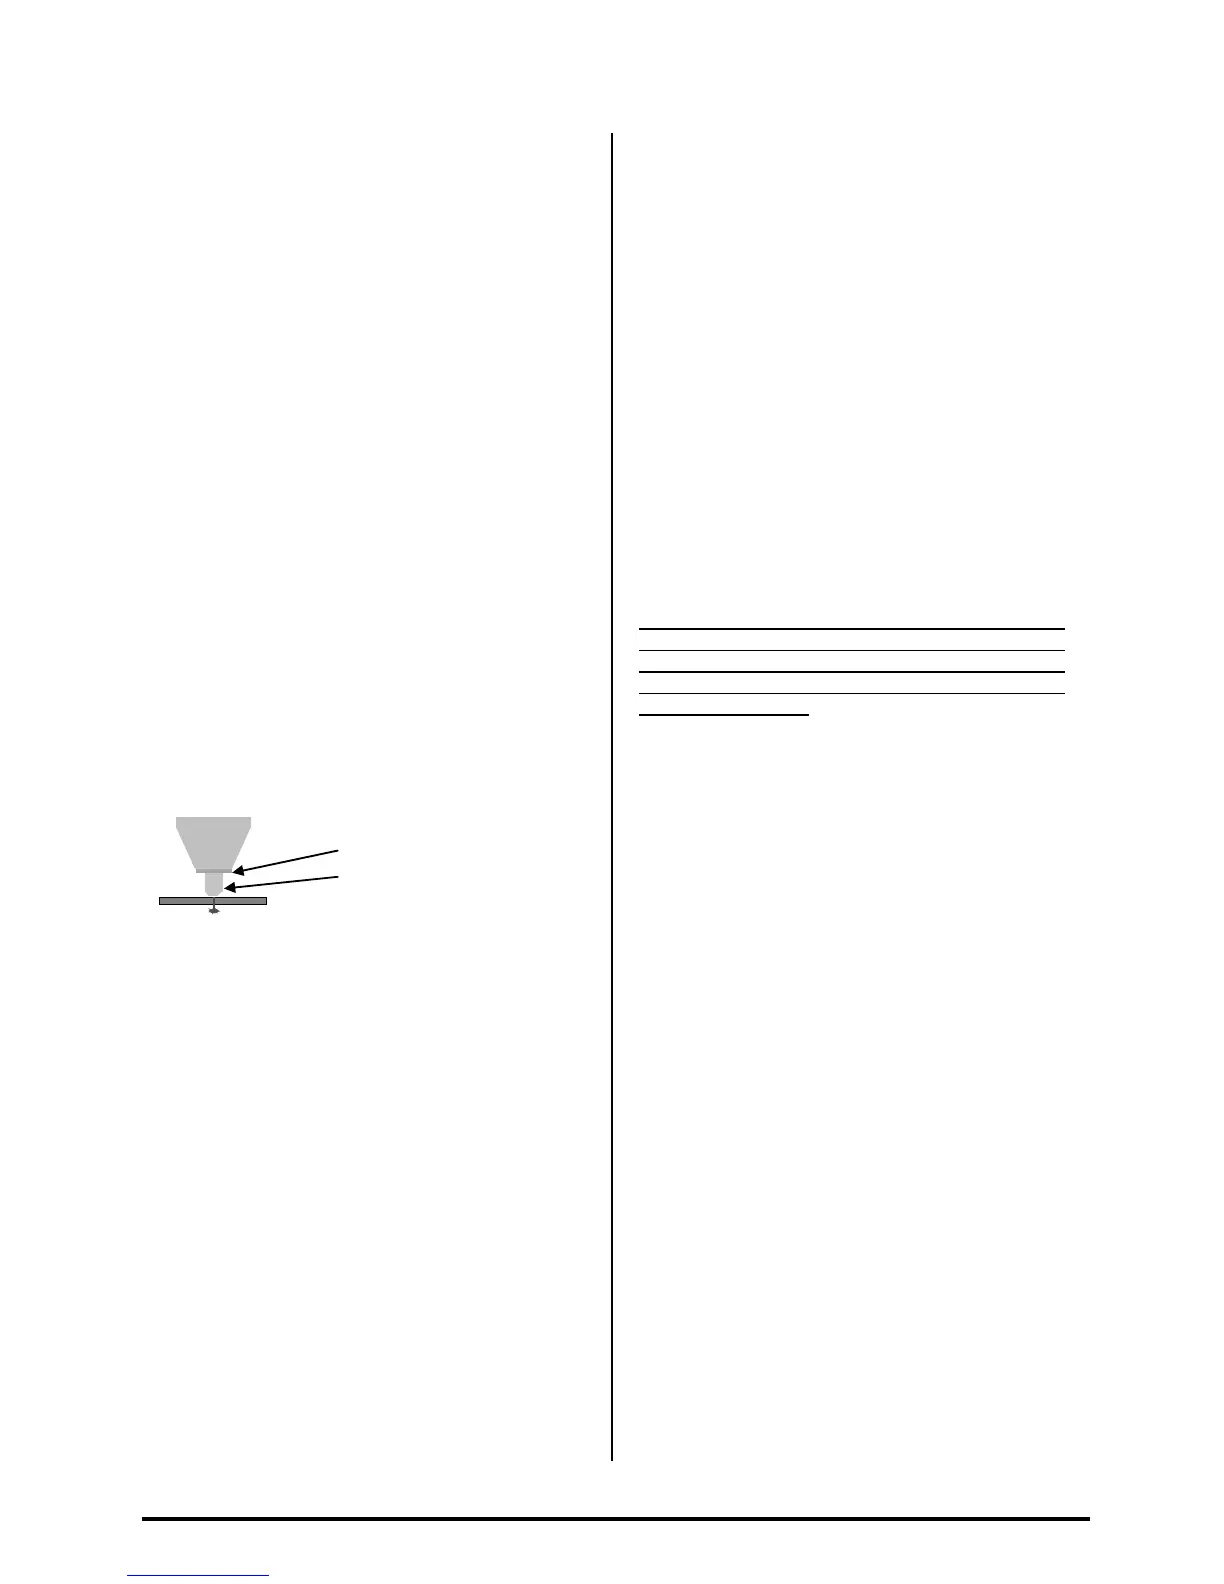
CONTACT CUTTING
This type of cut is used for materials with thickness
5mm or less.
- Remove the spacer and the 60A TIP. Prepare the
torch, fitting the consumable parts for contact
cutting: Tip 40A and Deflector.
- Regulate the current from minimum up to 40A
(max).
- Make the cut, remaining in contact with the work-
piece to be cut.
SWITCHING OFF
After having made the cut, the operator may switch
off the machine as follows :
1- Switch off the machine turning the line switch
(7) to position “0“.
2- Check that the machine live Led (4) and the air
presence Led (3) are off.
3- Disconnect the plug of the machine from the
power socket.
4- Disconnect the cable from the connector (earth
clamp).
CLEANING THE INSIDE OF THE MACHINE:
ALWAYS DISCONNECT INPUT PRIMARY
SUPPLY!!!
Before cleaning the inside of the machine it is
obligatory to FIRST follow the WARNINGS
described above and to proceed as follows:
1- Remove the casing, slackening the side screws;
2- Remove all traces of dust from the internal parts
of the machine by means of a jet of compressed
air at a pressure no higher than 3 Kg/cm
2
;
3- Visually check all the electrical connections,
ensuring that the screws and nuts are well
secured;
4- Visually check the state of all the components:
replace any deteriorated components;
5- Put back the casing, tightening the side screws.
PREVENTIVE MAINTENANCE OF POWER
SOURCE.
ALWAYS DISCONNECT INPUT PRIMARY
SUPPLY!!!
Inspect the inside of the POWER SOURCE
INVERTER from time to time (every 3-4 weeks
depending on usage and environment), removing
the deposits of dust from the inside parts so that
their cooling and operation is not impeded. The
frequency of this operation depends on the
position of the machine and on the quantity of dust
and deposits in the working atmosphere.
Frequently check that the power cables and
connections are securely fastened.
CHANGING WORN PARTS
Attention! The torch nozzle and the
neighbouring parts reach high temperatures
during use; to avoid the risk of burns, wait for
them to cool down before carrying out
maintenance work!
From time to time, or if you notice any
malfunctions, inspect the torch nozzle to see
whether there is any damage. If the nozzle hole is
deteriorated or appears to be oval, it is time to
change the spare parts.
Inspect the electrode: if the centre of the electrode
has a cavity deeper than 1.5 mm, change it.
No particular tools are needed to change the torch
parts. Just unscrew the closing cap and all the
torch components can be easily replaced. When
you unscrew the cap you hear a slight click due to
a micro switch which disables the machine so as to
avoid accidental starts. Once the torch is in order,
to start work again you must press the RESET
button.
SPECIAL MAINTENANCE
For any special maintenance jobs, it is essential to
have the necessary technical knowledge and
suitable equipment. Otherwise apply to the nearest
assistance centre.
SERVICE
This section describes basic maintenance
procedures performable by operating personnel.
No other adjustments or repairs are to be
attempted by other than properly trained
personnel.
WARNING:
ALWAYS DISCONNECT INPUT PRIMARY
SUPPLY!!!
Deflector cod 6074400000
Tip 40A cod 6073800000