6932200010
23
Disconnect primary power at the source before
disassembling of torch leads.
Frequently review the important safety precautions
at the front of this Manual. Be sure the operator is
equipped with proper gloves, clothing, eye and ear
protection. Make sure no part of the operator’s
body comes into contact with the work-piece while
the torch is active.
CAUTION
Sparks from the cutting process can cause
damage to coated, painted, and other surfaces
such as glass, plastic and metal.
GENERAL TORCH MAINTENANCE
- A. Cleaning Torch
Even when precautions are taken to use only clean
air with a torch, eventually the inside of the torch
becomes coated with residue. This build-up can
affect the pilot arc initiation and the overall cut
quality of the torch.
WARNING.
ALWAYS DISCONNECT INPUT PRIMARY
SUPPLY!!!
Disconnect primary power to the system before
disassembling the torch or torch leads.
DO NOT touch any internal torch parts while the
AC indicator light of the power supply is ON.
The inside of the torch should be cleaned with
electrical contact cleaner using a cotton swab or
soft wet rag. In severe cases, the torch can be
removed from the leads and cleaned more
thoroughly by pouring electrical contact cleaner
into the torch and blowing it through with
compressed air.
CAUTION
Dry the torch thoroughly before reinstalling.
COMMON OPERATING FAULTS
The following lists the more common cutting faults
and possible causes:
1. Insufficient penetration
a. Cutting speed too fast
b. Torch not at 90°
c. Metal too thick
d. Worn torch parts
e. Cutting current too low
f. NON- genuine manufacturer parts
2. Cutting Arc Extinguishes
a. Cutting speeds too slow
b. Torch stand-off too high from work piece
c. Cutting current too high
d. Work cable disconnected
e. Worn torch parts
f. NON- genuine manufacturer parts
3. Excessive dross Formation
a. Cutting speeds too slow
b. Torch stand-off too high from work piece
c. Worn torch parts
d. Improper cutting current
e. NON- genuine manufacturer parts
4. Short Life of Torch parts
a. Oil or moisture in air source
b. Exceeding system capability (material too thick)
c. Excessive pilot arc time
d. Air flow too low (incorrect air pressure)
e. Improperly assembled torch
f. NON- genuine manufacturer parts
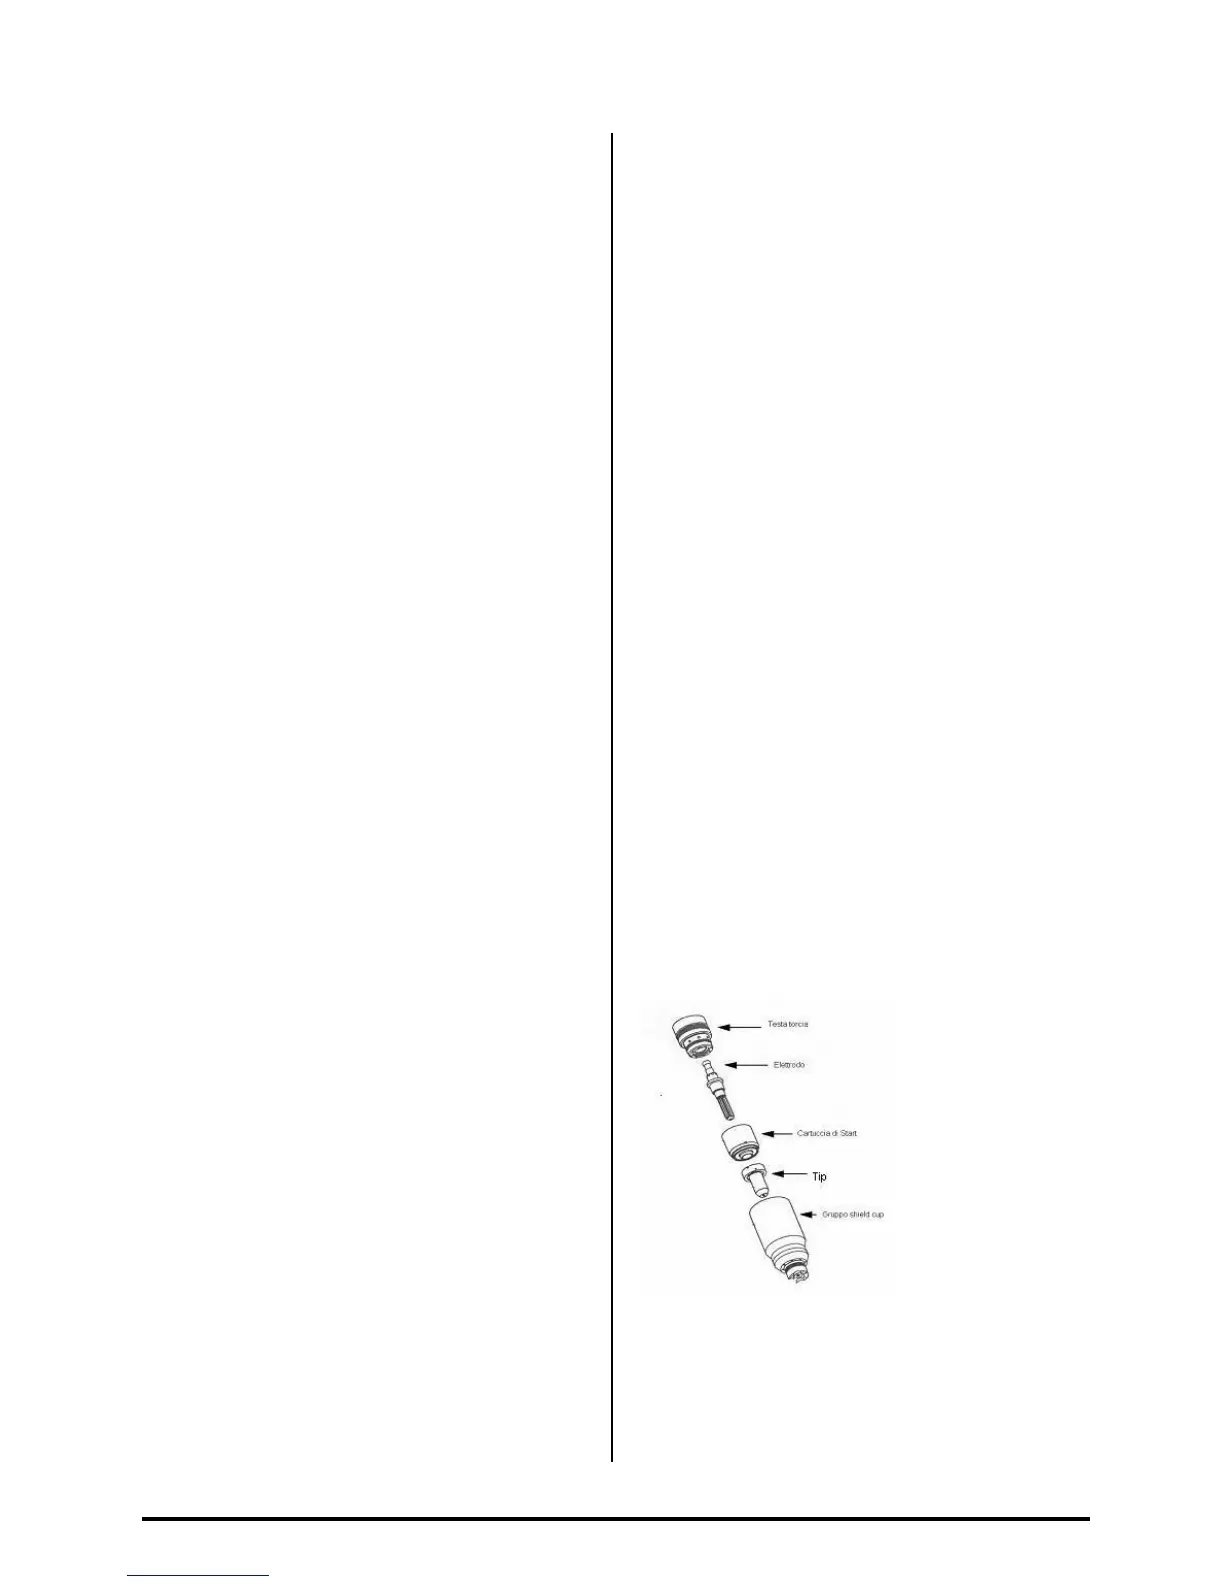
INSPECTION AND REPLACEMENT
CONSUMABLE TORCH PARTS
WARNING:
ALWAYS DISCONNECT INPUT PRIMARY
SUPPLY!!!
Disconnect primary power to the system before
disassembling the torch or torch leads
DO NOT touch any internal torch parts while the
AC indicator light of the power supply is ON.
Remove the consumable torch parts as follows
NOTE
The shield cup holds the tip and the starter
cartridge shield cup in place. Position the torch
with the shield cup facing out when the cup is
removed.
1. Unscrew and remove the shield cup from the
torch
NOTE
Slag build-up on the shield cup that cannot be
removed may effect the performance of the
system.
2. Inspect the cup for damage. Wipe it clean or
replace if damaged
Consumables parts
3. Removed the tip. Check for excessive wear
(indicated by an elongated or oversize
orifice).Clean or replace the tip if necessary.