94
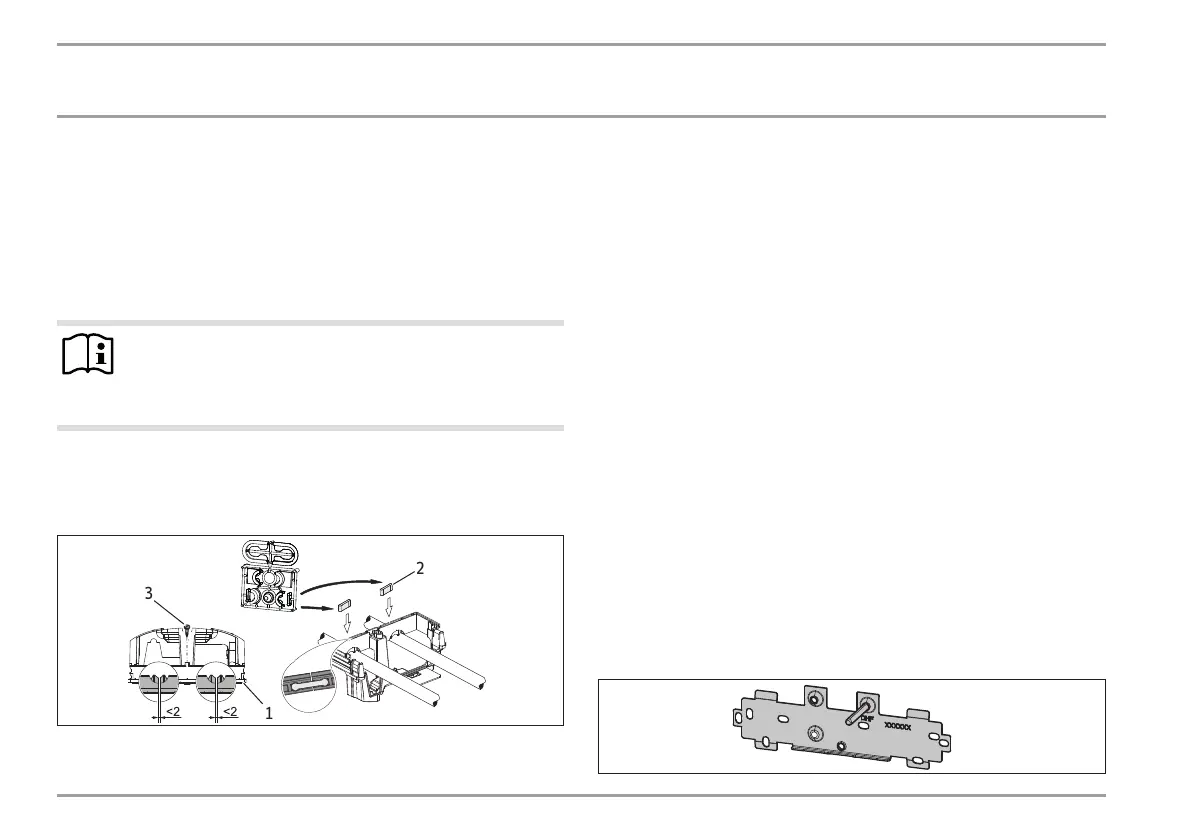
When installing the connection pipes without offset, break
off the sealing lips on the cover guide pieces.
Click the cover guides into place in the knock-outs.
Position the back panel guide pieces on the pipes. Push them
together. Then push the guide pieces against the back panel
as far they will go.
Secure the lower back panel section with a screw.
Note
Use the cover guide pieces with sealing lips if the connec-
tion pipes are slightly offset. In this case, the back panel
guide pieces are not fitted.
13.9 Installation of the lower back panel section in
the case of threaded fittings on finished walls
D0000053286
2
3
1
1 Lower back panel section
2 Connection piece as delivered
3 Screw
If using threaded connections on finished walls, the lower back
panel section can also be installed after fitting the taps/valves. To
do this, carry out the following steps:
Cut open the lower section of the back panel.
Fit the lower section of the back panel by bending it out at
the sides and guiding it over the pipes.
Insert the connection pieces into the lower section of the
back panel from behind.
Click the lower section of the back panel into place.
Secure the lower back panel section with a screw.
13.10 Wall mounting bracket when replacing an
appliance
An existing STIEBELELTRON wall mounting bracket may be used
when replacing appliances (except for DHF instantaneous water
heater).
Break through the back panel of the appliance to expose the
threaded stud on the fitted wall mounting bracket.
Replacing a DHF instantaneous water heater
26_02_02_0815_
 Loading...