the appropriate seats.
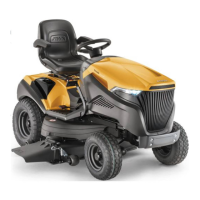
3.3 FITTING THE SEAT (Fig. 3.3)
in one of the 6 positions.
At this point the seat is engaged andcannot
3.4 ASSEMBLY AND CONNECTING THE
BATTERY (Fig. 3.4)
the seat.
-
-
IMPORTANT Always fully charge the bat-
tery according to the instructions in the battery
booklet.
IMPORTANT To prevent the safety device in
the electronic circuit board from cutting in, never
start the engine until the battery is fully charged!
3.5 ASSEMBLING THE GRASS CATCHER
BRACKETS (Fig. 3.5)
-
-
grass catcher rotates.
3.6 REMOVAL OF THE STOP FROMTHE
HOOKING PAWL OF THEGRASS
CATCHER (Fig. 3.6)
-
3.7 MOUNTING THE FRONT BUMPER
(if provided)
• Bumper Type “I” (Fig. 3.7)
• Bumper Type “Il” (Fig. 3.8)
3.8 ASSEMBLING THE LEVERS
FOR TIPPING THE GRASS CATCHER
(Fig. 3.9)
Electric control
-
-
-
Before attaching the grass catcher to its sup-
4. CONTROLS AND
INSTRUMENTS
4.1 STEERING WHEEL (Fig. 4.1 no.1)
4.2
(Fig. 4.1 no.2)
4.3 THROTTLE LEVER (Fig. 4.1 no.3)
for cold starting.
 Loading...