EN - 25
3. Connect idler spring. See Figure 29.
4. Reinstall belt covers and secure each
with self-tapping screws removed earlier.
IMPORTANT: Make sure belt has tension and
remains aligned after installation is complete.
Remove Ground Drive Belt
IMPORTANT: Retain all parts for
reinstallation.
1. Place unit in service position. See
Service Position on page 19.
2. Remove deck drive belt. See Remove
Deck Drive Belt on page 24.
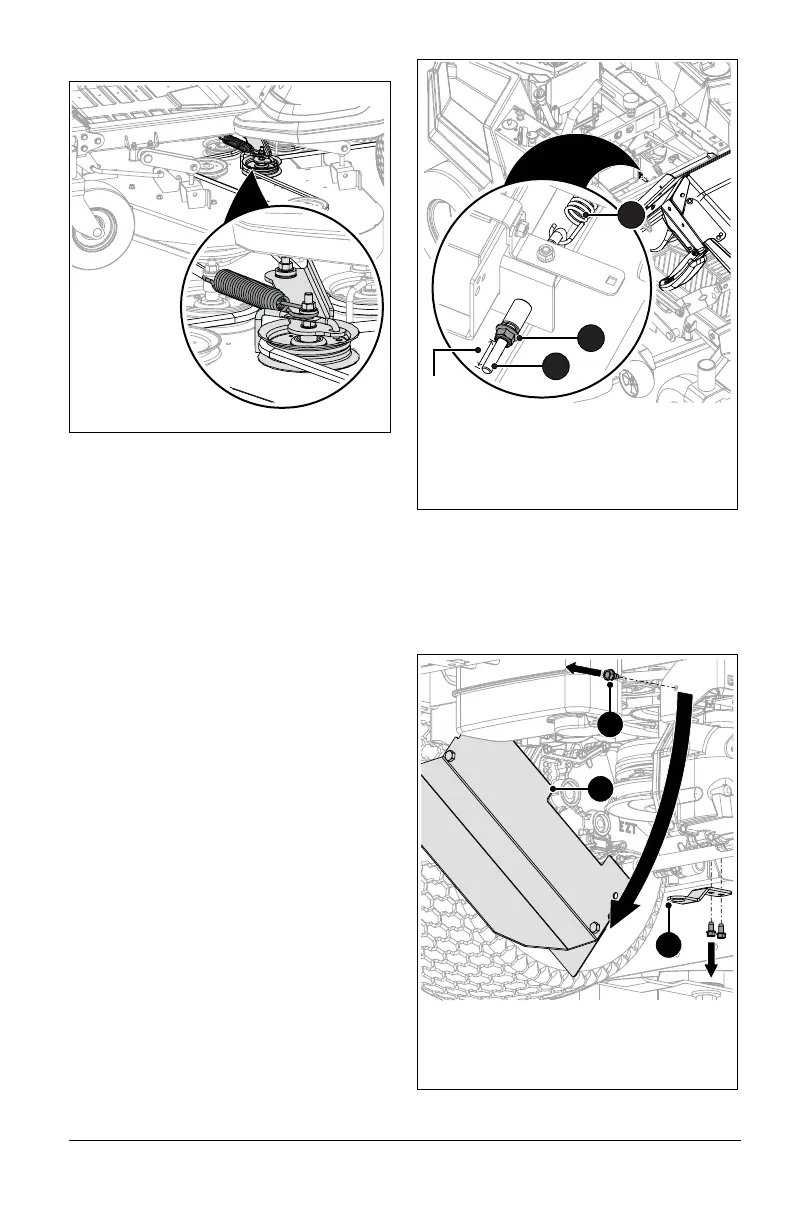
3. Loosen nut on eye bolt and disconnect
idler arm spring. See Figure 30.
See Figure 31.
4. Remove the right-side self-tapping screw
from heat shield and rotate shield out of
the way.
5. Remove two self-tapping screws from
clutch stop bracket and remove bracket.
Figure 30
1
2
3
6.1 cm
(2.4")
1. Nut
2. Eye Bolt
3. Idler Arm Spring
Figure 31
1. Heat Shield
2. Clutch Stop Bracket
3. Self-tapping Screw
1
2
3