0478 201 9913 B - EN
44
1 Reversible blade
● On the blades, measure the
distance (A) between the bore to the
edge of the blade at several points.
Minimum clearance:
A=6mm
2 Wing blade
● Measure the blade width (B) at the
upward-pointing curved edge of the
wing blade.
Minimum blade width:
B=15mm
3 Wing blade (GHE 250, GHE 260)
● Measure the blade width (C) at the
upward-pointing curved edge of the
wing blade.
Minimum blade width:
C=19mm
4 Shredding blades (GHE 250,
GHE 260)
● Measure the blade width (D) at the
upward-pointing curved edge of the
shredding blade.
Minimum blade width:
D=13mm
11.8 Reversing the blades
● Remove the blade set. (Ö 11.5)
● Unscrew screws (1) and remove
together with nuts (2).
● Remove blade (3) upwards.
● Clean the blade disc.
● Reverse blade (3) and place onto the
blade disc with the sharp edge exposed
and align the bores.
● Insert screws (1) through the bores and
screw on nuts (2). Tighten the nuts (2)
to 10 Nm.
● Install the blade set. (Ö 11.6)
Sharpening the blades:
Blades which are blunt on both sides must
be sharpened before resuming work.
In order to ensure optimum machine
operation, the blades should only be
sharpened by a technician. STIHL
recommends STIHL specialist dealers.
● Remove the blades for sharpening.
● Cool the blades when sharpening,
e.g. with water. The blade must not be
allowed to display blue colouring, as
this would reduce its cutting quality.
● Sharpen the blade evenly to prevent
vibrations due to imbalance.
● Check blades for damage before
installing: the blades must be replaced
if notches or cracks are visible or if the
blades have reached the wear limits.
● Sharpen blades at a sharpening angle
of 30°.
● Sharpen the blades against the cutting
edge.
● After sharpening, remove any
sharpening burr at the cutting edge
using fine sandpaper.
● Observe the tightening torques
contained in the "Reversing the blades"
section when installing the blades.
11.9 Electric motor and wheels
The electric motor is maintenance-free.
The wheel bearings are maintenance-free.
11.10 Storage and winter break
Store the garden shredder in a dry and
locked place that is generally free of dust.
Make sure that the machine is kept out of
the reach of children.
Only store the garden shredder in good
operating condition and with the feed
chute fitted.
Note the following points when storing the
garden shredder for extended periods
(over winter):
● Thoroughly clean all external parts of
the machine.
● Thoroughly lubricate/grease all moving
parts.
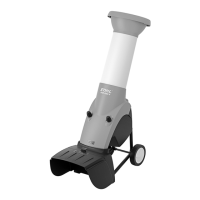
12.1 Pulling or pushing the
garden shredder
● Hold the garden shredder at the
upper chute (1) and tilt to the rear.
● The garden shredder can be pulled or
pushed slowly (walking pace).
Blunt reversible blades may only be
reversed once. Always reverse
both blades.
19
12. Transport
Risk of injury!
Before transporting, carefully read
and observe the section "For your
safety", in particular the
"Transporting the machine" section.
(Ö 4.4)
20

 Loading...