0458-759-8221-C
12
English
5 IMPORTANT SAFETY INSTRUCTIONS
■
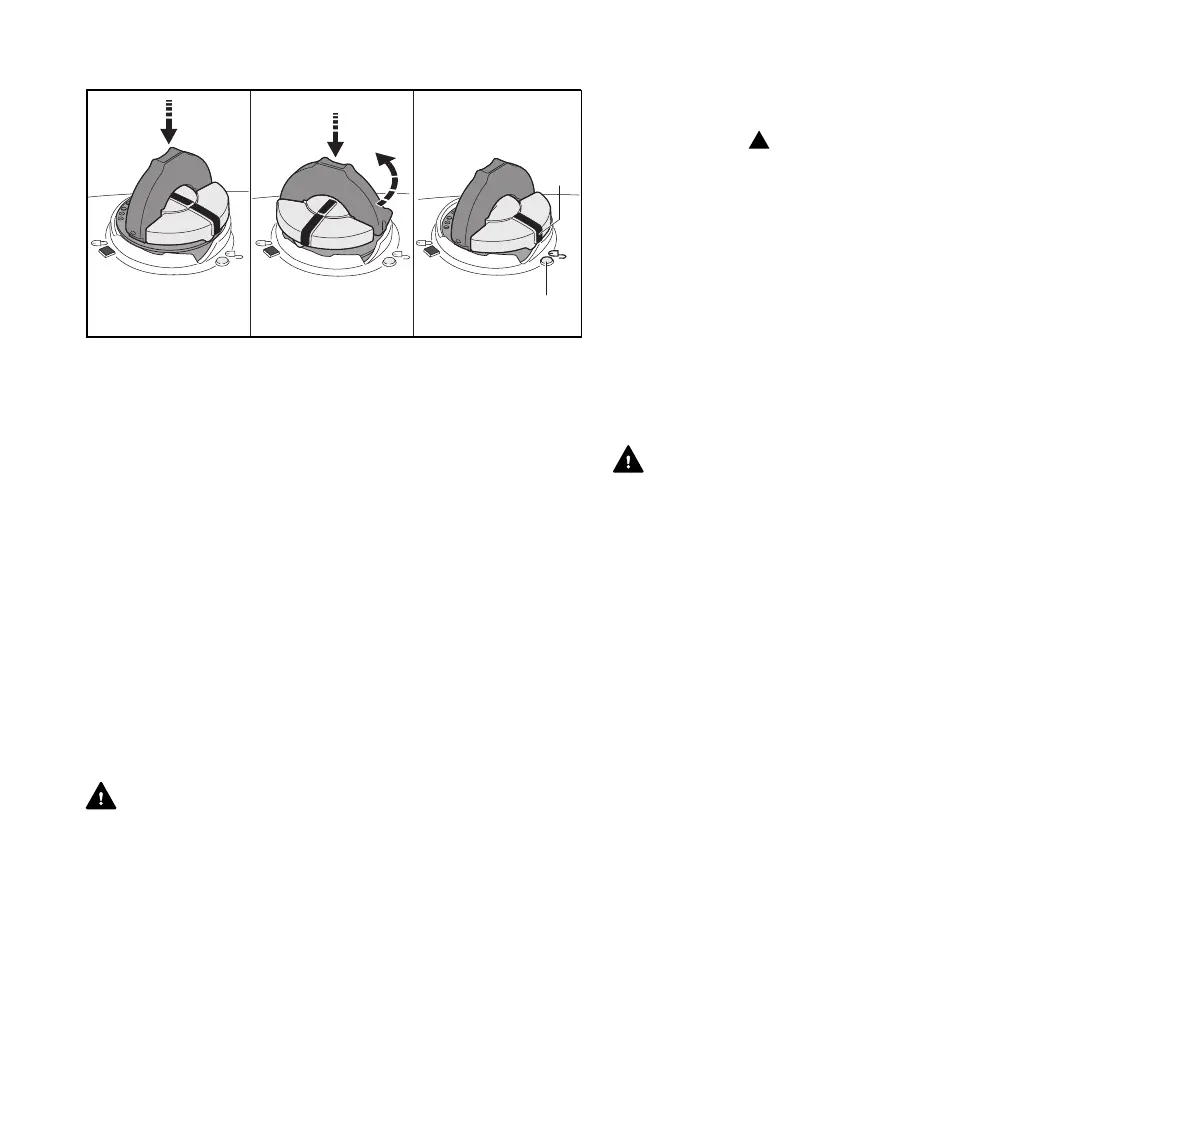
■ To return the base of the cap to the proper starting
position for installation:
– Drop the cap into the fuel tank opening (A).
– Turn the cap counter-clockwise with slight pressure
until it drops fully into the fuel tank opening
(approx. 1/4 turn) (B). This will rotate the base of the
cap into the correct starting position for
installation (C). The exterior positioning mark (1) on
the cap will line up with the "unlocked" symbol on the
fuel tank housing. The interior positioning mark (3)
should be under the grip and not in line with the outer
positioning mark (1).
– Then, turn the cap clockwise, closing it normally.
■ If your fuel cap still does not tighten properly, it may be
damaged or broken. Stop using the unit and take it to your
authorized STIHL dealer for repair.
Vapor Lock
WARNING
■ Vapor lock occurs when fuel in the fuel line or carburetor
vaporizes, causing bubbles to block the free flow of liquid
fuel into the carburetor.
■ Vapor lock cannot be relieved or affected by opening the
fuel tank. Removing the fuel filler cap without first allowing
the chain saw to cool adequately can result in fuel
spraying. Always follow the instructions in this section
when removing the fuel cap.
■ To relieve vapor lock:
– Place the Master Control Lever in the start
position and try to start the chain saw, @ 14.
– If your chain saw will not restart, or if vapor lock
occurs again, the chain saw is being used in
conditions too extreme for the fuel being used.
Discontinue use and let the engine cool completely
before attempting to start the chain saw.
– Using good quality, fresh fuel (stored less than 30
days) also can help reduce the occurrence of vapor
lock.
5.6 Using the Chain Saw
5.6.1 Before Operation
WARNING
■ Misuse or unauthorized use may result in personal injury
and property damage.
– Use the chain saw only as described in this
instruction manual.
■ For proper assembly of the bar and chain:
– Read and follow the instructions on mounting the
guide bar and chain, @ 10.2.1.
■ The chain, guide bar and sprocket must match each other
in gauge and pitch. Before mounting or replacing:
– Read the information on guide bar and chain
combinations, @ 26.
– Read and follow the instructions on kickback and
other reactive forces, @ 6.
– Select the shortest bar that will meet your cutting
needs. Longer bars add weight and may be more
difficult to control.
 Loading...