4
www.sngerelectronics-eu.com
FITTING GUIDE
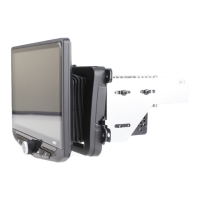
1. With the HEIGH10® unit congured correctly, aach the fascia brackets to the relevant sides of the radio module using the screws within the kit. Place into the
vehicle and roughly test t with the fascia to measure whether the brackets need moving forwards/backwards.
2. With the brackets aligned correctly, aach the fascia to the brackets over the top of the unit using the screws that come within in the kit.
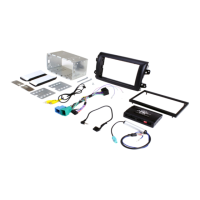
3. Once all of the steps in ‘Stereo Installaon’ are complete, place the assembly into the dashboard and screw down using the pre-exisng screws. Then reas-
semble the main fascia panel.
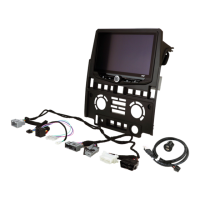
5. Aach the antenna adapter to the vehicles pre-exisng connecon and the back of new HEIGH10® unit.
2. Take the 14-way connector on the vehicle interface harness and plug this into the relevant connecon on the side of the interface.
3. Take the 12-way connector of the stereo patch lead and plug this into the relevant connecon on the side of the interface. Then take the 3.5mm jack and
aach this to the HEIGH10® unit.
4. Aach the 4-way camera extension harness to the interface.
6. Aach the USB retenon lead in between the vehicle pre-exisng USB connector and the HEIGH10® unit.
7. Connect the male yellow RCA to the ‘reverse camera input’ on the back of the new stereo.
1. Take the interface and set the dipswitches accordingly (note that these are default to o):
ON (DOWN) OFF (UP)
DIPSWITCH 1 Pioneer head units All other head units
DIPSWITCH 2 Reverse Camera PAL Reverse Camera NTSC
DIPSWITCH 3 Reset factory sengs (switch) Reset factory sengs
DIPSWITCH 4 Not Used Not Used
9. Aach the addional wiring on the harness to the back of the stereo:
- Speed Pulse - Park Brake - Reverse
10. When all the above wires (and any addional accessories) have been connected, nally make the power connecons between the stereo and the vehicles
pre-exisng connector.
For a full connecon breakdown of the HEIGH10® unit, see the “Installaon Manual” that comes with the unit.
8. Connect the aermarket reverse camera (if required) to the female yellow RCA on the camera extension harness.
Note: ensure the ‘Camera Connected’ opon in the ‘Preferences’ menu is set to ‘Yes’ for the camera to funcon correctly.