7 QZ 70 en36 | Quartz
StoneL publication 105406revA
200
400
600
800
1000
1200
1400
1600
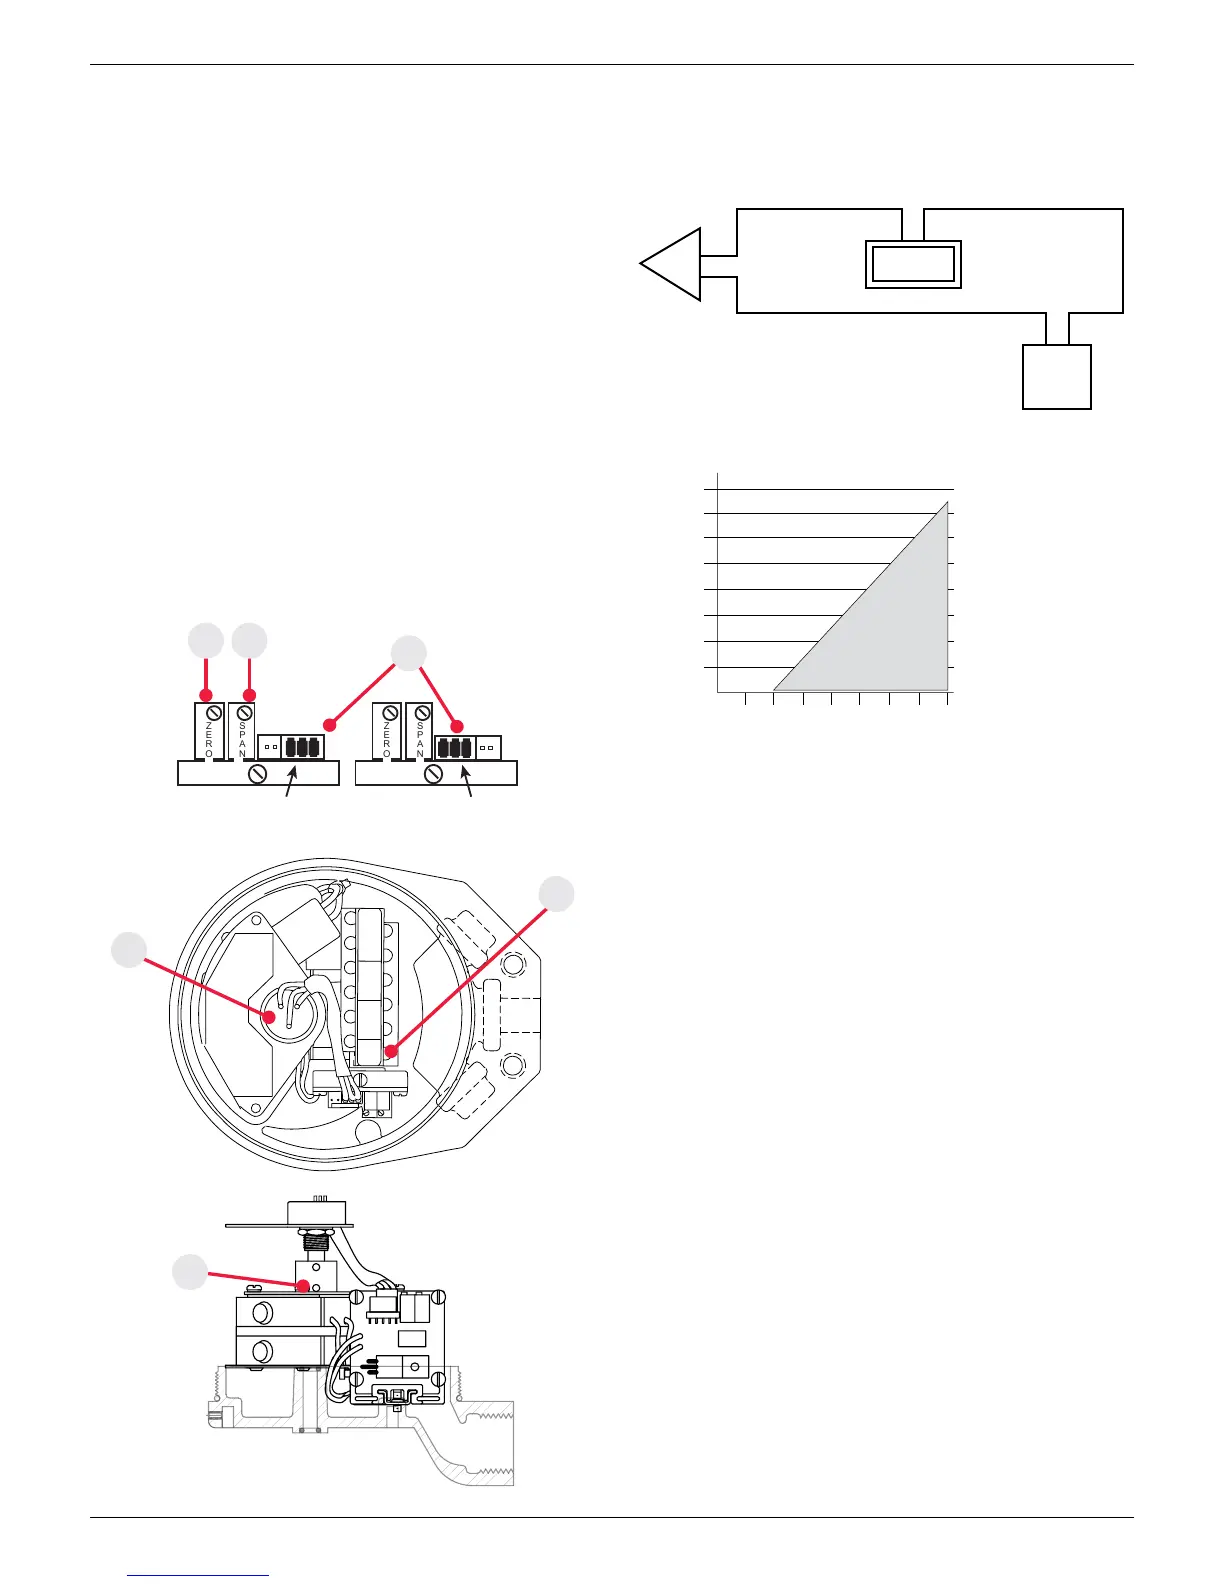
Position transmitter calibration
1. Connect the plug as shown for either clockwise or
counterclockwise to open operation (as viewed from top).
2. Operate actuator to desired zero position. With power
disconnected, connect an ohmmeter across the terminals located
on top of the potentiometer. For counterclockwise rotation,
connect to the terminals with the black lead and white lead. For
clockwise rotation, connect the ohmmeter to the terminals with
the red lead and white lead.
3. Loosen bottom set screw and rotate coupling until the ohmmeter
reads between 400 - 600 ohms. Retighten setscrew. Verify the
ohmmeter still reads between 400 - 600 ohms.
4. Disconnect the ohmmeter and connect DC power to the positive
(+) and negative (-) terminals (see electrical schematic).
5. Adjust the screw on the zero trimpot for a 4 mA output.
6. Operate actuator to the desired 100% position.
7. Adjust the screw on the span trimpot for a 20 mA output. Zero and
span adjustments are non interactive.
Load curve
4.6.1 4 to 20 mA position transmitters with and without switches (Type 5_, 7_) continued
Electrical schematic
SPARES
C
C
NO
NC
1
2
3
4
TOP SW BTM SWTRANS
NO
NC
-
+
Z
E
R
O
SPA
N
Z
E
R
O
SPA
N
clockwise to open
operation
2 pins visable
2 pins
counterclockwise
3
75
1
2
4
Note: Plug must be at one
end of connector or the other
+ -
+ -
+
-
24 VDC
Touch & Tune switch setting
Refer to appropriate installation and adjusting instructions for bench
testing and switch setting procedures for Quartz units with position
transmitter and switches
QN53, QX53, QN73, QX73 see page10
QN5T, QX5T, QN7T, QX7T see page11
QN5X, QX5X, QN7X, QX7X see page12
QN5E, QX5E, QN5F, QX5F, QN7E, QX7E, QN7F, QX7F see page14
QN54, QX54, QN74, QX74 see page16
QN5R, QX5R, QN7R, QX7R see page17
QN5A, QX5A, QN7A, QX7A see page18
QN5N, QX5N, QN7N, QX7N see page19
QN5L, QX5L, QN5P, QX5P, QN7L, QX7L QN7P, QX7P, see page20
QN5G, QX5G, QN5H, QX5H, QN5S, QX5S, QN7G, QX7G, QN7H, QX7H,
QN7S, QX7S see page21
QN5J, QX5J, QN7J, QX7J see page22
QN5M, QX5M, QN7M, QX7M see page23
QX5V, QX5W, QX7V, QX7W see page24
 Loading...