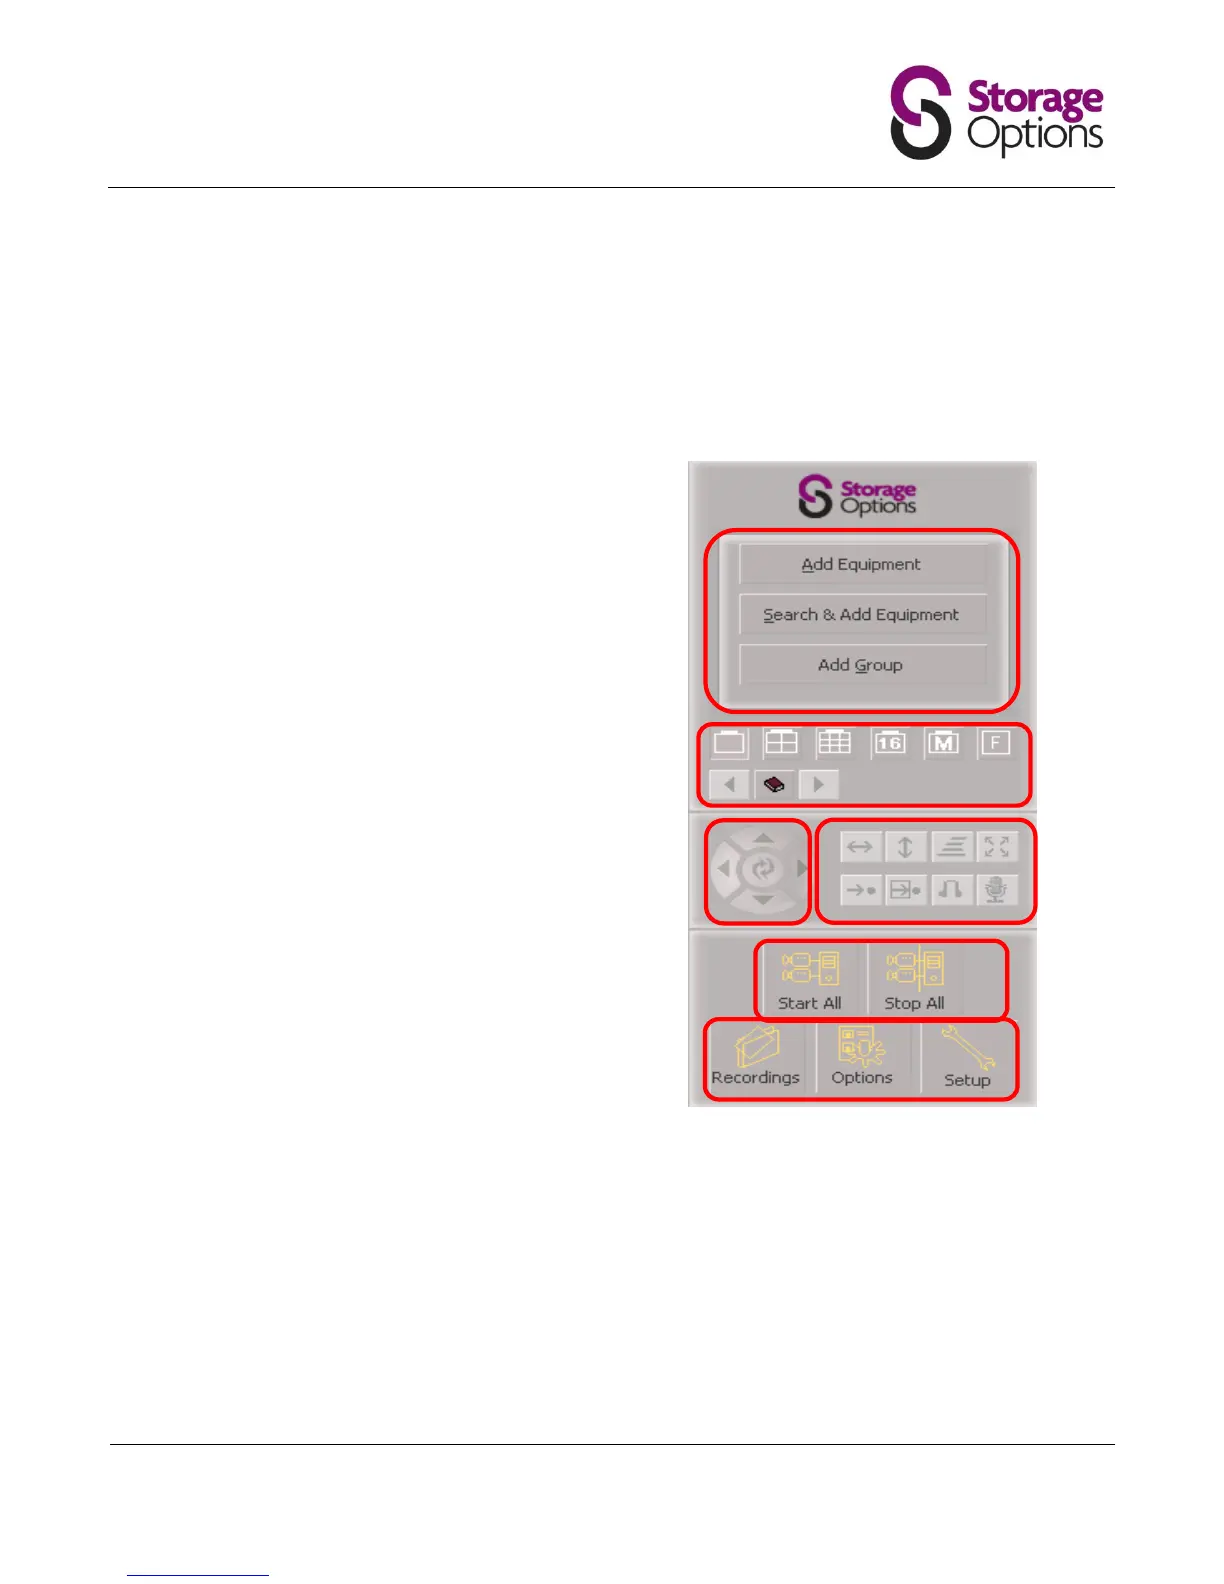
3.4 Camera Software Navigation Buttons
The Storage Options IP Camera Manager control interface is divided into 6 distinct sections. Each of these
areas has a specific function in controlling your IP camera surveillance system. You can hover the mouse
pointer over a button to view a description.
Here you can add an IP camera to the
manager. Once a camera is
connected, this area will change to
display a list of the available IP
cameras.
These controls are used to choose the
layout of camera windows. You can
choose between 1, 4, 9, 16 cameras in
a grid, or “M” allows you to choose a
different layout, and “F” allows you to
view your chosen layout in full screen.
The ↑ and ↓ arrows allow you to
tilt the camera.
The ← and → arrows allow you to
pan the camera.
The middle button allows you to
start or stop cruise control.
Here you can start and stop horizontal
or vertical patrols, choose the camera
rotation speed, and set audio modes.
These buttons are used to start and
stop viewing of all attached cameras.
Here you can choose to view previous
recordings, set system options, and
setup advanced configuration.