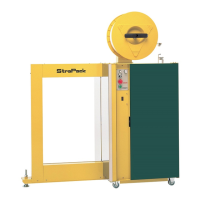
Control Group
Adjustment of Volume
PRECAUTION;
All the volume are preset at the factory, and normally should not need
adjustment.
If adjustment is necessary, follow the instruction below.
Pay attention that adjustment will be cause of trouble.
1. Heater Tem
erature Dial
The correct heater temperature is critical for a secure strap joint. To determine the best
setting, start with heater dial at position 3 or 4. Then, according to the results, gradually
adjust temperature until the strongest seal occurs consistently. Turn dial clockwise to
raise the temperature and counterclockwise to lower the temperature. For your safety,
we recommend to check the quality of the strap seal once a day. Factors such as
workroom temperature, strap thickness, and condition of the machine may affect the
resulting seal, but once properly set, heater temperature will rarely need adjustment.
Please carefully read the separate leaflet"CHECK THAT SEAL" in order adjust to the
heater temperature.
2. Reset Switch
When error lamp flashes or lights, depress this Reset Switch after correcting
cause of trouble.
3. Stra
Cast-off volume (T1)
This volume determines the timing that empty strap loop is cast off when the Start
Switch is pressed by accident without package. When tension is sometimes insufficient
to small package, turn this volume clockwise a little.
4. Forward Timer (T2)
Forward Timer controls the forwarding time of the strap. When the strap dose not reach
the stopper at the Sealing Head during continuous operation, turn this clockwise a little.
5. Fuse (5A)
The Fuse Holder is built into the top of the control box. Unscrew cap and replace fuse
when necessary. Replace only with 5 ampere fuse.
6. VR1
This timer is used to reduce noise which is occurred at cutting of strap after
tensioning. To make the noise lower, turn the volume clockwise. Note that strappings
peed will be slower as the volume is turned to right. If the volume is turned clockwise
too much, tension will become loose for hard or compressible packages.
7. VR2
This timer is used to adjust strap sealing time. If sealed straps are easily apart after
strapping, turn the volume clockwise slightly.
8. VR3
This timer adjusts time to send electric current to Heater in order to keep heater
temperature during continuous operation.
9. VR4
This is a volume of reversin
ulse to be used to detect incom
lete reversin
of stra
.
10. VR5
This timer controls the reverse time when incom
lete reversin
is occurred.
The timer works in connection with VR4.
-15-