C. Measure the voltage as in Step D on page 22 (AC testing).
D. The meter reading must reflect the vehicle’s supply voltage and be between 11 and 15
Volts DC.
1. If there is no reading the charge cord needs to be checked.
a. Place the multimeter into the continuity test position and place one meter lead
onto the right charge connector pin (with the connector facing you, key on top).
b. Place the other meter lead onto the ground spring on the cigarette lighter plug.
c. The meter should indicate continuity.
d. Place one meter lead on the left charge connector pin (connector facing you, key
on top).
e. Place the other meter lead onto the tip of the cigarette lighter plug.
f. The meter should indicate continuity. If it does not, check the fuse.
(1). Remove the fuse by removing the end of the cigarette lighter plug.
(Push and twist the end cap.)
(2). Test the continuity of the fuse.
(3). If required, replace the fuse with a 20mm X 5 mm fuse (2 amp slow-blow, 2
amp fast-blow, or 5 amp fast blow).
g. If there is no continuity (complete circuit) in Step 1c above, or after replacing the
fuse, the DC-1 should be replaced.
2. If the meter shows proper voltage, proceed to Testing the Charge Rack below.
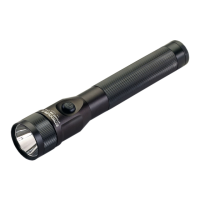
Testing the Charge Rack
The 12V DC direct wire charge rack has a permanently wired cord to supply input power.
If possible the direct wire charge rack should be checked while it is connected to its power
source (a known good 12V DC source is also suitable).
Note: Direct Wire Systems must be connected to the vehicle battery through either a
switched or un-switched connection. Streamlight recommends that Direct Wire Systems
not be connected to the accessory rail of a “battery saver” or supplemental charger. Some
such devices can destroy the Vulcan charge circuitry and will void the warranty.
- 23 -