15 MA_310D-R_3100D-R_A16-3_181015_en
3.4
3.4.1
Hook
Removal and fitting of the hook (Fig. 2 and Fig. 3)
Attention!
Disconnect machine from the mains!
Remove the following parts:
Cover (head back), needle, stitch plate, steering lever (1) (Fig. 2), bolt (15)
(Fig. 2), needle lever (18) (Fig. 2), stop lever (17) (Fig. 2) with hook stop (13)
(Fig. 2) and bevel gear (3) (Fig. 3), then the hook can be pulled out to the front.
Fitting in reverse order.
It must be observed that the teeth of the bevel gears (3) (Fig. 3) and (2) (Fig. 3)
marked red and the surface of the hook screw must again form a line when
fitted.
3.4.2
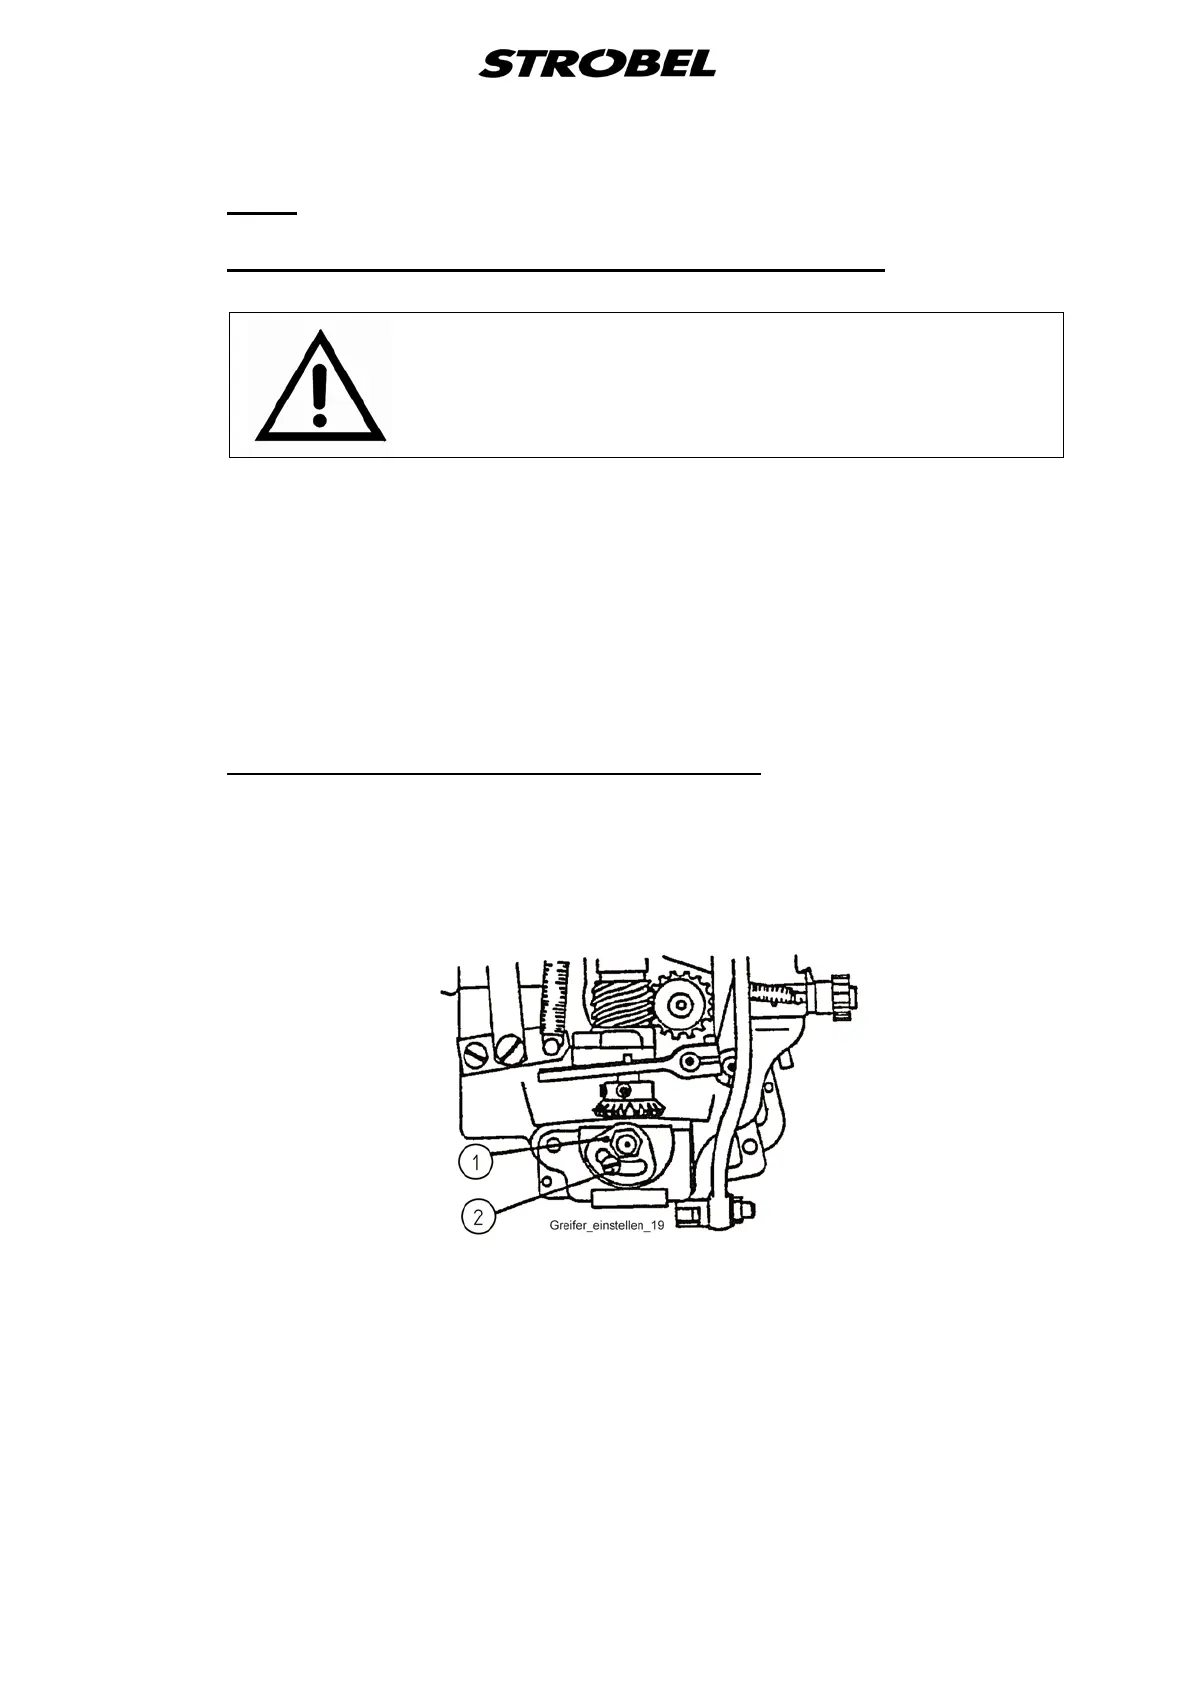
The distance from the hook point to a 100-needle must be 0.1 mm. If the
readjustment of the hook is necessary, this is carried out by releasing the
cheese-head screw (2) and turning the eccentric bush (1).
Adjusting the hook to the needle (Fig. 4)
Fig. 4


 To Next Page