EENN
1-46 2971-109-001 REV B www.stryker.com
Service
Main board replacement
Tools required:
• Zipper pull tool or equivalent
• Needle nose pliers
• ESD system
Procedure:
1. See Foot box cover access on page 1-40.
2. Properly ground yourself (see Protecting against Electrostatic Discharge (ESD) on page 1-33).
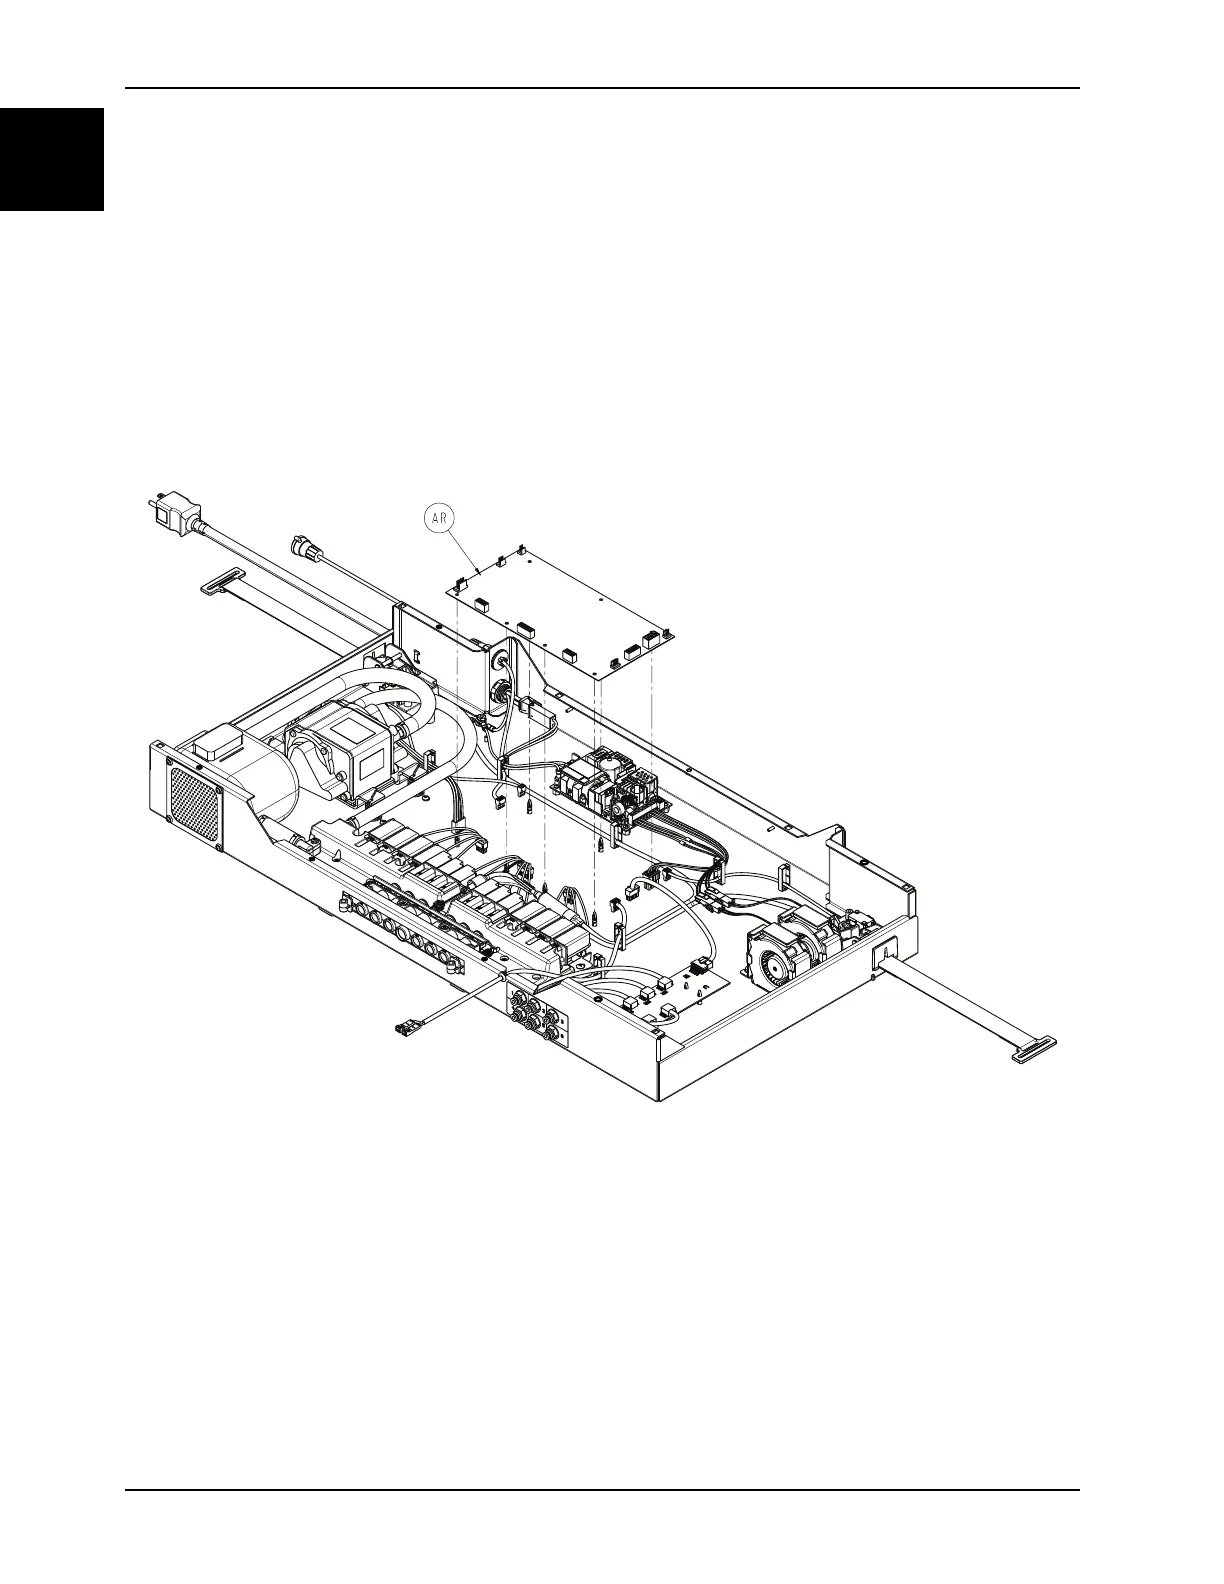
3. Remove all wiring connections from the main board (AR) (Figure 1-21 on page 1-46).
Note: Pay attention to all connection points before disconnecting.
Figure 1-21: Main board
4. Using needle nose pliers, apply a slight upward pressure on the main board to unclip the seven plastic standoffs.
Note: During reinstall, align the standoffs to the main board and press near the standoffs to seat the main board. Do
not bend the board.
5. Remove and discard the main board.
6. Reverse steps to reinstall.
Notes
• During reinstall, make sure to align the Velcro® patches.
• After installation, remove the zipper pull tool or equivalent from the zipper.
• Make sure that the watershed covers the zipper.