EENN
1-50 2971-109-001 REV B www.stryker.com
Service
Bed integration cable connector replacement
Tools required:
• Zipper pull tool or equivalent
• 1” Combination wrench or socket
Procedure:
1. See Foot box cover access on page 1-40.
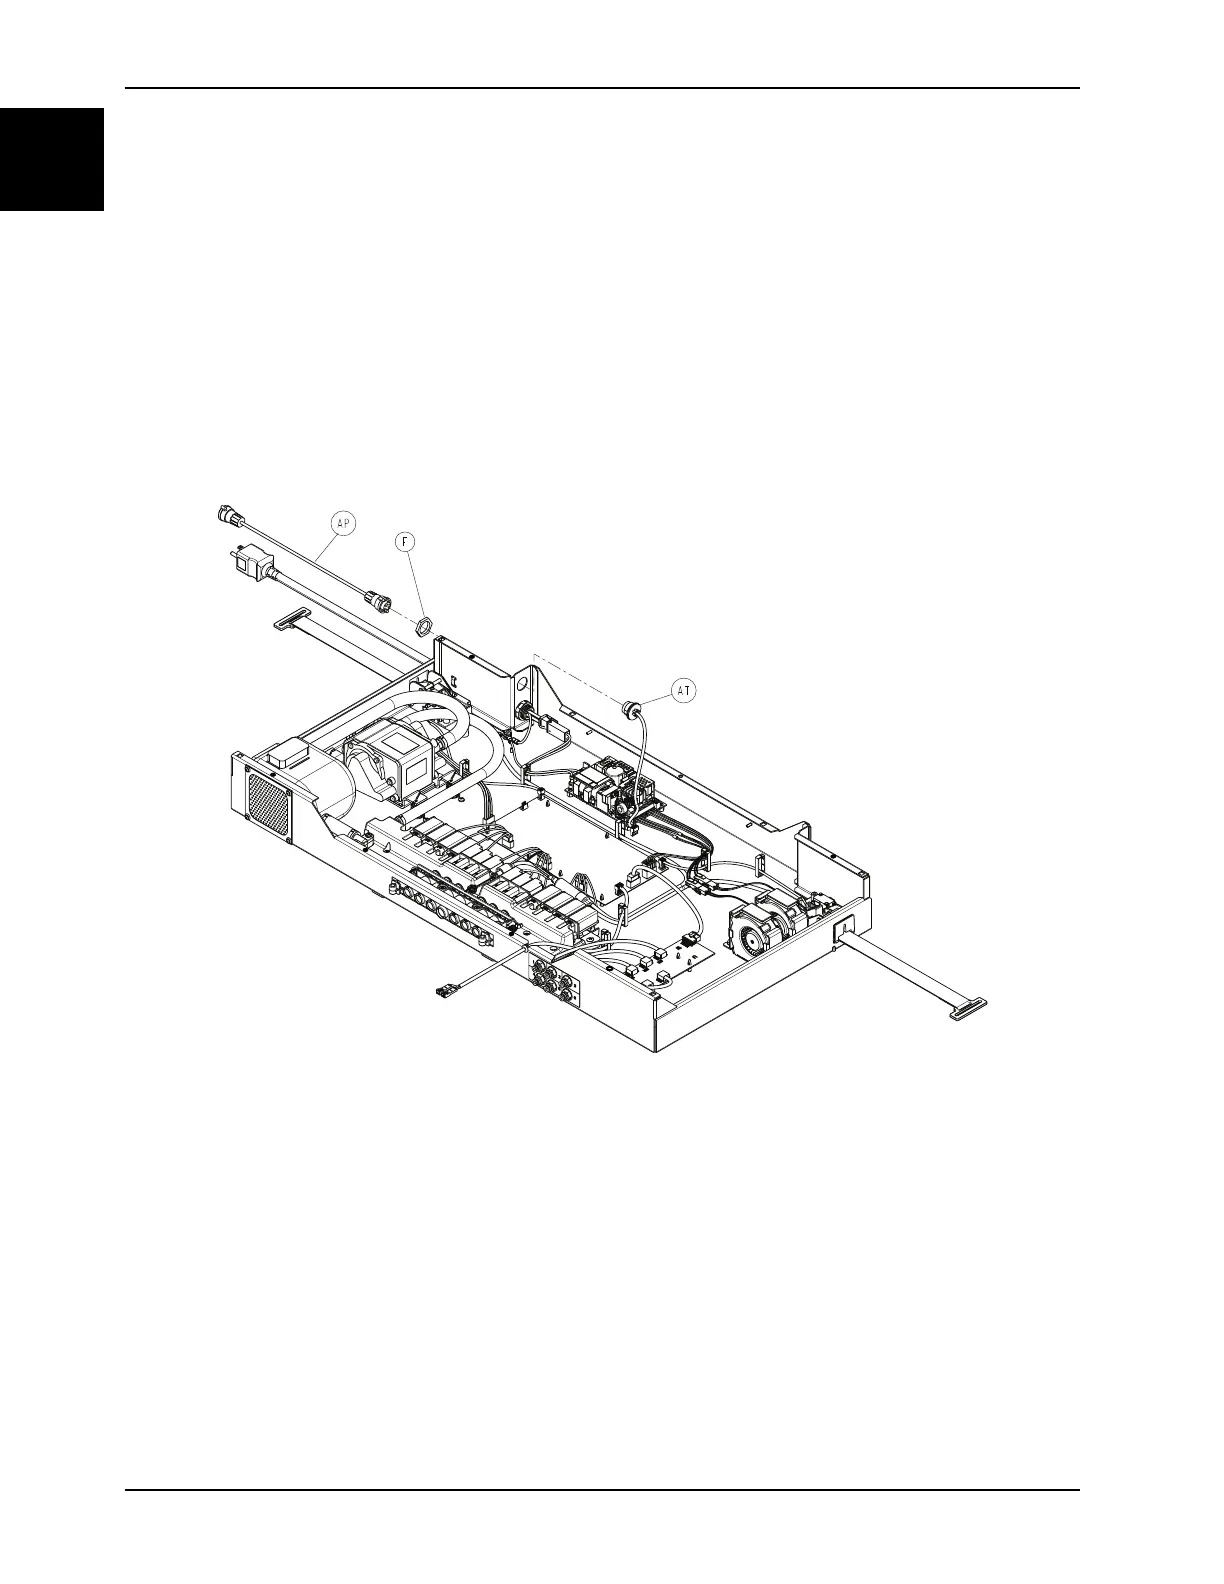
2. Using your fingers, disconnect the bed integration cable connector (AP) from the foot box by rotating the turn-lock
counterclockwise (Figure 1-23 on page 1-50).
3. Using a 1” combination wrench, remove the plastic retaining nut (F) on the bed integration cable connector securing
it to the foot box. Save the nut.
4. Disconnect the can inner cable (AT) from the main board (connector J) (Figure 1-23 on page 1-50).
Figure 1-23: Bed integration cable connector
5. Remove and discard the bed integration cable connector.
6. Reverse steps to reinstall.
Notes
• During reinstall, make sure to align the Velcro® patches.
• After installation, remove the zipper pull tool or equivalent from the zipper.
• Make sure that the watershed covers the zipper.
7. Verify proper operation before returning the product to service.