Installation Information
Wine Storage
Wine Storage
(400-
(400-
2
2
)
)
Series
Series
2-4
#3758410 - Revision C - May, 2014
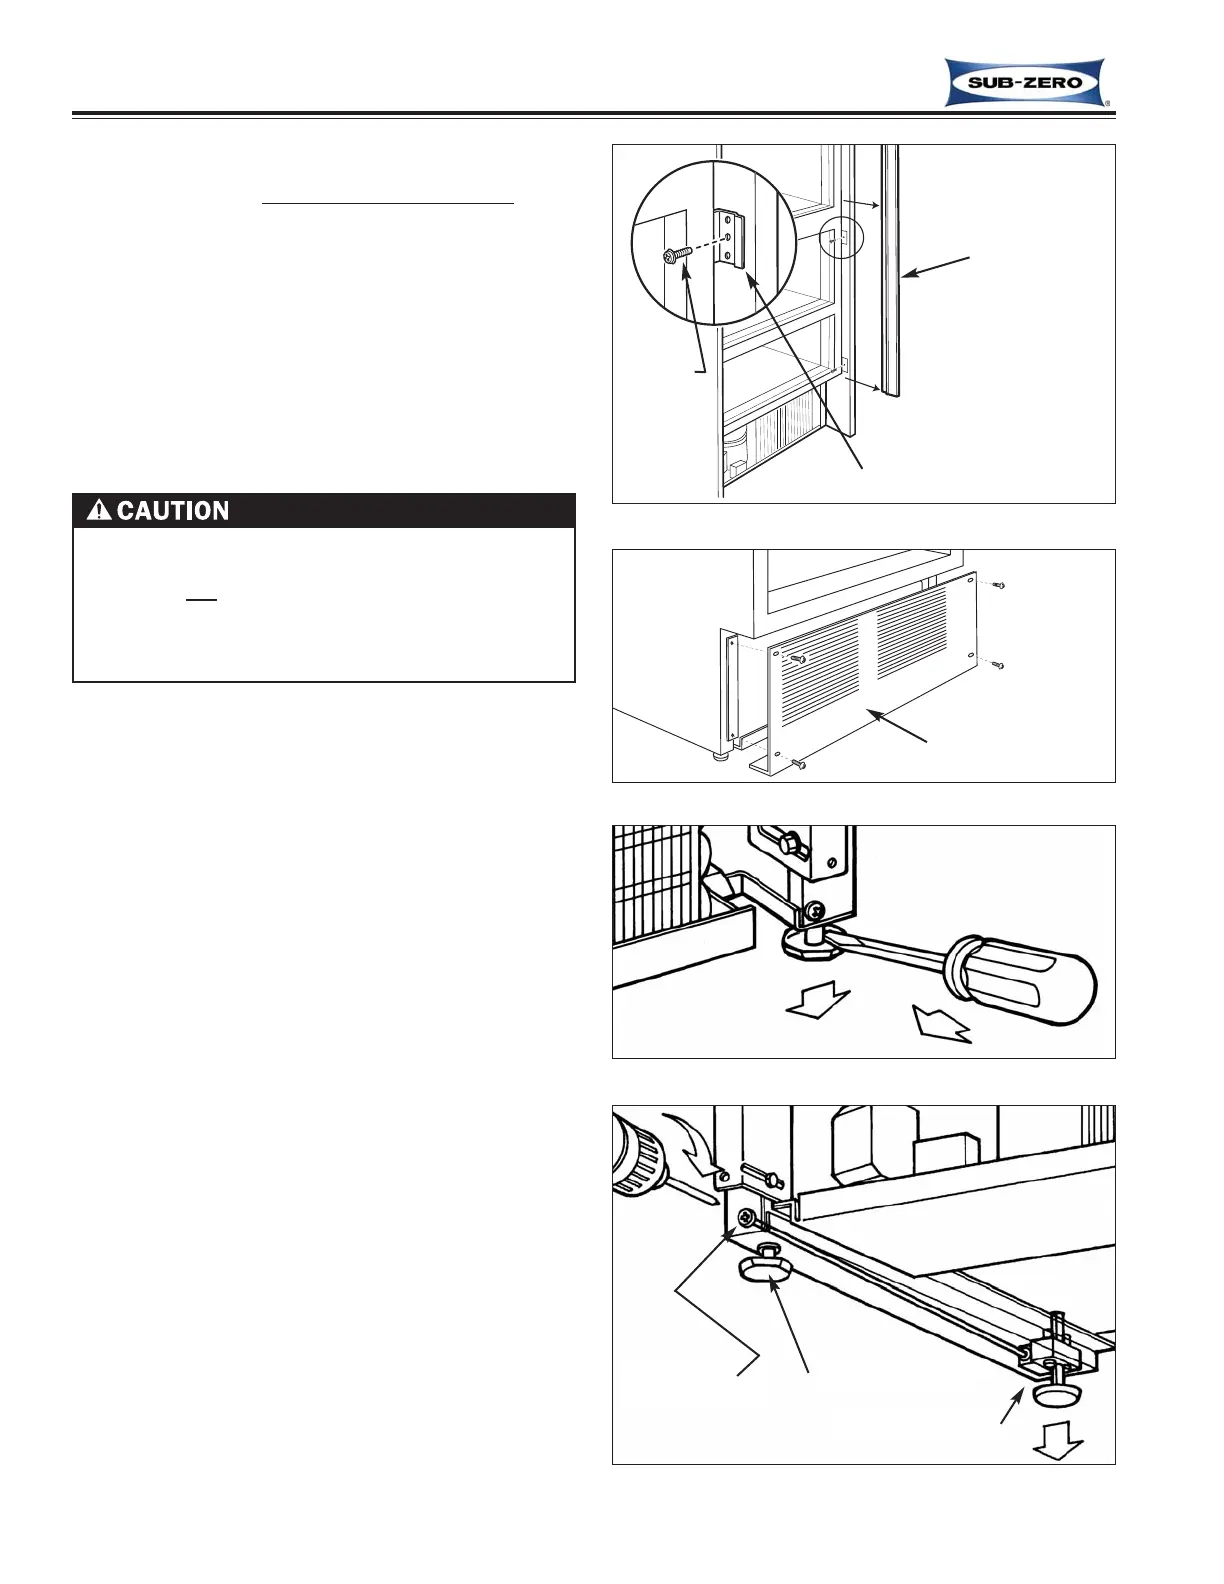
Rear leveling legs will move only 1/16” (2 mm) for
every 18 revolutions of the Phillips-head adjusting
screw. Do not
over torque. Use lowest torque set-
ting on any power screwdriver. Do not turn rear lev-
eling legs by hand, doing so will damage rear level-
er assembly.
Figure 2-6. Molding & Brackets
Figure 2-9. Adjusting Rear Levelers
Figure 2-8. Adjusting Front Leveling Legs
Figure 2-7. Kickplate/Grille Removal
Side Molding
Unit to Cabinet Bracket
Kickplate/ Grille
Rear Leveler
Adjusting Screw
Front Leveling Leg
Rear Leveler Assy
Screw
Unit Leveling (427-2 & 427R-2)
NOTE: Unit must be installed before final leveling
. If
unit is anchored to cabinets, remove anchor screws
before leveling, reinstalled after (See Figure 2-6).
1. Remove kickplate/grille (See Figure 2-7).
2. To raise front, turn front leveler legs counterclock-
wise, clockwise to lower (See Figure 2-8).
3. At front of unit base is an adjusting screw that reach-
es to rear leveler assembly. To raise rear, use
Phillips-head screwdriver to turn adjusting screw
clockwise, counterclockwise to lower (See Figure 2-
9).