
R
Ryan ClarkSep 12, 2025
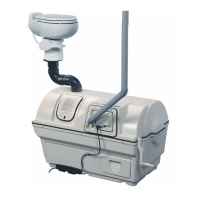
How to unclog the drum screen in my Sun-Mar Plumbing Product?
- MmaypatriciaSep 13, 2025
To address a clogged drum screen in your Sun-Mar Plumbing Product, remove the finishing drawer to find the drum screen to the left of the opening. Spray the drum screen with Compost Quick and let it sit for 15 minutes. Then, use a long-handled wire brush to vigorously scrub the drum screen.