27
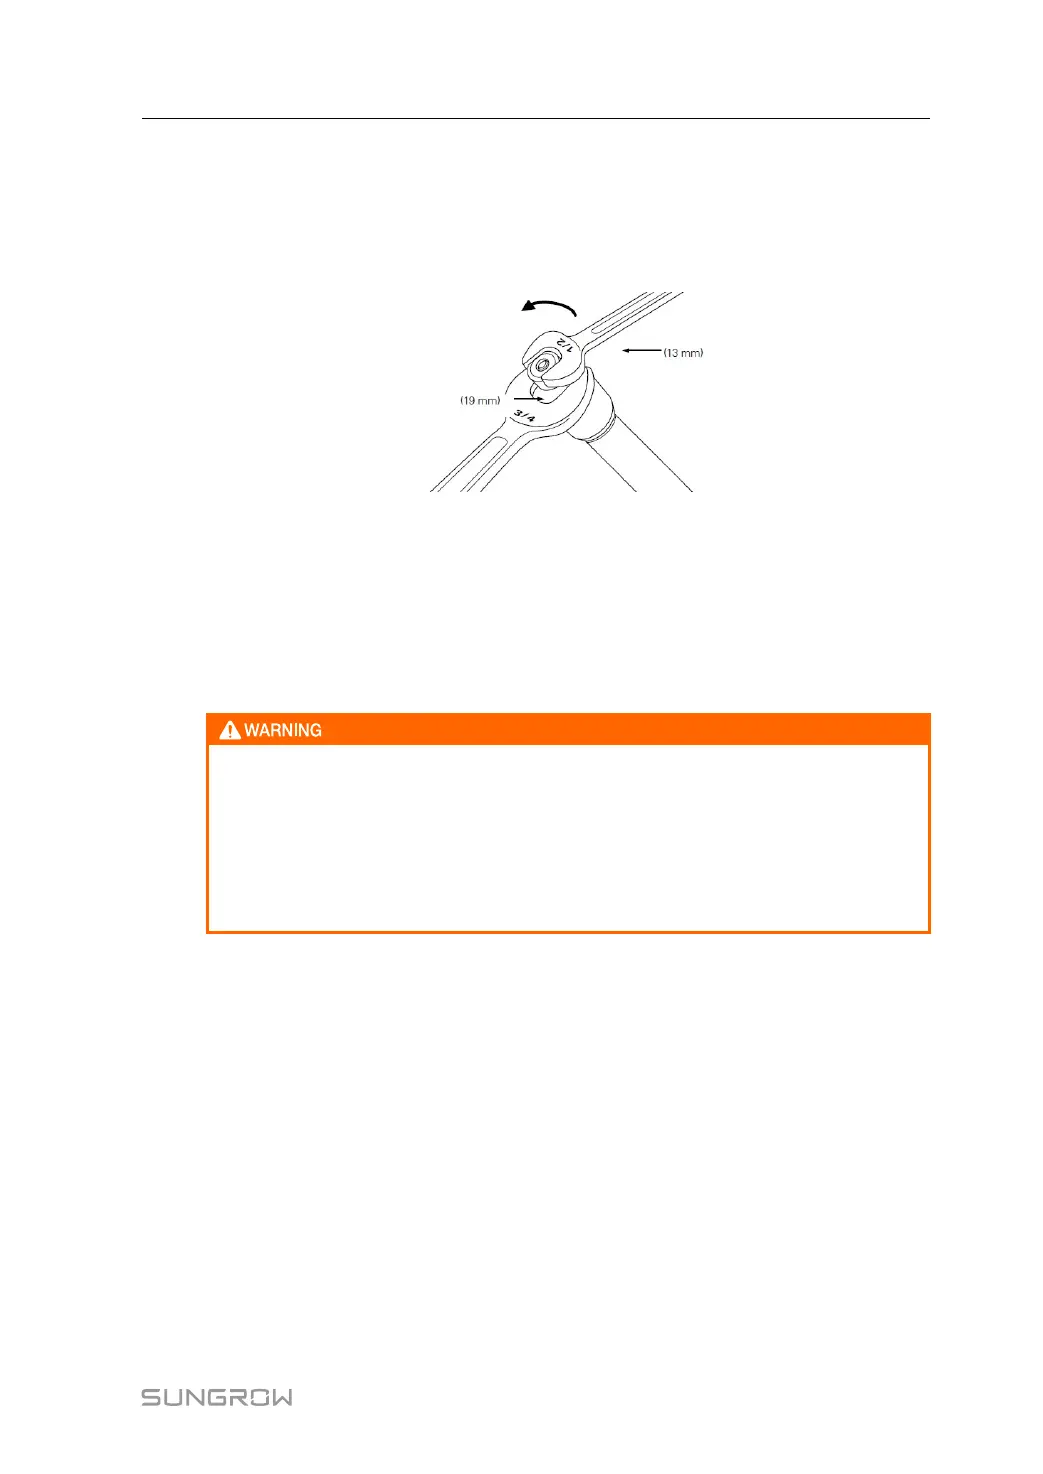
Step 2 Remove end plug and fuse link from fuse cartridge
Use 3/4 inch (19 mm) and 1/2 inch (13 mm) wrenches to remove end plug.
Use screwdriver or other tool to straighten the tulip tip end of fuse link and push fuse link out
of fuse cartridge.
figure 8-8 Remove end plug from fuse cartridge
Step 3 Insert replacement fuse link into fuse cartridge, see "figure 8-9 Fuse link replacement"
• A slight resistance may occur when inserting fuse link into cartridge. Refer to A and B in
"figure 8-8 Remove end plug from fuse cartridge"
• If the catalog number of the fuse being replaced is not known or is illegible on the fuse,
consult equipment specifications or manufacturer.
Using a Bay-O-Net link with a higher amp rating could result in improper
coordination with the backup current limiting fuse inside the transformer or
elsewhere on the system. This may result in a much larger outage in the event of
failure within the transformer or a fire or explosion of the transformer. Installing a
Bay-O-Net link with smaller than recommended amp rating may cause an
unnecessary fuse operation and service interruption. Always follow the equipment
specifications when replacing a fuse link.
User Manual 8 Components and Accessories