2
6. While your helper supports the EasyShade, loosen
the 3mm Allen head Set Screws, located on each
Figure 5). With the aid of
your helper, carefully remove the EasyShade from
the Brackets and place it in your work area.
Aluminum
Housing
for the
EasyShade
Assembly
3mm Set Screw
Figure 5
Bracket
Protruding
Top Groove.
Recessed
of the
EasyShade
Assembly
7. Using a 4mm Allen Wrench, remove the Allen
head Set Screw securing the Solar Panel to the
EasyShade Housing. See Figure 2 for Set Screw
WARNING: HAVE A HELPER HOLD THE EASYSHADE
HOUSING STILL, WHILE REMOVING THE SOLAR
PANEL. FAILURE TO DO SO CAN RESULT IN DAMAGE
TO THE EASYSHADE AND/OR PERSONAL INJURY.
8.
the top of the Solar Panel, where it snaps on to
the top of the EasyShade Housing. See Figure 6.
Note: The Connectors are Keyed to ensure proper
alignment of Pins in the Cable Connectors.
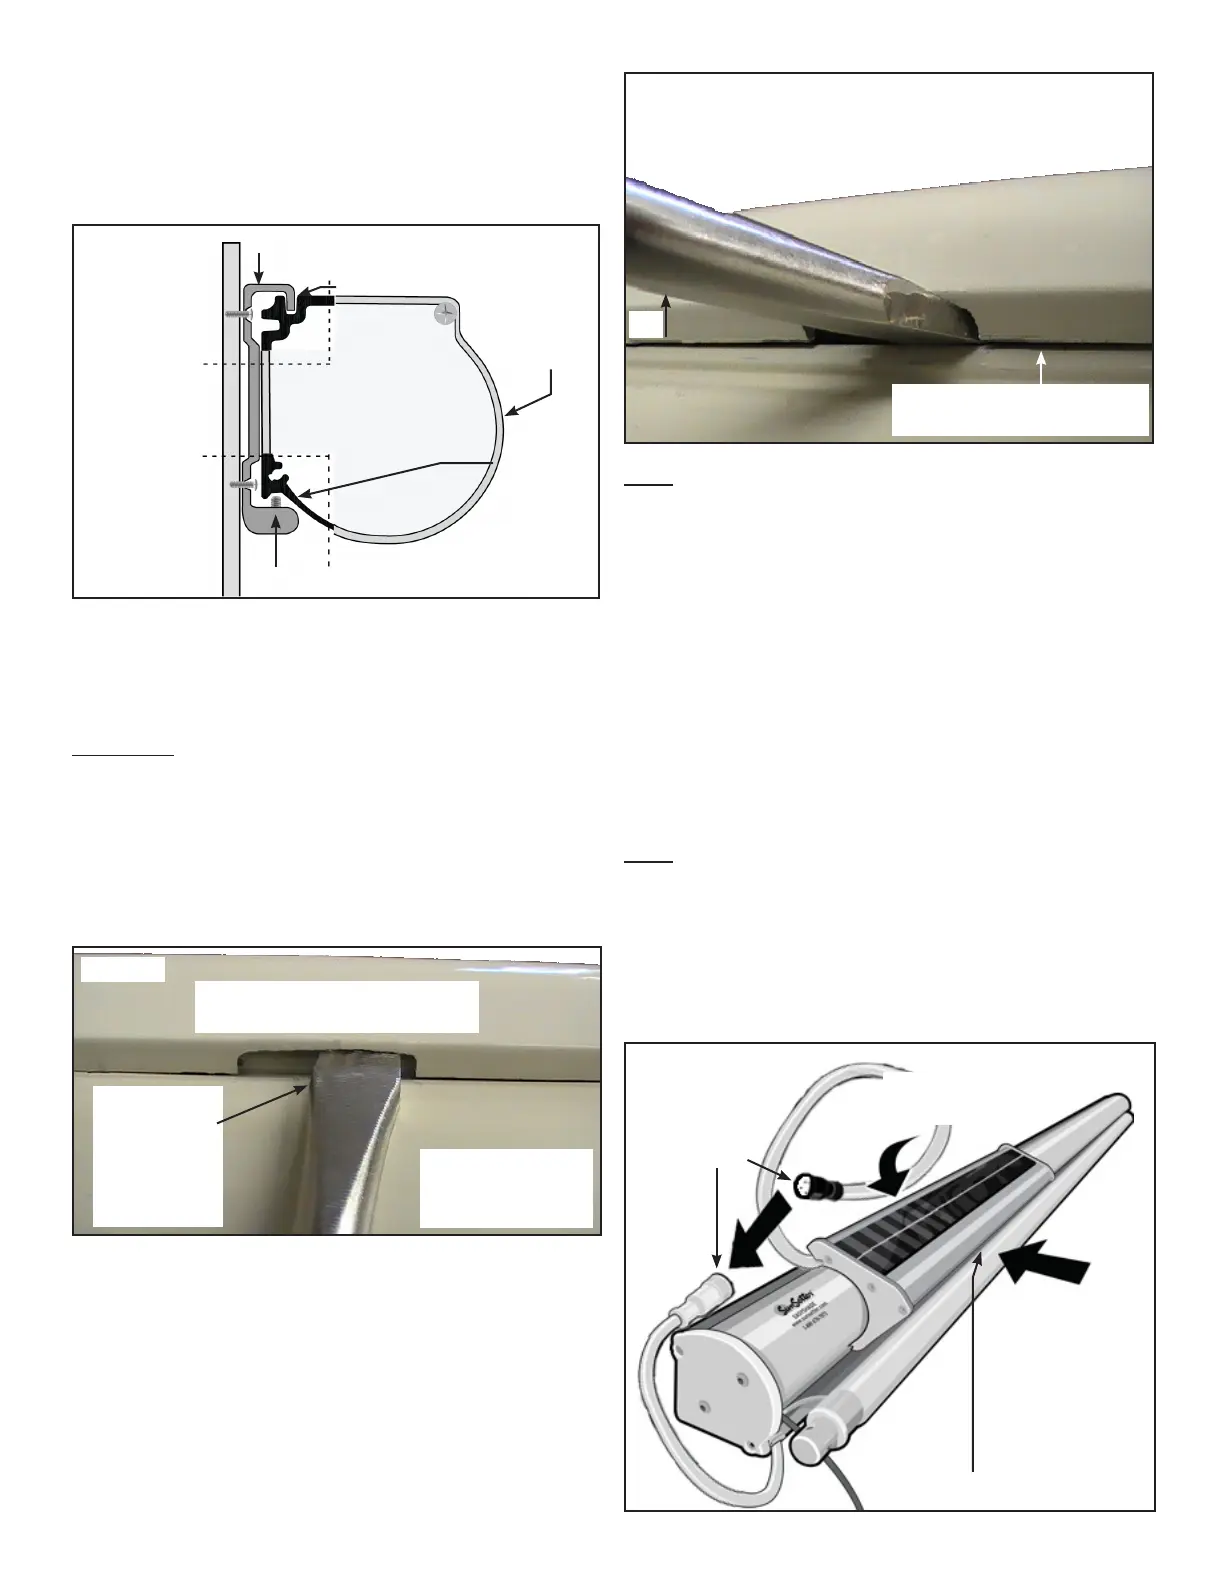
13. Secure the ends together using the Screw Locking
Mechanism on the Connectors. See Figure 8.
14.
a.
under the front of the Fabric Panel Opening of
the EasyShade Housing. See Figure 8.
b.
into place. See Figure 8.
Note: When posioning the Solar Panel on the
Housing, route the Power Cable that is connected to
the Motor behind the housing. Move the Solar Panel
far enough away to remove slack in the Power Cable.
Total length of the combined Cable is about four
feet. For narrow EasyShades, excess Cable can be
tucked behind the Housing.
Top of Solar Panel, viewed
from behind the EasyShade.
Top of EasyShade
Housing, viewed
from behind.
Flat blade
screwdriver
inserted into
slot behind
Solar Panel.
Figure 6
Pry the Solar Panel up and away from
the EasyShade Housing with the at
blade screwdriver inserted into the slot.
Figure 7
Up
Solar Panel separates
from EasyShade Housing.
Figure 8
Connect
Power Cord
of Solar Panel
under opening
in the EasyShade
Housing
Insert Allen screw
Snap top of Solar Panel
onto Housing
9. With the screwdriver inserted into the Slot, pry
the Solar Panel up and away from the EasyShade
EasyShade Housing. See Figure 7.
10.
11. Remove the replacement Panel from packaging.
12. Connect the Power Cord between the Motor and
the Solar Panel.