14
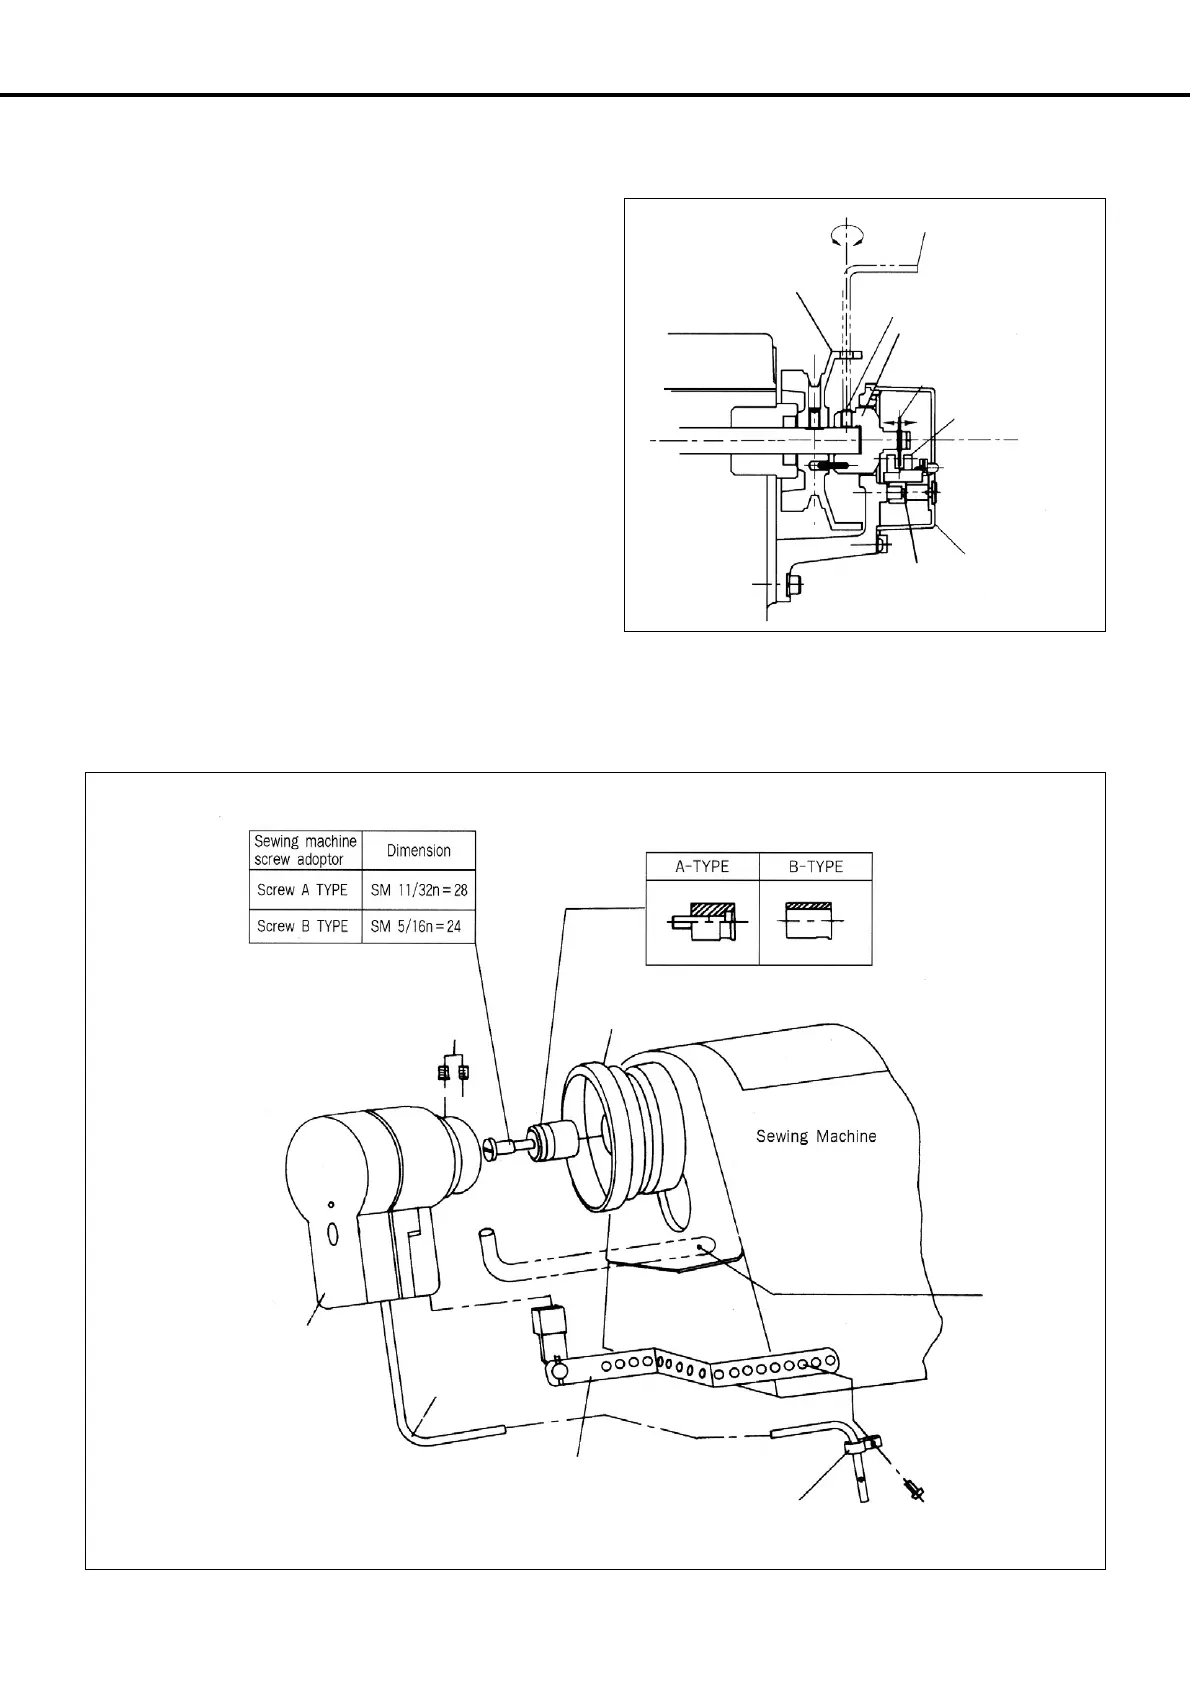
4) Mounting the position sensor (Synchronizer) and
setting the film
(1) Mounting the position sensor(Synchronizer)
① SunStar thread-cutting sewing machine.
All SunStar thread-cutting sewing machines are equipped
with a position sensor. Users, therefore, are required to the
adjust the film position, if necessary, as shown in the figure.
② All other sewing machines(including other manufacturers’ brands)
First, attach the position sensor-mounting adapter to the upper shaft of the sewing machine. Second, attach the position sensor-fixing
plate to the body of the sewing machine as shown below in the figure. Third, secure the position sensor to the adapter with the fixing
screws.
L Wrency
Pulley
Synchro shaft-fixing screw(2)
Synchro shaft
Photo film
(Adjusted left and right)
Photo INTERRUPT
COVER
Upper Shaft
P.C.B Holder
Adapter
Position Sensor-Fixing Bolts
Position Sensor
Cable
Position Sensor-Fixing Plate(Type B)
Nylon Cable Tie
Fiixing Bolt for Position
Sensor-Fixing Plate
Position Sensor-
Fixing Plate(Type A)
Pulley
 Loading...