24
3) Threading
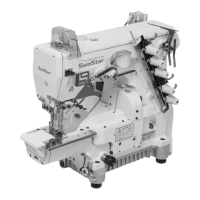
Insert the thread as shown in figure 27 for 3-needle sewing machine.
If treading is not done correctly, stitches may skip, threads may break or tension may be uneven. A, B and C stand for each
needle thread, D for top cover thread and E for looper thread.
Except for the second needle thread in the case of 2-needle sewing machine, refer to the above instructions for threading.
You can thread easily by lifting the lever② of the looper thread guiding bracket①.
For general types of threads, pull the thread into the looper⑤ through looper shaft bushing eyelet④, but for threads made of
cotton or polyester, remember not to insert the thread into looper shaft bushing eyelet④.
4) Adjustment of thread tension
Thread tension must be adjusted according to the type of
threads and fabrics, stitch length and other sewing
conditions.
Thread tension can be adjusted by rotating the thread
adjusting device cap①. Turn clockwise to strengthen and
counterclockwise to weaken the tension.
[ Figure 28 ]
①
Strong
Weak
[ Figure 27 ]
①
A
B
C
D
E
②
③
④
⑤
The path of trimming sewing machine
When using wool thread
Do not insert thread
when using wool thread

 Loading...


