DRUM
30 SUPERMAX OWNER’S MANUAL
Reassembly Procedure
1. To assemble the unit after replacing drums,
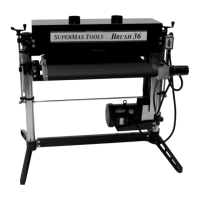
install the sanding drum support brackets. Slide
the drums through the bearings but do not tighten
the set screws in the bearings yet. Install the V-belt
pulleys, but don’t tighten the set screws yet.
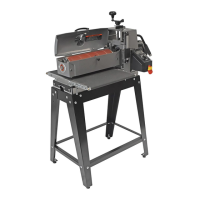
2. Remove the 2x6 from the conveyor bed at this
time. Align the cross brace and the dust cover at
this time. Install the four bolts on the right
(inboard) side. Install the on/off switch with the
infeed bolts and two bolts on the left (outboard)
side of the sander and tighten securely.
3. Tighten the two set screws in each of the four
bearing collars. Spin the drums by hand to check if
they spin freely.
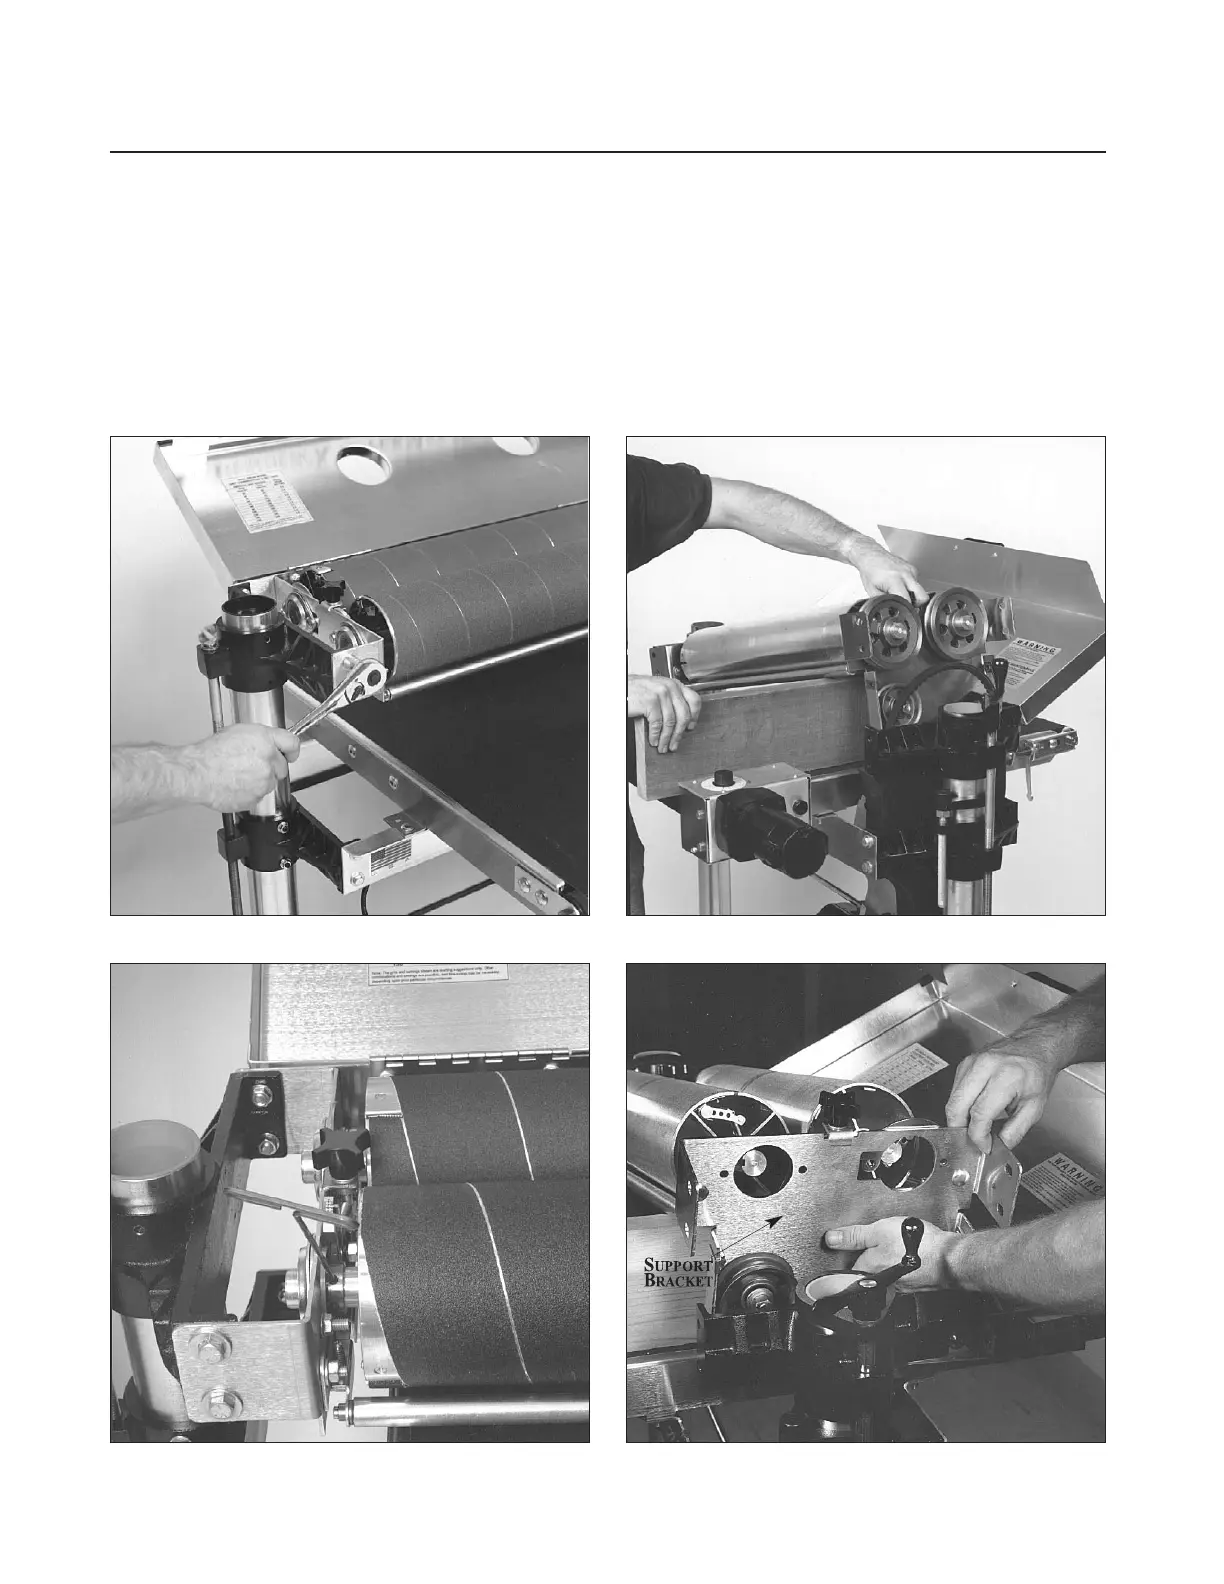
Fig. 31. Drum support casting bolts (outboard side). Fig. 32. Supporting drums with 2x6 on edge.
Fig. 33. Loosening drum bearing set screws. Fig. 34. Removing sanding drum support bracket.