Do you have a question about the Supermicro A2SAP-H and is the answer not in the manual?
Covers precautions for handling ESD sensitive components to prevent damage.
Guides on installing the motherboard in a chassis, ensuring proper alignment.
Step-by-step guide for securing the motherboard within the chassis.
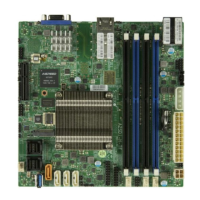
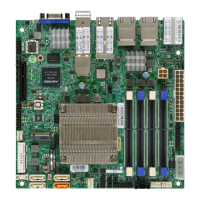
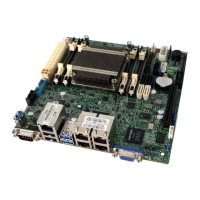
Details supported memory types, speeds, and capacity for installation.
Provides step-by-step instructions for installing SO-DIMM modules correctly.
Provides step-by-step instructions for safely removing SO-DIMM modules.
Details USB 3.0 back panel ports and USB 2.0 connections via headers.
Details the reset button connection for resetting the system.
Details the JCOM1 header providing two RS232/422/485 COM connections.
Describes the M.2 slot for internal devices and its support for SATA/PCI-E SSDs.
Details the JEIO1 header supporting DP/HDMI, PCIe x1, USB 2.0, LPC, SATA, SMBus, Power.
Describes the Mini PCI-E slot at JMP1 for installing compatible devices.
Provides general procedures for troubleshooting system issues before contacting support.
Lists essential checks to perform before powering on the system.
Steps to diagnose and resolve issues where the system does not power on.
Steps to diagnose and resolve issues with no video output.
Procedures to troubleshoot system boot failures and POST errors.
Steps to diagnose and resolve memory-related errors and issues.
Addresses reasons and solutions for losing BIOS setup configuration.
Guides to troubleshoot system instability during or after OS installation.
Method for isolating issues by using a minimal system configuration.
Techniques for isolating faulty components by testing them individually.
Explains the recommended procedure for updating the system BIOS.
Provides instructions for removing and installing the CMOS battery.
Details the procedure for warranty service, including RMA requests.
Explains how to enter the BIOS setup utility using specific keys.
Describes the main BIOS setup screen and its configurable items.
Accesses advanced BIOS setup options for system configuration.
Settings for DeepSx Power Policies and Watch Dog Timer functionality.
Controls system shutdown behavior when the power button is pressed.
Sets the system's power state after an AC power outage.
Displays detailed CPU information including model, speed, and cores.
Covers EIST (SpeedStep) and Turbo Mode for power and performance.
Enhanced Intel SpeedStep Technology for automatic adjustment of voltage and frequency.
Enables processor cores to run faster than the manufacturer's specified frequency.
Selects the performance state (Max Performance or Max Power Saving) before OS handoff.
Enables setting the power limit for the CPU.
Sets the PL1 clamp bit for CPU power management.
Configures the value for Power Limit 1 in milli watts.
Indicates the time window over which the TDP value should be maintained.
Determines how many CPU cores are activated for each CPU.
Enables running multiple OS and applications in independent partitions.
Enables Intel Virtualization Technology for Direct I/O (VT-d).
Allows changing the P-State (Power-Performance State) coordination type.
Settings for GOP Driver, LVDS Panel Support, Panel Support, and IGD Configuration.
Dynamic Video Memory Technology for allocating system memory to video devices.
Sets the total memory size used by internal graphics devices.
Enables or disables the IGFX Power Management function.
Settings for ASMedia USB Controller, M.2, and Intel I210 Gigabit LAN.
Configures ASPM and PCIe Speed for the ASMedia USB Controller.
Sets Active State Power Management (ASPM) level for PCI-E devices.
Configures ASPM and PCIe Speed for devices in the M.2 slot.
Configures ASPM and PCIe Speed for the Intel I210 Gigabit LAN.
Configures ASPM and PCIe Speed for devices in the Mini PCIe slot.
Settings for USB 3.0, XHCI Pre-Boot Driver, and XHCI Hand-Off.
Enables or disables support for USB 3.0.
Enables XHCI support on a pre-boot drive specified by the user.
Enables or disables support for rear I/O USB 3.0.
Settings for Chipset SATA, SATA Mode Selection, and Aggressive LPM.
Settings for TPM 2.0 module detection and security device support.
Enables onboard security devices for TPM support and enhanced security.
Changes the TPM State, requiring a system restart.
Selects the Trusted Computing Group (TCG) specification version.
Allows the user to configure security settings.
Determines when a password entry is required (Setup or Always).
Sets the administrator password required to enter the BIOS setup utility.
Sets a user password required to log into the system and BIOS setup.
Enables secure boot support to ensure system security at bootup.
Selects the desired secure boot mode (Standard or Customized).
Allows configuration of key management settings if Secure Boot Mode is Customized.
Installs the default Secure Boot keys set by the manufacturer.
Installs the default settings for all keys.
Installs all default secure keys set by the manufacturer.
Configures the settings of the platform keys.
Configures the Key Exchange Keys (KEK).
Loads the database from manufacturer defaults or from a file.
Loads the DBX from manufacturer defaults or from a file.
Loads the DBT from manufacturer defaults or from a file.
Uploads and installs an OSRecovery Signature from factory defaults or file.
Loads the DBR from manufacturer defaults or from a file.
Uploads and adds OSRcovery Signature into Key Management.
Allows the user to configure various boot settings.
Prioritizes the order of bootable devices that the system can boot from.
Lists common beep codes encountered during POST and their meanings.
Details the SuperDoctor 5 program for system health monitoring.
Warns about battery replacement dangers and proper disposal.
Warns that product disposal must follow all national laws and regulations.
Describes how to recover the UEFI BIOS from boot block or main BIOS corruption.
Procedure to recover BIOS image using a USB-attached device.
Instructions for using a USB device to perform UEFI BIOS recovery.
Guides on navigating the BIOS Recovery menu.
Steps to initiate the BIOS flash update process.
Commands for navigating directories and starting the BIOS update process.
| Form Factor | Mini-ITX |
|---|---|
| Memory Type | DDR4 |
| Memory Slots | 2 |
| Max Memory | 32 GB |
| PCIe Slots | 1 x PCIe 3.0 x16 |
| SATA Ports | 4 |
| Storage Interface | SATA III |
| M.2 Slots | 1 |
| Video Output | HDMI, DisplayPort |
| Serial Port | 1 |
| Power Connector | 24-pin ATX |