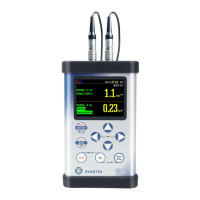
Control of the instrument has been developed in a fully interactive manner. The user can operate the
instrument by selecting the appropriate position from the selected Menu list. Thanks to that, the number of
the control push-buttons of the instrument has been reduced to nine for ease of use and convenience.
2.1 Control push-buttons on the front panel
The following control push-buttons are located on the
front panel of the instrument:
• <ENTER>, (<Menu>), [<Save>],
• <ESC>, (<Cal.>), [<S/P>],
• <Shift>, [Markers]
• <Alt>, [Markers]
• <
5
>,
• <
3
>,
• <
4
>,
• <
6
>,
• <Start/Stop>.
The name given in (...) brackets denotes the second push-button function which is available after pressing it
in conjunction (or in sequence) with the <Shift> push-button. For the first two push-buttons the name given
in square brackets […] denotes also the third push-button function which is available after pressing it in
conjunction (or in sequence) with the <Alt> push-button.
<Shift>
The second function of a push-button (written in red colour on a push-button) can be used
when the <Shift> push-button is pressed. This push-button can be used in two different
ways:
• as Shift like in a computer keyboard (e.g. while typing the filename); both <Shift>
and the second push-button must be pressed together (two finger operation);
• as 2nd Fun; this push-button can be pressed and released before pressing the
second one or pressed in parallel (while operating in “2nd Fun” mode, see the
following notice) with the second push-button (one finger operation).
The <Shift> push-button pressed in conjunction with <Alt> enables the user to enter the
Markers on the plots during the measurement.
<Alt>
This push-button enables the user to choose the third push-button function in case of
[<Save>] and [<Pause>] push-buttons. In order to select the third function the user must
press the <Alt> and the second push-button simultaneously.

 Loading...