9
Note: If you see a red cross near the network and the text: “The settings saved on this computer for the network do not match the
requirements of the network”, please refer to the troubleshooting section of this manual.
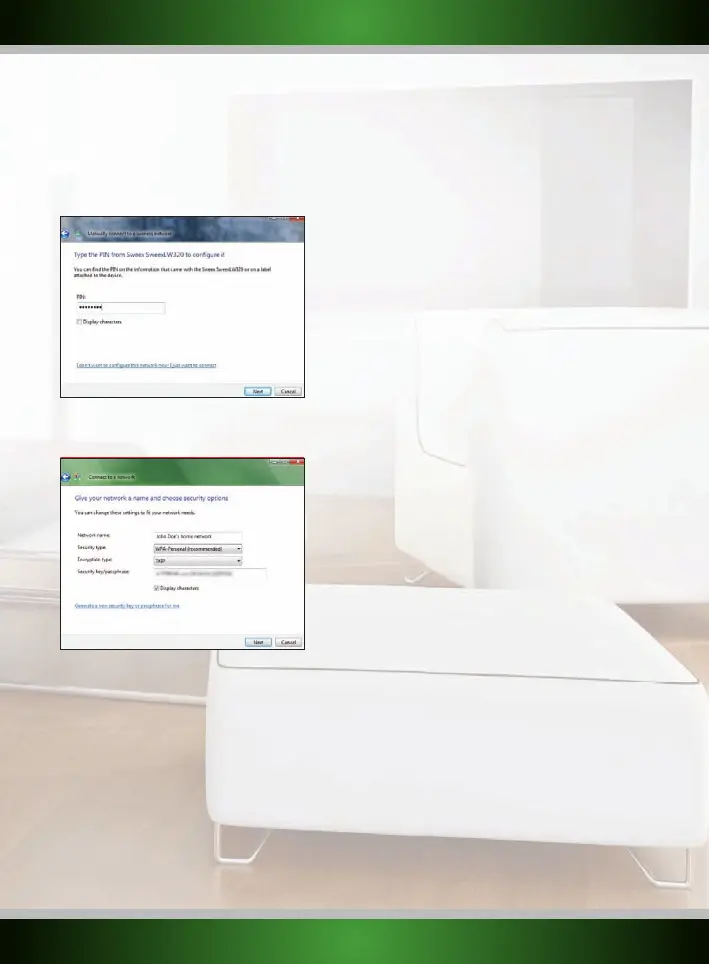
If you have Windows Vista with Service Pack 2 or Feature Pack for Wireless installed and you are connecting the router for the first time, Vista
will allow you to easily setup and secure your wireless network through the WPS method. After connecting you will see the following screen.
Enter the PIN code on the label on the bottom of your router and click “Next”:
The following screen will appear, enter the desired name for your wireless network, enter a security key and click “Next” to begin configuring
the router:
Note: It is very important that you write down the security key and keep it in a secure place, it is required to add older, non-WPS enabled
devices (such as a Windows XP computer) to your network. Because your network is now already setup and secured, you can skip the
“Wireless network configuration” and “Securing your wireless network” chapters of this manual.
English version