11
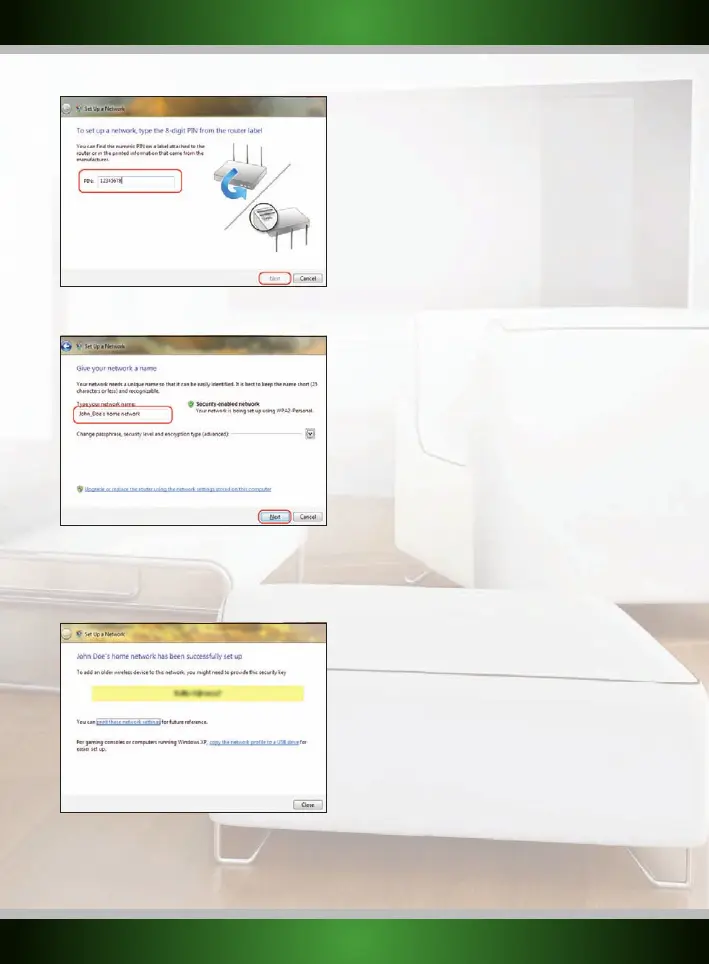
The following screen will appear, enter the desired name for your wireless network and click “Next” to begin configuring the router:
Note: The default security method with this setup procedure is WPA2. If a device in your network does not support WPA2, you can change the
security method by clicking the “Advanced” button.
When the router is configured, you will see the following screen:
Note: It is very important that you write down the security key and keep it in a secure place, it is required to add older, non-WPS enabled
devices (such as a Windows XP computer) to your network. Because your network is now already setup and secured, you can skip the
“Wireless network configuration” and “Securing your wireless network” chapters of this manual.
English version