©2018 SwellPro All Rights Reserved
39
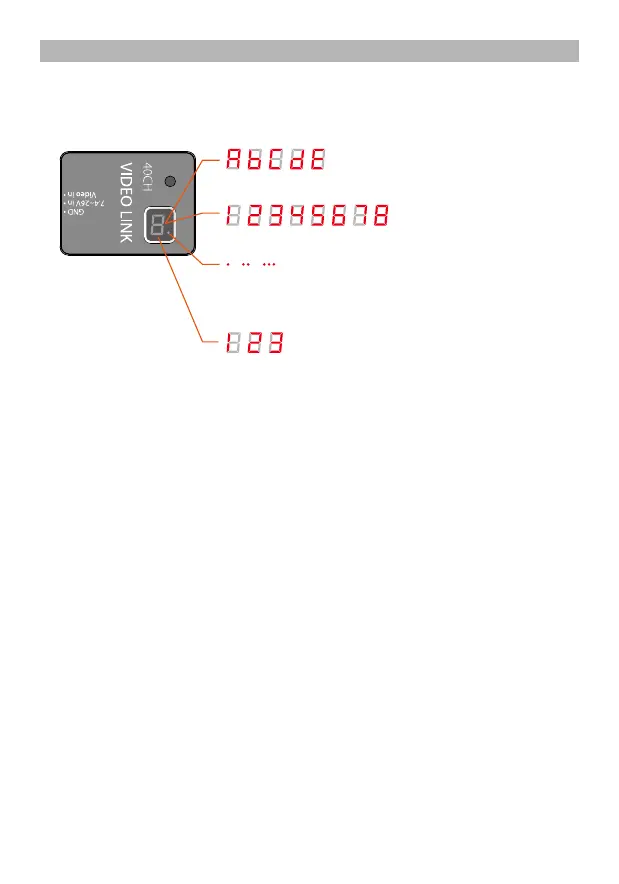
Band:A b C d E
Channel:1 2 3 4 5 6 7 8
Power: Led flashing sequences: 1 time represents 25mW,
2 times represents 400mW, 3 times represents 600mW
Power indication:1(25mW)、2(400mW)、3(600mW)
Channel Selection
After powering on the transmitter, it will initially display the currently selected frequency
band, followed by the current channel, and, in the lower right corner, a red dot flashing
indicating the currently selected transmission power level as described above.
An Example: To set up channel E5:
1. Long press the button for 3 seconds, it initially enters into the band selection, and will
automatically scroll between the bands (A, B, C, D, E), When it reaches “E”, short press the
button to choose E brand and short press again to scroll from E1 to E8, long press for 2
seconds to confirm the channel.
2. To adjust to E5, short press the button 4 times. When the system cycle shows the frequency
band E and channel 5, long press the button for 2 seconds, the dot in the lower right corner
will flash once to confirm the selection, release the button. On completion, the system will
display “E” first, followed by “5”, and finally the dot will flash representing the transmission
power level.
Selecting the channel (there are a total of 40 channels)
Video Transmitter Channel Selection
 Loading...