CHANGING A WHEEL
1. Leave caravan hitched to towing vehicle
and ensure handbrake is applied.
2. Lower corner steadies (as safety
measure) on the side that the wheel is
being changed to stabilise the caravan.
3. Use wheel brace to slacken off wheel
nuts on the wheel to be changed.
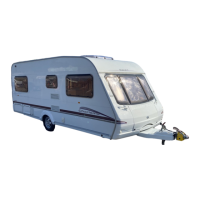
4. Position jack under the axle at the
appropriate jacking point (see fig. B)
5. Jack up the caravan until the wheel for
removal is just off the ground.
6. Remove the wheel nuts, wheel trims and
remove the wheel.
7. Fit spare wheel and reverse the above
procedure.
Ensure clean, dry mating surfaces and
clean, dry bolt/nut sealing areas.
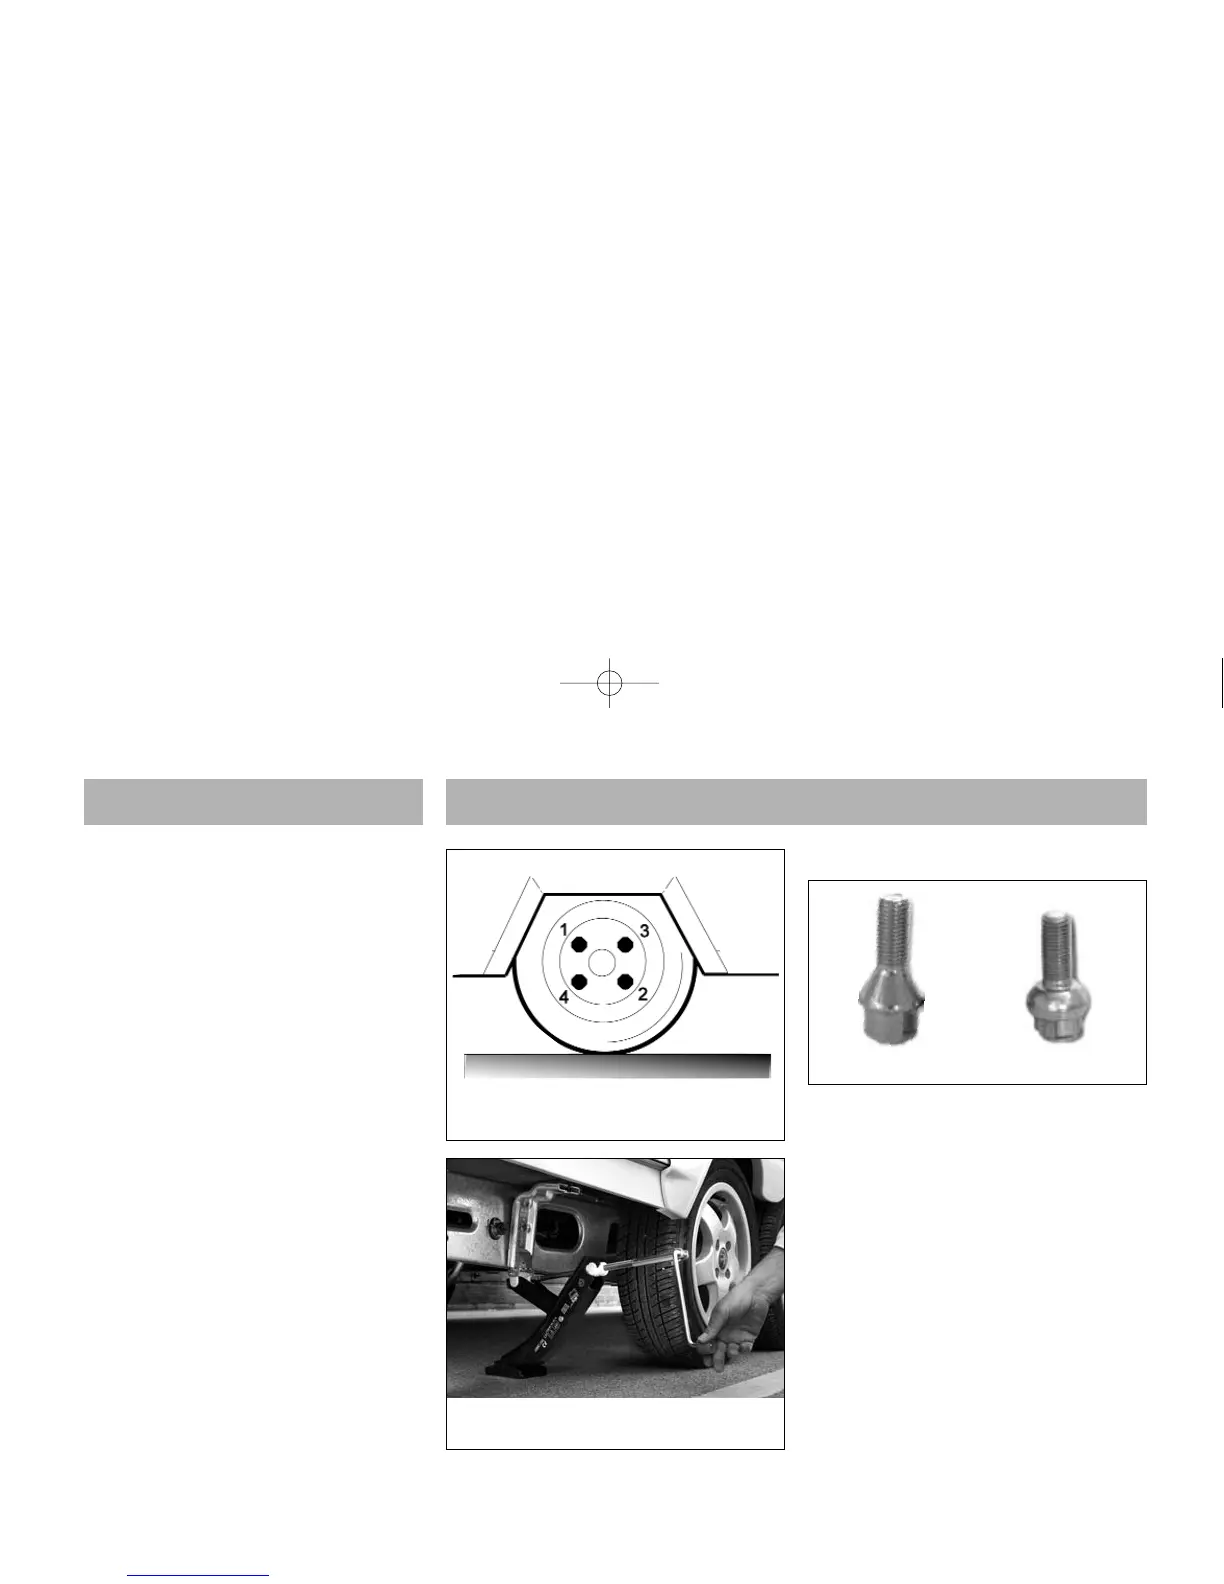
8. Tighten all four/five nuts, according to Fig.
A, to 88Nm (65lb/ft) for steel wheels or
115Nm (85lb/ft) for alloy wheels using a
torque wrench or have checked as soon
as possible.
Ensure the correct wheel fixings are used,
as supplied with your caravan
IMPORTANT
When a wheel has been removed and
replaced the torque of the wheel nuts should
be re-checked after approximately 15 miles
of running. (See 8 above).
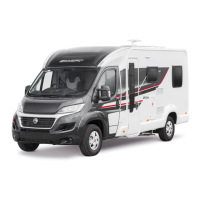
PLEASE NOTE DIFFERENT BOLT TYPES
Conical seated wheel bolts are suitable for
14” and 15” alloy and 14” steel spare wheel
use only. However Spherical seated wheel
bolts must be used on the 15” steel spare
wheel (Challenger and Cameo single axle).
Spherical seated bolts must not be used on
any 14” wheel or 15” alloy wheel this is due
to the machined seating on the wheel rim.
MODELS AFFECTED: CAMEO SINGLE
AXLES AND CHALLENGER RANGE.
SPHERICAL BOLTS ARE TIE WRAPPED TO
THE SPARE WHEEL.
Fig. A Wheel Nut Tightening
Conical Spherical
Fig. B Scissor Jack
The Towing Code
18