1-7-6 T2127EA
6-2. Setting for 7F DATA/SLP REC/
MONO Data Values
1. Enter the Service mode. (See page 1-7-1.)
2. 7F Data Adjustment: Press [VOL p] button on
the service remote control unit once to show “7F”
on the display.
SLP REC Adjustment: Press [VOL p] button on
the service remote control unit twice to show “SLP
R” on the display.
MONO Adjustment: Press [VOL p] button on the
service remote control unit three times to show
“MONO” on the display.
3. 7F Data Adjustment: Select “FF” by pressing
[CH. o / p] buttons on the service remote control.
SLP REC Adjustment: Select “0” by pressing
[CH. o / p] buttons on the service remote control.
MONO Adjustment: Select “OFF” by pressing
[CH. o / p] buttons on the service remote control.
7. H. Size Adjustment
Purpose: To obtain correct size of screen image.
Symptom of Misadjustment: Size of screen image
may not be properly displayed.
Note: VR531 --- Sub CBA
1. Input monoscope pattern.
2. Adjust VR531 so that the monoscope pattern is
90+1%/-5% of display size and the circle is round.
8. H. Pincushion Adjustment
Purpose: To obtain straight line on the screen.
Symptom of Misadjustment: Straight line image may
not be properly displayed.
Note: VR2530 --- Sub CBA
1. Input crosshatch pattern.
2. Adjust VR2530 so that the lines of the crosshatch
pattern become straight.
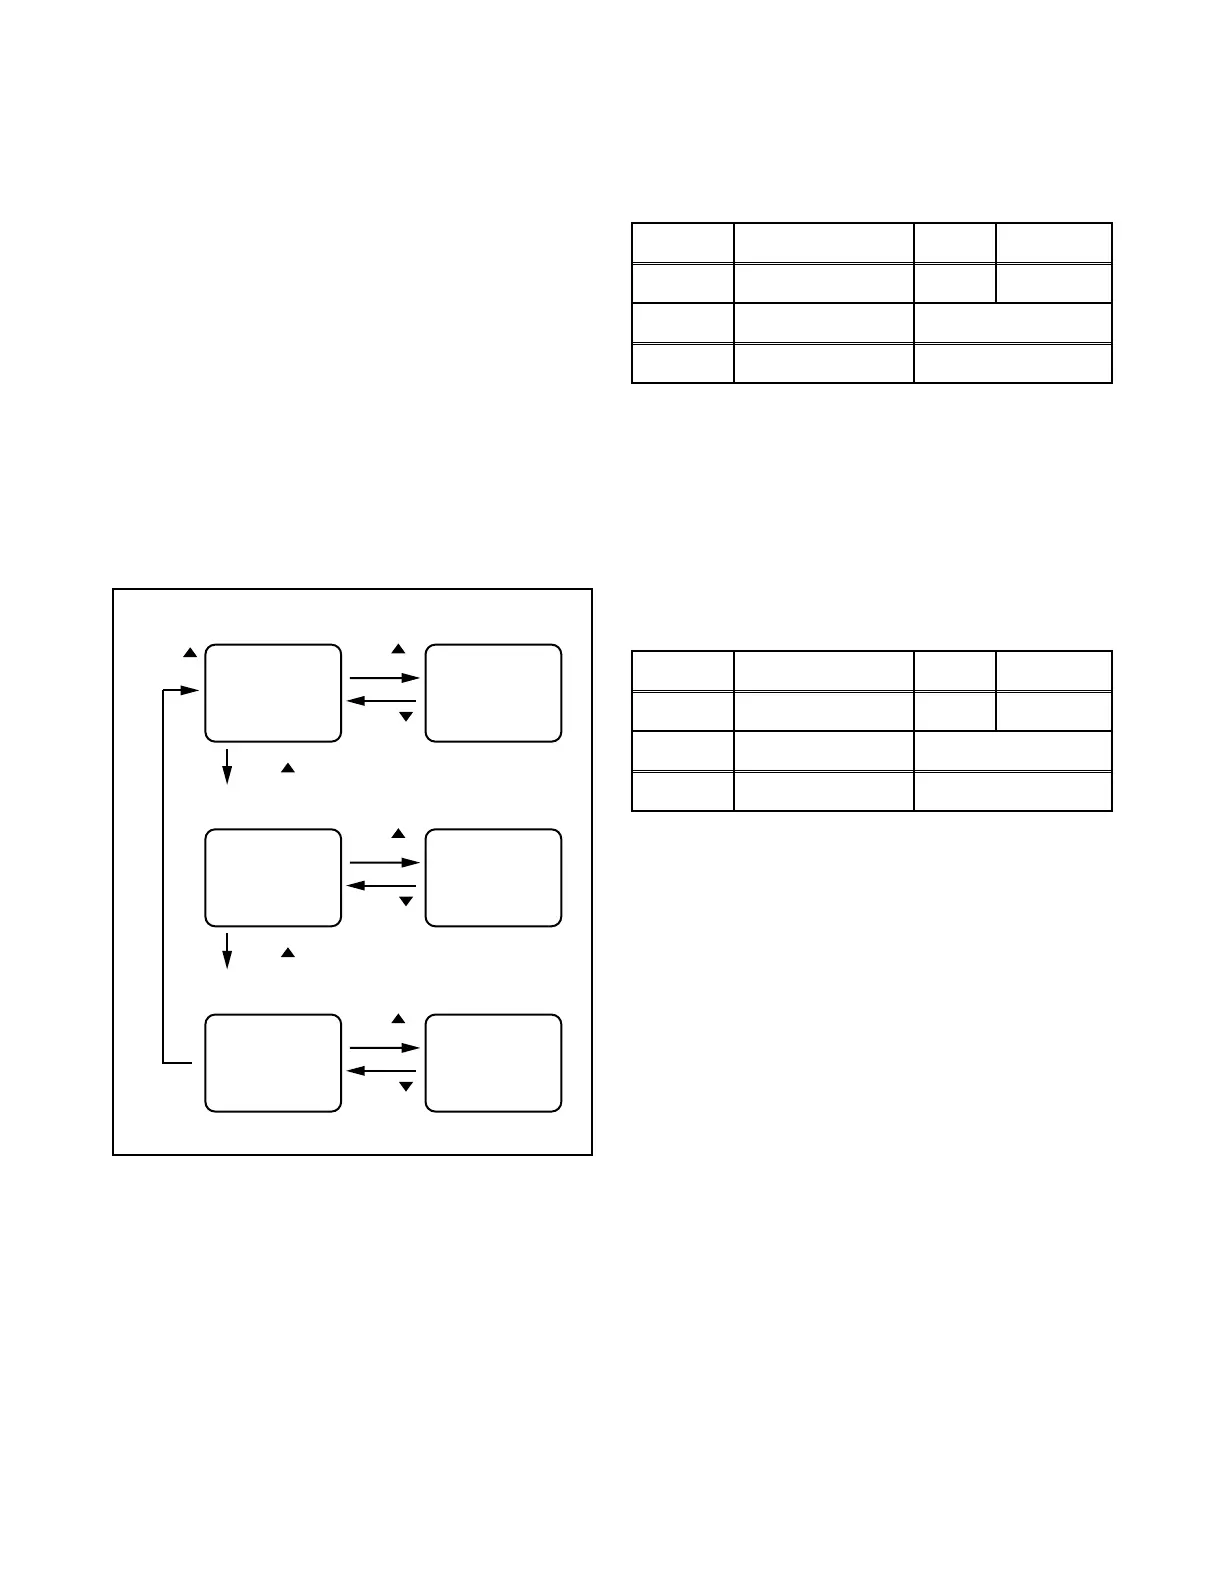
Fig. 5-2
[VOL ] button
7F DATA Adjustment (Factory mode)
[CH. ]
button
[VOL ]
button
[VOL ] button
7F= FF 7F= 00
[CH. ]
button
SLP REC Adjustment
[CH. ]
button
SLP R= +2 SLP R= 0
[CH. ]
button
MONO Adjustment
[CH. ]
button
MONO= ON MONO= OFF
[CH. ]
button
Test point Adj. Point Mode Input
--- VR2531 --- Monoscope
Tape M. EQ. Spec.
--- Pattern Generator 90+1%/-5%
Test point Adj. Point Mode Input
--- VR2530 --- Crosshatch
Tape M. EQ. Spec.
--- Pattern Generator See below