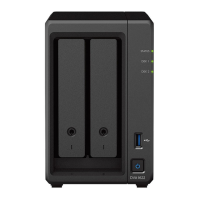
Hold the memory module by its edges and avoid touching the gold connectors.
Synology will not provide full product warranty or technical support if a non-Synology memory module is
used for memory upgrade.
4. Insert the drive trays back into the drive bays.
5. Reconnect the cables removed in step 1, then press the power button to turn on your Synology NAS.
To make sure your Synology NAS recognizes the new memory capacity
1. Install DiskStation Manager (DSM). Please see “Install DSM on Synology NAS” for more information.
2. Sign into DSM as admin or a user belonging to the administrator’s group.
3. Go to Control Panel > Info Center and check Total Physical Memory.
If your Synology NAS does not recognize the memory or does not start up successfully, please make sure that the memory module is installed correctly.
To remove the memory module
1. Follow step 1 and 2 of the “To install the memory module” section to shut down your Synology NAS,
disconnect the cables and remove the drive trays.
2. Push the levers on both sides of the memory module outward. The memory module will be released from its slot.
3. 3 Hold the memory module by its edges and remove it from the slot.
4. Insert the drive trays back into the drive bays.
5. Reconnect the cables removed in step 1, then press the power button to turn on your Synology NAS.
Add an M.2 NVMe SSD to Synology NAS
You can install up to two M.2 NVMe 2280 SSDs on your Synology NAS to create an SSD cache volume. Follow the steps below for SSD module installation and removal.
To install an M.2 NVMe SSD module
1. 1 Shut down your Synology NAS. Disconnect all cables from your Synology NAS to prevent possible damage.
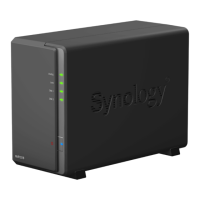
2. The SSD slots are located at the bottom of your Synology NAS.
3. Remove the two covers protecting the modules. You will see two empty slots that are numbered as shown below.
Note: Hold the SSD module by its edge and avoid touching the gold connectors.
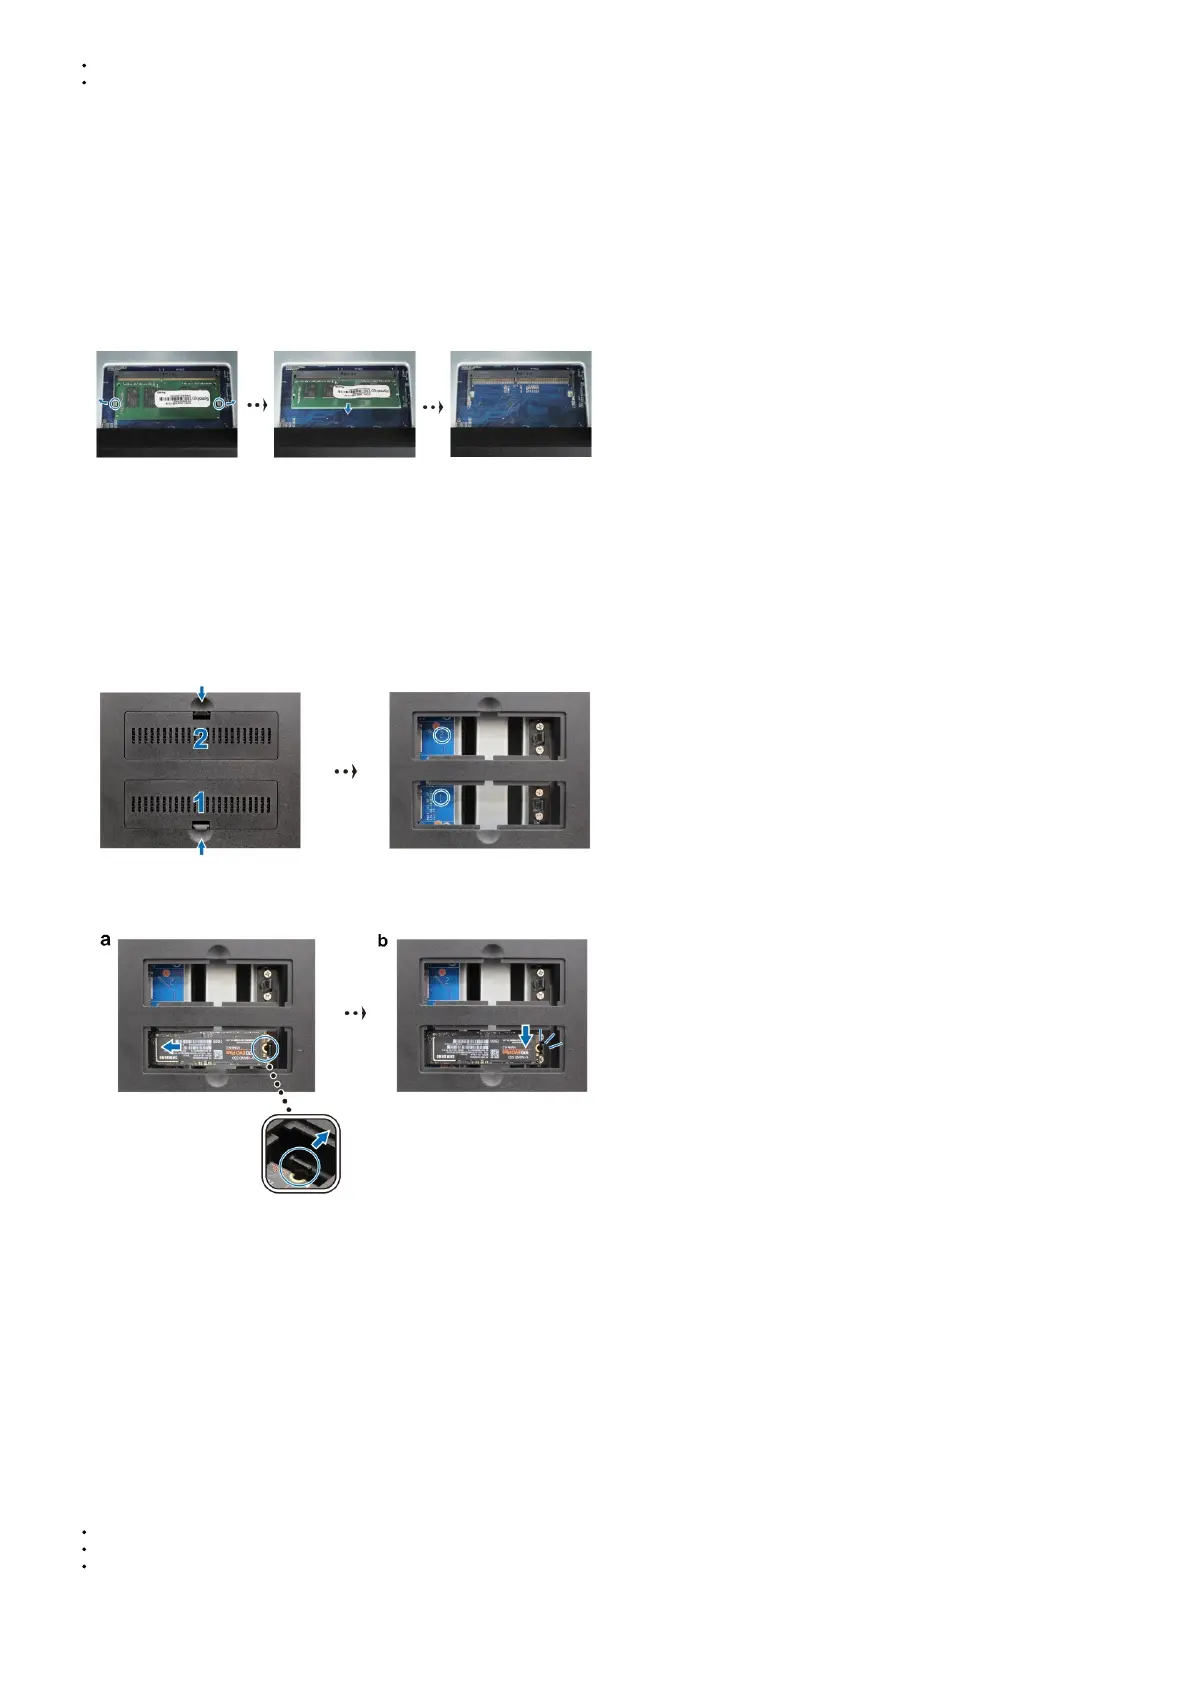
4. Start from slot 1. Insert your SSD module into the empty slot:
a. Align the small gap between the gold connectors of the SSD module with the notch in the empty slot. Insert the module into the slot. Make sure that the module is properly
inserted.
b. Push the lever outward as shown below. While holding the lever, push down the SSD module, then release the lever to secure the SSD module. Replace the covers.
5. If needed, repeat the steps above to install a second SSD module into the second slot.
6. Reconnect the cables removed in step 1, then press the power button to turn on your Synology NAS.
To remove the M.2 NVMe SSD module
1. Shut down your Synology NAS. Disconnect all cables from your Synology NAS to prevent possible damage.
2. Push the lever outward. The module will pop up and be released from the slot.
3. Hold the SSD module and remove it from the slot. Replace the covers.
4. Reconnect the cables removed in step 1, then press the power button to turn on your Synology NAS.
System Maintenance
Initial Troubleshooting Guide
We have selected several helpful articles on frequently asked questions to help you perform initial troubleshooting on your Synology NAS. To view the articles, please click the links
provided below:
General
What can I do to troubleshoot NAS connection problems?
Why does my Synology NAS make unusual noises?
How to reset my Synology NAS
Hard Disk Drive