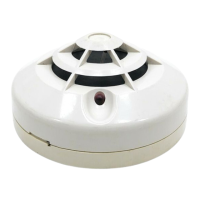
N770-04-00 3 I56-393-05
Position the switch on the valve with the bolts on the inside
(preferably) or outside of the yoke, depending on clear-
ances. Adjust the position of the OSY2 as far as possible
from the valve gland and in a location where the actuat-
ing lever contacts the unthreaded section of the valve
stem (if the valve stem is already grooved, proceed di-
rectly to step 6).
3. When the switch is in position on the valve, slide the
open end of the clamping bar onto the bolts and under
the retaining washers. If necessary, adjust the length of
the actuating lever by loosening the set screw on the
cam, sliding the lever in or out, as appropriate, and re-
tightening the set screw. The lever is properly adjusted
when it clears the clamping bar. Tighten the nuts by
hand and slide the OSY2 until the second switch trip
points are found as the lever rests on the valve stem.
This approximates the final position of the OSY2 after
the valve stem is grooved. Carefully check all clearances
of the bolts, actuator, mounting bracket, clamping bar,
and OSY2 cover. Adjust the position as necessary. If
clearance is a problem, refer to the Limited Clearance
Valves (page 1) section of this manual.
4. Mark the point on the valve stem where the actuating le-
ver contacts the valve stem.
5. Remove the OSY2 by loosening the nuts and sliding the
clamping bar from beneath the retaining washers. Re-
move the OSY2 from the valve and set it aside.
(a) Valves 1
1
/2" in diameter and smaller only.
Use a
1
/4" untapered round file to file a groove
3
/32"
deep in the valve stem at the mark that was made in
step 4. Be sure to remove any burrs resulting from the
filing to avoid damaging the valve stem packing
gland.
(b) Valves larger than 1
1
/2" inches in diameter only.
Use a
3
/8" untapered round file to file a groove
1
/8"
deep in the valve stem at the mark that was made in
step 4. Be sure to remove any burrs resulting from the
filing to avoid damaging the valve stem packing
gland.
6. Mount the switch loosely with the actuating lever cen-
tered in the groove. When the switch is in position on
YOKE
GROOVE
CLAMPING BAR NOT SHOWN
THREADED VALVE
GLAND HEX NUT
OR BOLT
VALVE
STEM
GLAND
STEM HEX
Figure 3: the valve, slide the open end of the clamping bar onto
the bolts and under the retaining washers, as indicated
in Figure 2.
7. Ensure that the actuating lever does not hit the inside
of the cover or the clamping bar at any point in its
travel. If it does, adjust the length of the lever by loos-
ening the set screw, sliding the lever in or out, as
needed, and retightening the set screw.
8. Adjust the supervisory switch position on the valve so
that both switches are depressed (COM to B circuit
open) when the actuating lever is in the groove with
the valve in the full open position. The COM to B
circuit should close when the valve is closed
1
/5 of its
travel or 2 full turns of the handle, whichever is less.
The switch produces an audible “click” when it closes.
The switch closure can also be tested electrically by
using an ohmmeter to test for continuity between its
terminals.
9. Tighten the nuts securely with a wrench and check the
operation of the OSY2 as in step 8. If necessary, reposi-
tion the OSY2 and test it again.
10. Wire the supervisory switch as shown in Figure 4.
11. Replace the OSY2 cover and tighten the tamper-resistant
cover screws with the special wrench provided. Store
this wrench in a secure location.
12. Test the operation of the OSY2 by closing the valve the
1
/5 of its travel distance or two full turns, whichever is
less. The circuit between COM and B should indicate a
closure during this procedure. If it does not, readjust
the supervisory switch and actuator positions until the
switch closes when the valve is operated.
Testing
Test the operation of all supervisory switches before they
are placed into service and at least semiannually, or as re-
quired by the authority having jurisdiction.
NOTE: Notify the proper authorities that the supervisory
switch(es) is (are) undergoing maintenance and,
therefore, will be temporarily out of service. Dis-
able the system or zone undergoing testing to pre-
vent unwanted alarms.
Test the operation of the OSY2 by closing the valve the
1
/5
of its total travel distance or two full turns, whichever is
less. A contact closure must occur during this procedure. If
it does not, readjust the supervisory switch and actuator
positions until the switch closes when the valve operated.
Technical Manuals Online! - http://www.tech-man.com