10
| Installation
Follow instructions delivered with the cooker hood how to prepare it before installation.
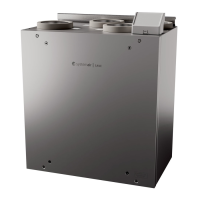
Fig. 8 Installation of the cooker hood
1. Place a circular insulation on the cooker hood connector to prevent air leaking (figure 8, pos. 2).
Insert the cooker hood directly into the unit (figure 8, A). Screw the cooker hood to the bottom of the SAVE–P VTR
150/B unit (figure 8, pos. Y). The duct connector have to go into the unit. Make sure the duct connector is aligned
with the unit before starting (figure 8, pos. X). Use included screws and plastic spacers to prevent over-tightening
which could lead to bent cooker hood (figure 8, pos. 1).
2. Other installation method is to connect the cooker hood to the unit via a flexible duct (figure 8, B). Use mounting
mechanism which is delivered together with the cooker hood (figure 8, pos. Z).
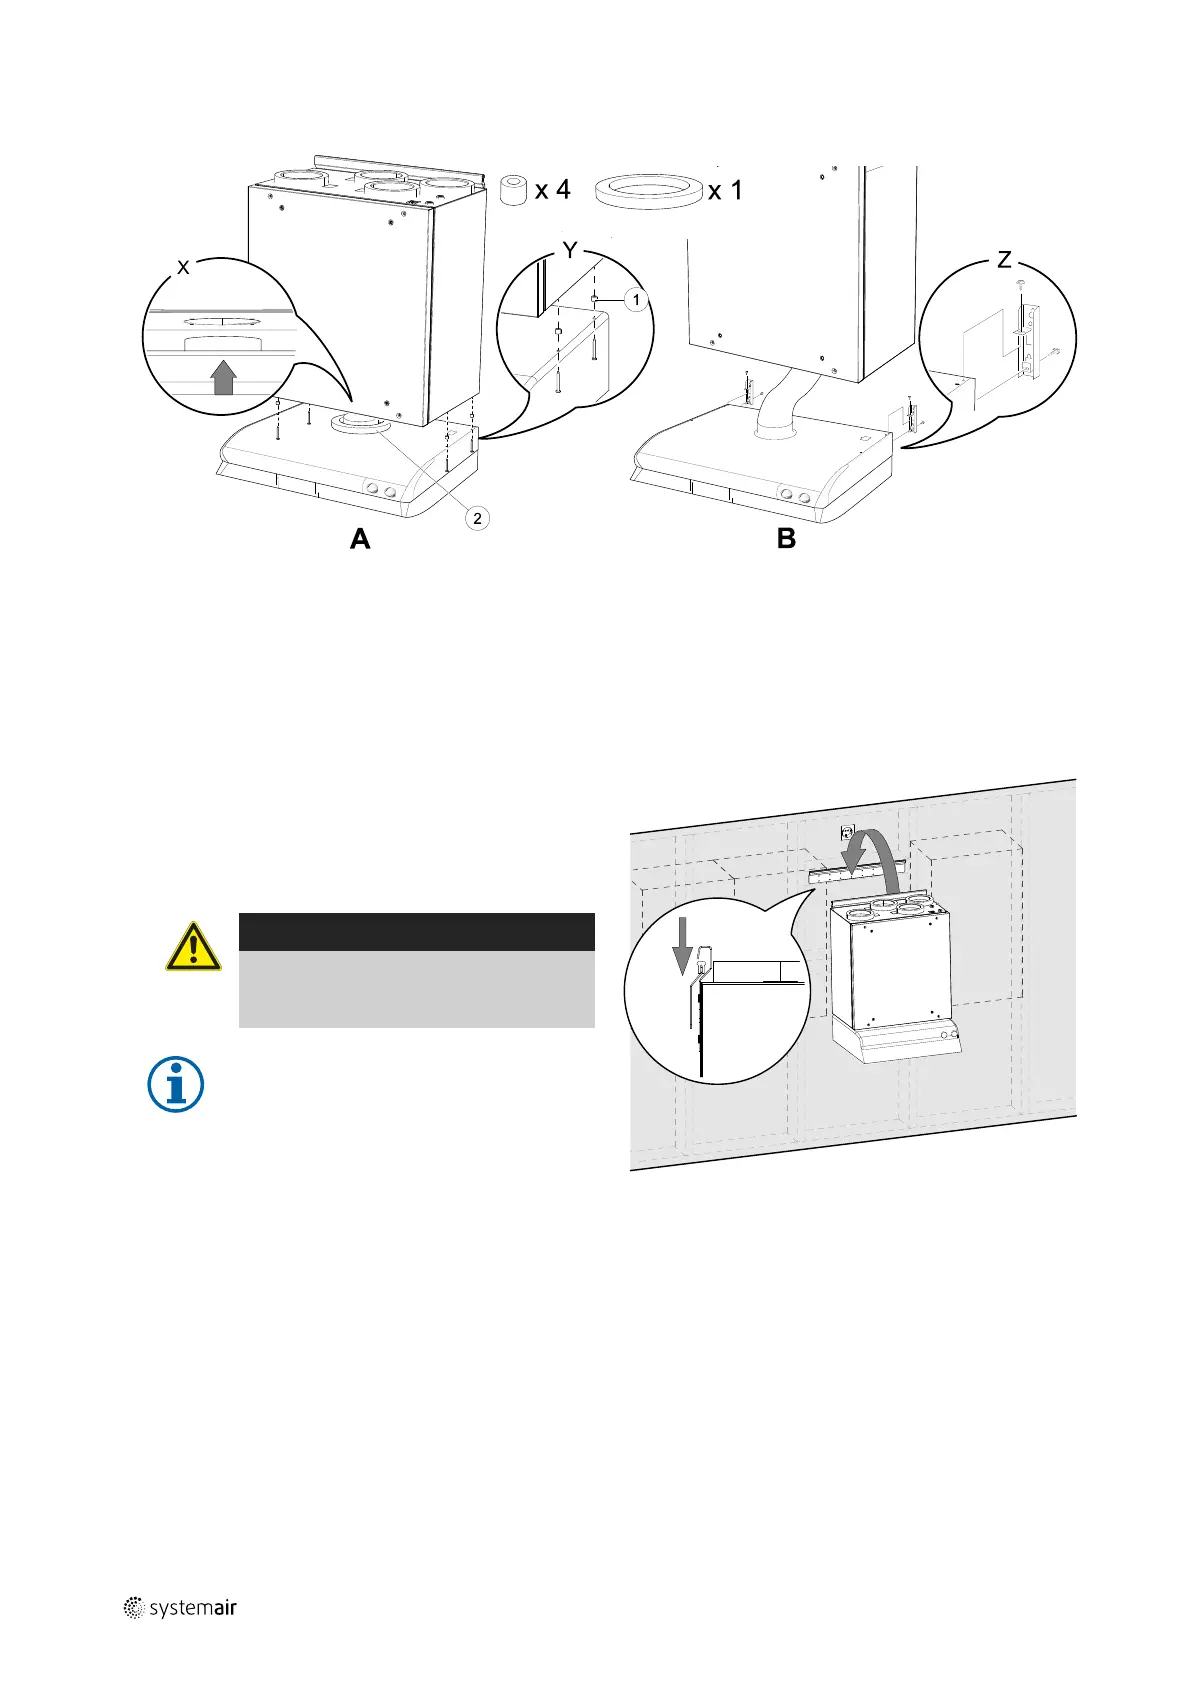
Fig. 9 Placing the unit on the mounting bracket (the cooker hood is not
shown)
1. Pull the cooker hood power supply and control cables
to the top since the mounted SAVE–P VTR 150/B unit
will block access to the back.
2. Once all cooker hood cables at the back are led to the
top, lift the unit and hang it on the mounting bracket.
Warning
Beware of sharp edges during mounting
and maintenance. Use protective gloves.
Consider the unit weight when mounting!
Note:
Make sure that the unit is completely vertical
and horizontal once mounted on the wall.
Check with a spirit level.
Make sure there is at least 2 mm gap between
the unit and the cupboard to prevent vibration
noises.
6.3 Installation with 392–10/B cooker hood
Product name and number
• 392-10/B Slimline — 77265
There are two options how to install the cooker hood:
• The cooker hood is attached directly to the bottom of the unit. This option can be used when the whole unit with a
cooker hood will be shifted forward using wood blocks to be alighted with the cupboards or when the cupboard size
matches the unit and no adjustments are needed. This way the unit can be simply mounted directly on the wall with
already attached cooker hood.
• The cooker hood is attached to the sides of cupboards using included brackets. If the unit and cooker hood is not
aligned, a flexible duct must be used since it will be impossible to insert the cooker hood directly into the unit.
271401 | v1
 Loading...