27
English
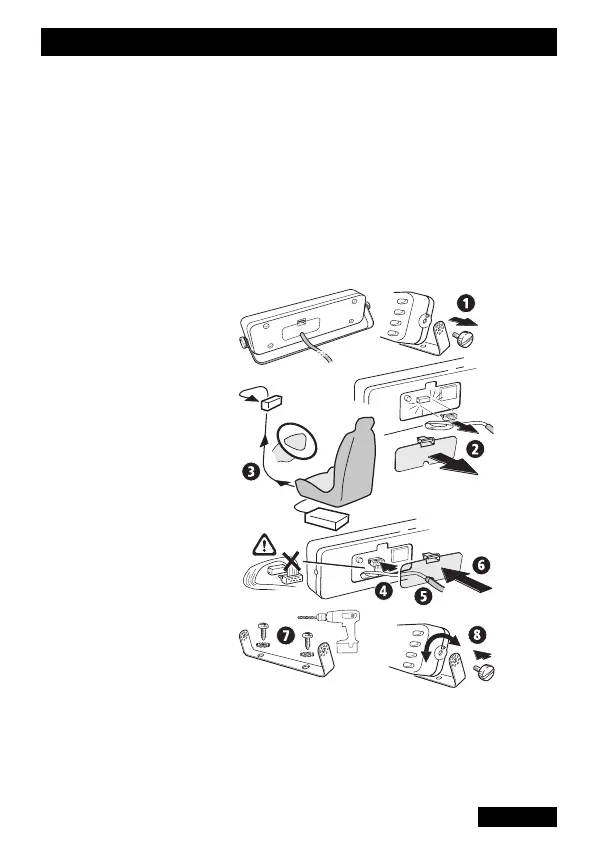
5 Refit the cable to the cable clamp on the rear cover
and slip the two nuts into the receptacles at each end
of the rear cover.
6 Refit the rear cover and replace the cover screws,
tightening them carefully. Do not overtighten the
screws.
The control head can now be installed as follows:
7 Mount the bracket for the control panel on a flat
surface using the self-tapping screws supplied.
Figure 9: Remote Control Head Option
8 Place the control head in the bracket, position it for a
good viewing angle, and fit the 2 screws to secure it in
place.
Installation