21 Page
Installaon
Installaon Manual
4" (102 mm)
straight pipe
3" (76 mm) x 4" (102 mm)
increaser
Exhaust vent collar
(Female)
3" (76 mm) elbow
with bird screen
Intake vent collar
(Female)
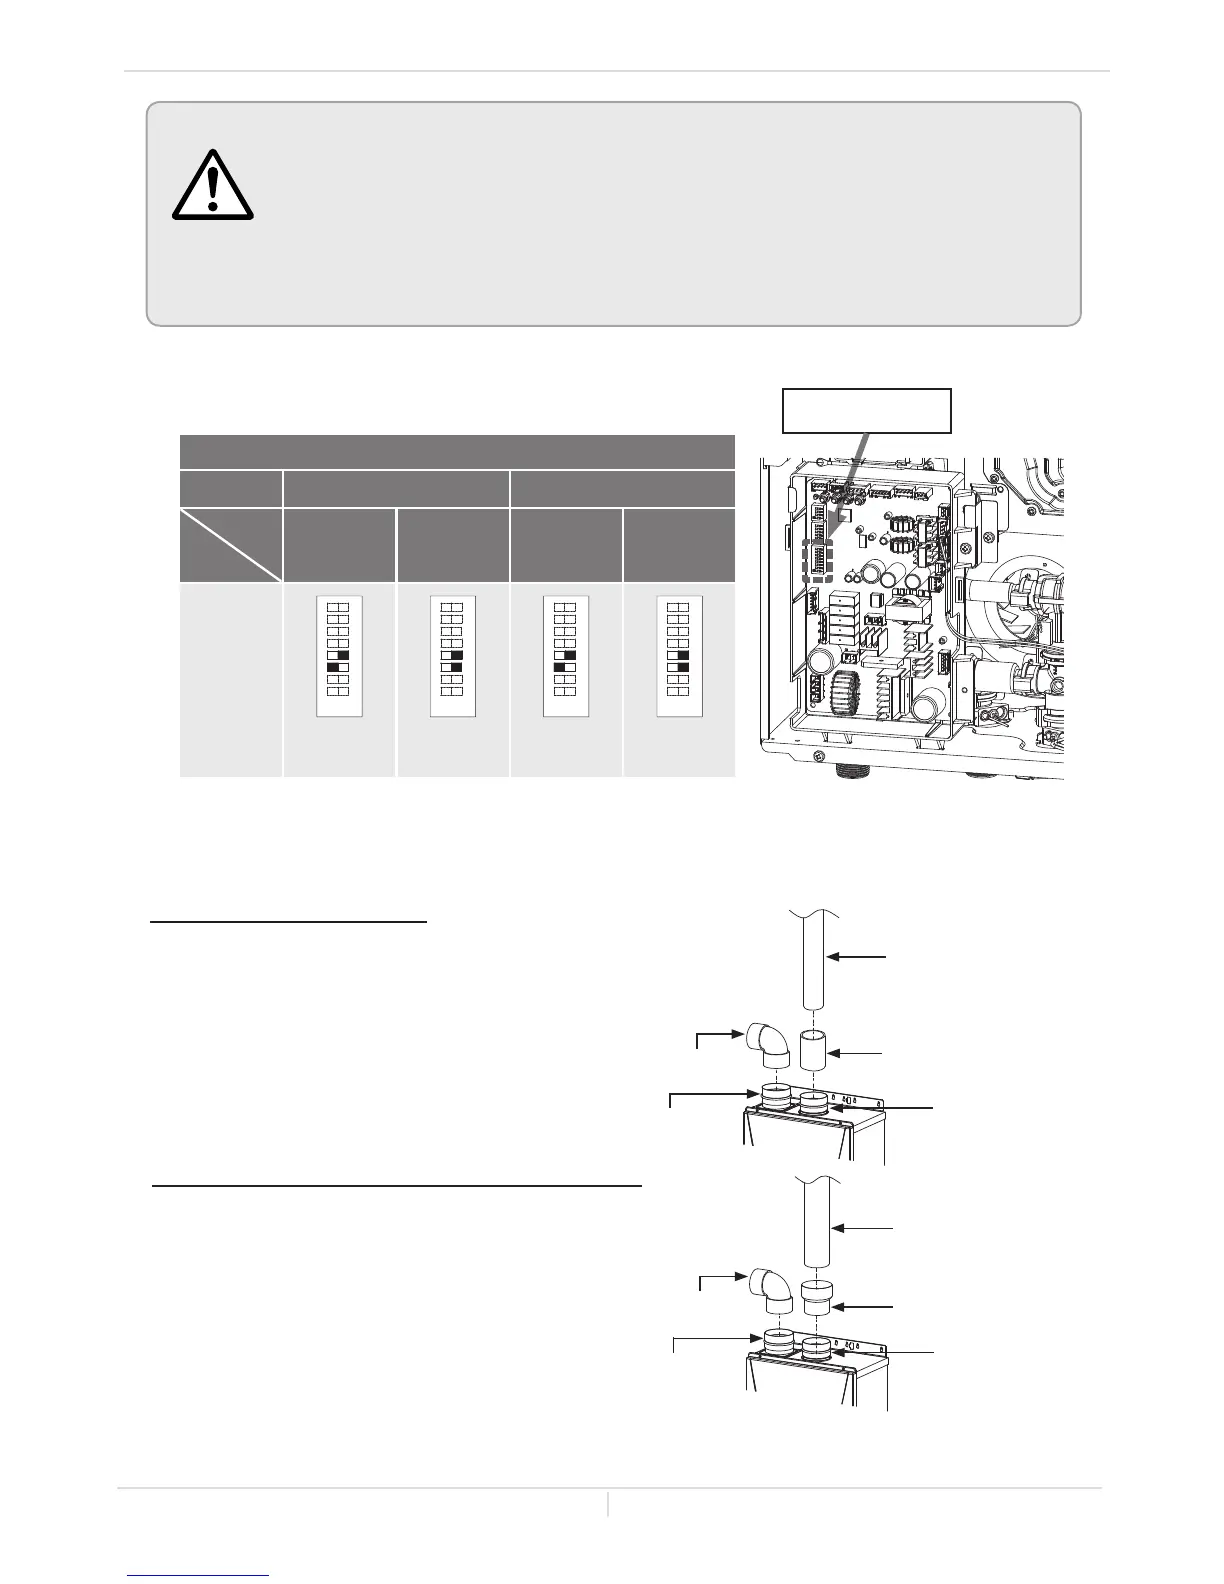
1. Connect a 3" (76 mm) elbow directly on
the intake vent collar of the water heater.
2. Connect a 3" x 4" (76 mm x 102 mm)
increaser directly on the exhaust vent
collar of the water heater.
3. Connect a 4" (102 mm) straight pipe to
the increaser.
3" (76 mm) coupling
(included)
3" (76 mm)
straight pipe
Exhaust vent collar
(Female)
3" (76 mm) elbow
with bird screen
Intake vent collar
(Female)
1. Connect a 3" (76 mm) elbow directly
on the intake vent collar of the water
heater.
2. Connect a 3" (76 mm) coupling directly
on the exhaust vent collar of the water
heater.
3. Connect a 3" (76 mm) straight pipe to
the coupling.
DIP switch settings : Single vent pipe installations
Vent diameter
3" (76 mm)
venting
4" (102 mm)
venting
5 to 45 ft
(1.5 to 13.7 m)
(DEFAULT)
46 to 70 ft
(13.8 to 21.3 m)
5 to 50 ft
(1.5 to 15.2m)
(DEFAULT)
51 to 100 ft
(15.3 to 30.5 m)
Lower bank
of
DIP switches
No. 3 : O N
No. 4 : OFF
No. 3 : OFF
No. 4 : OFF
ON
No. 3 : O N
No. 4 : OFF
No. 3 : OFF
No. 4 : OFF
Vent
length
DIP
switches
Lower bank of
DIP switches
Set DIP switches shown in the table below depending on
the vent diameter and length.
WARNING
To adjust vent length, adjust only the No. 3 and No. 4 DIP switches in the
LOWER bank of DIP switches. (See below.) DO NOT adjust the other DIP
switches.
Turn off the power supply to the water heater before changing the DIP
switch settings.
Failure to observe these warnings could lead to carbon monoxide poison-
ing or death.
 Loading...


