38 Page
TEMPERATURE REMOTE CONTROLLER
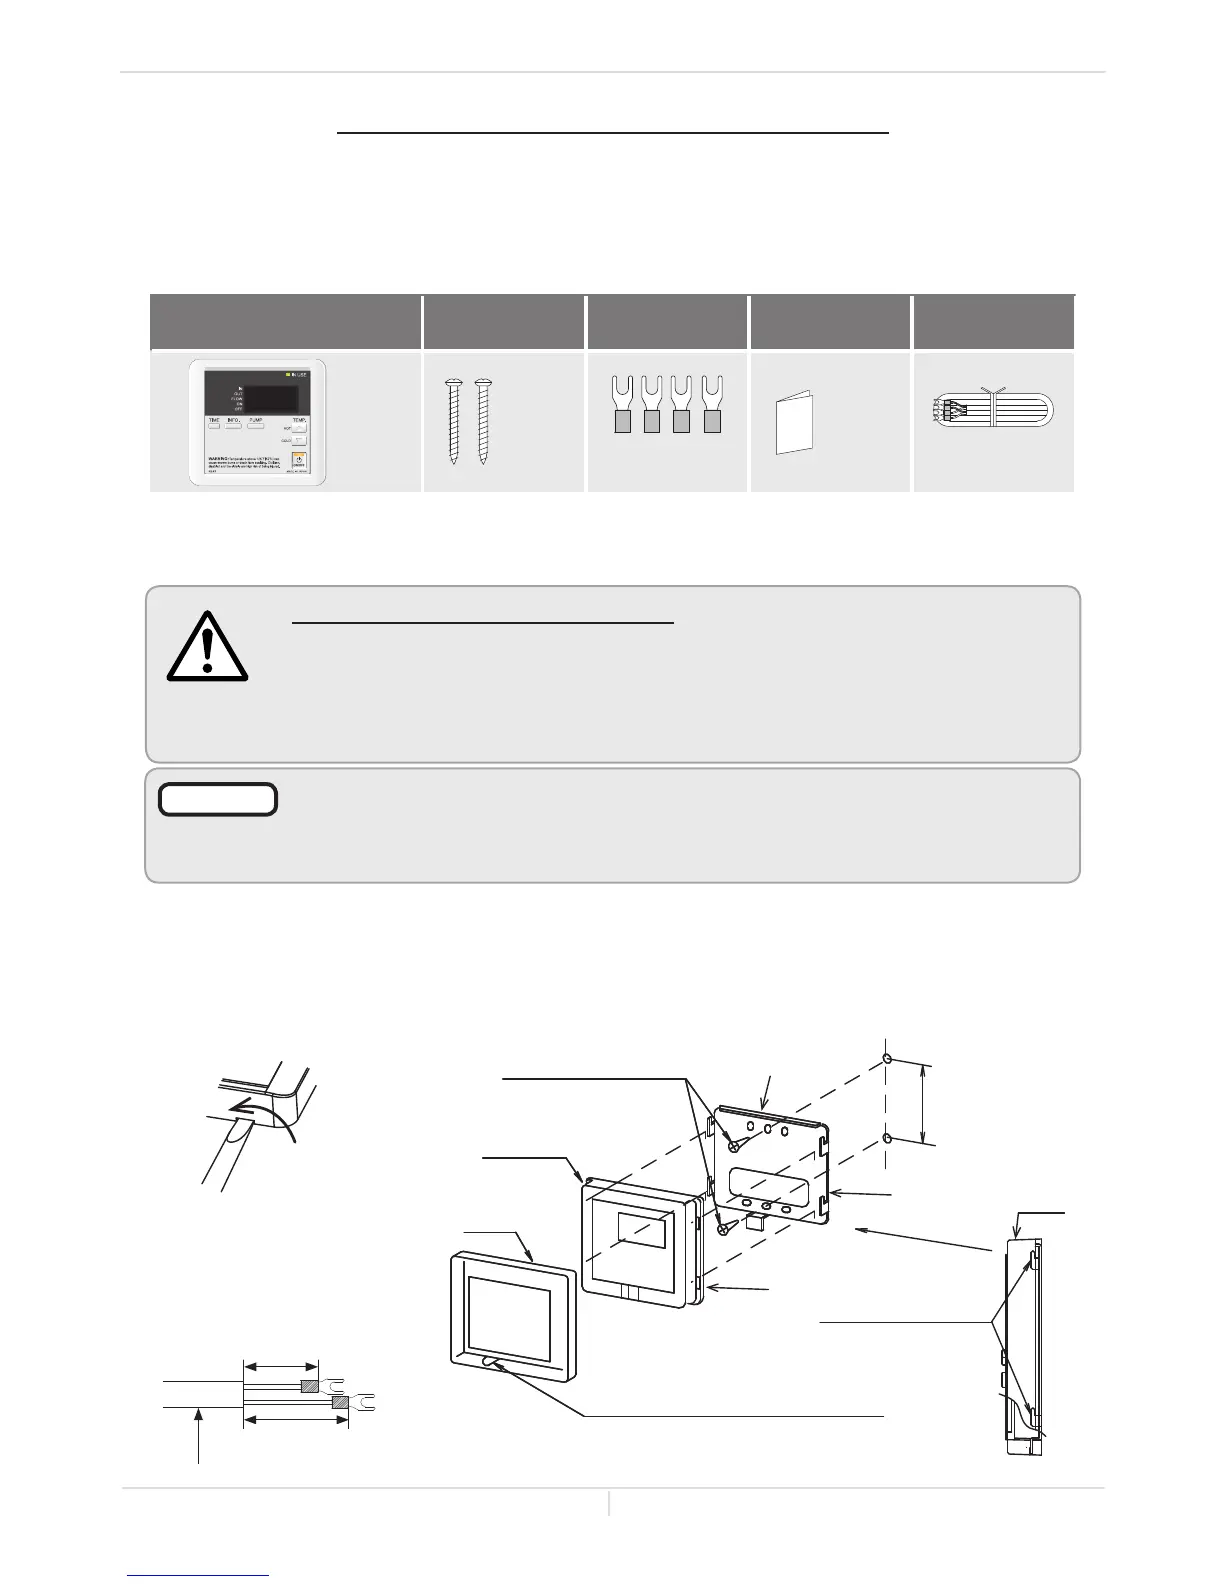
-Included accessories - Outdoor model only
Installaon
Installaon Manual
Fig. B
1. Take the Frame off of the remote controller with a flat head screwdriver. (Fig. A and B)
2. Attach the Metal plate on the wall with two provided screws. (Fig. B)
3. If you use another cable, crimp the Fork terminals to the wires. (Fig. C)
Cut out (removed during later steps).
Frame
Main unit
Metal plateAached short screws
A + B
3-1/4 inch
(83.5 mm)
Hook B to the Fixing
bracket on A.
A
B
Fig. A
Press and twist flat
head screwdriver
against the cutout.
Twist
Remote controller cable
1-3/8 Inch
(35 mm)
Fig. C
1-5/8 Inch
(41 mm)
Fork
Terminals
100276687 (TM-RE43)
It is also an optional accessory as a second remote for the indoor model. Refer to pp. 9 and 10.
*The optional remote controller (100276687/TM-RE43) has no remote controller cable.
Verify that the items listed below are included with the remote controller.
Temperature
remote controller
Screws Fork terminals Manual
Remote controller
cable*
Qty: 1
Qty: 2
Qty: 4
Qty: 1
Qty: 1
• The remote control is an optional accessory that can be installed in a hall, closet, etc., to allow for
temperature adjustment without having to go to the heater.
• When installed, the remote will take priority over the built-in controller of indoor models.
-Installaon-
This remote controller is NOT waterproof.
The water heater can only have one remote controller.
Do not install in high temperature environments, high humidity conditions outdoors, in
direct sunlight, or within the reach of children.
Make sure the remote controller does not come into contact with water or oil.
Failure to observe these warnings could result in personal injury or electrical shock.
WARNING
Do not place the remote controller cable close to other wires from other products.
Cables used for the remote controller connection must be:
Minimum 20 gauge wire (No polarity)
Maximum 400 ft (122 m) long
NOTICE
 Loading...


