5-57
MAINTENANCE
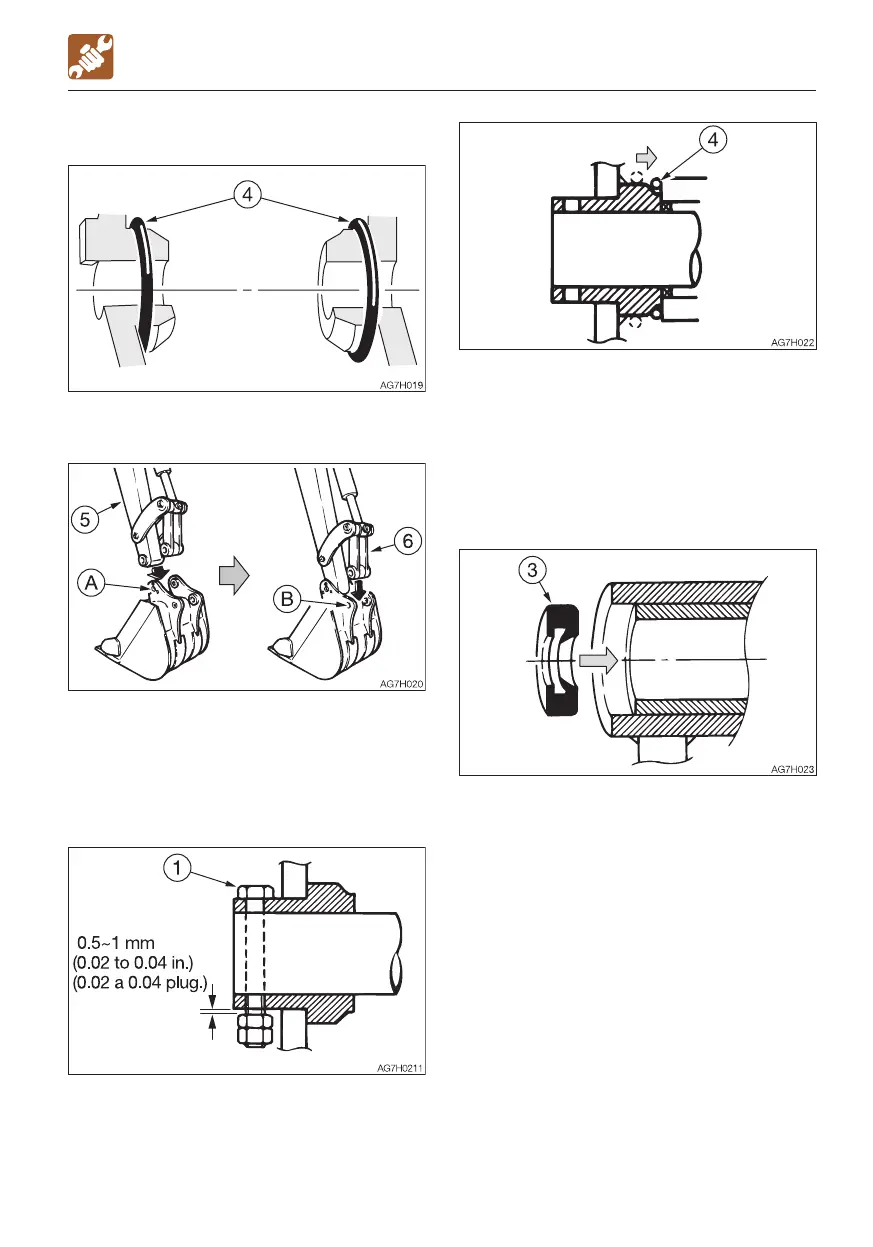
Installation
WHEN REQUIRED
1. Set the O-ring (4) on the bucket as shown
on the figure above.
2. Align the pin hole (A) on the bucket with
the pin hole on the arm (5), and install the
pin (2).
3. Operate the cylinder, align the pin hole (B)
on the bucket with the pin hole on the link
arm (6), and install the pin (2).
4. Align the turn prevention holes, and then
install the bolt (1) and the nut. Be sure to
leave a gap of about 0.5 to 1 mm (0.02 to
0.04 in.) between the nut and bucket
bush, or the nut will come loose.
5. Adjust the gap between the bucket and
the arm.
Refer to “Adjusting the gap between the
bucket and arm (If equipped)” on page
5-58.
6. Slide the O-ring (4).
Replacing the pin seal
1. Set the pin seal (3) in the direction shown
on the figure above.
2. Use a mallet to slowly press the pin seal
in. Be careful not to damage the seal.