51
Table 6.2 Service tasks
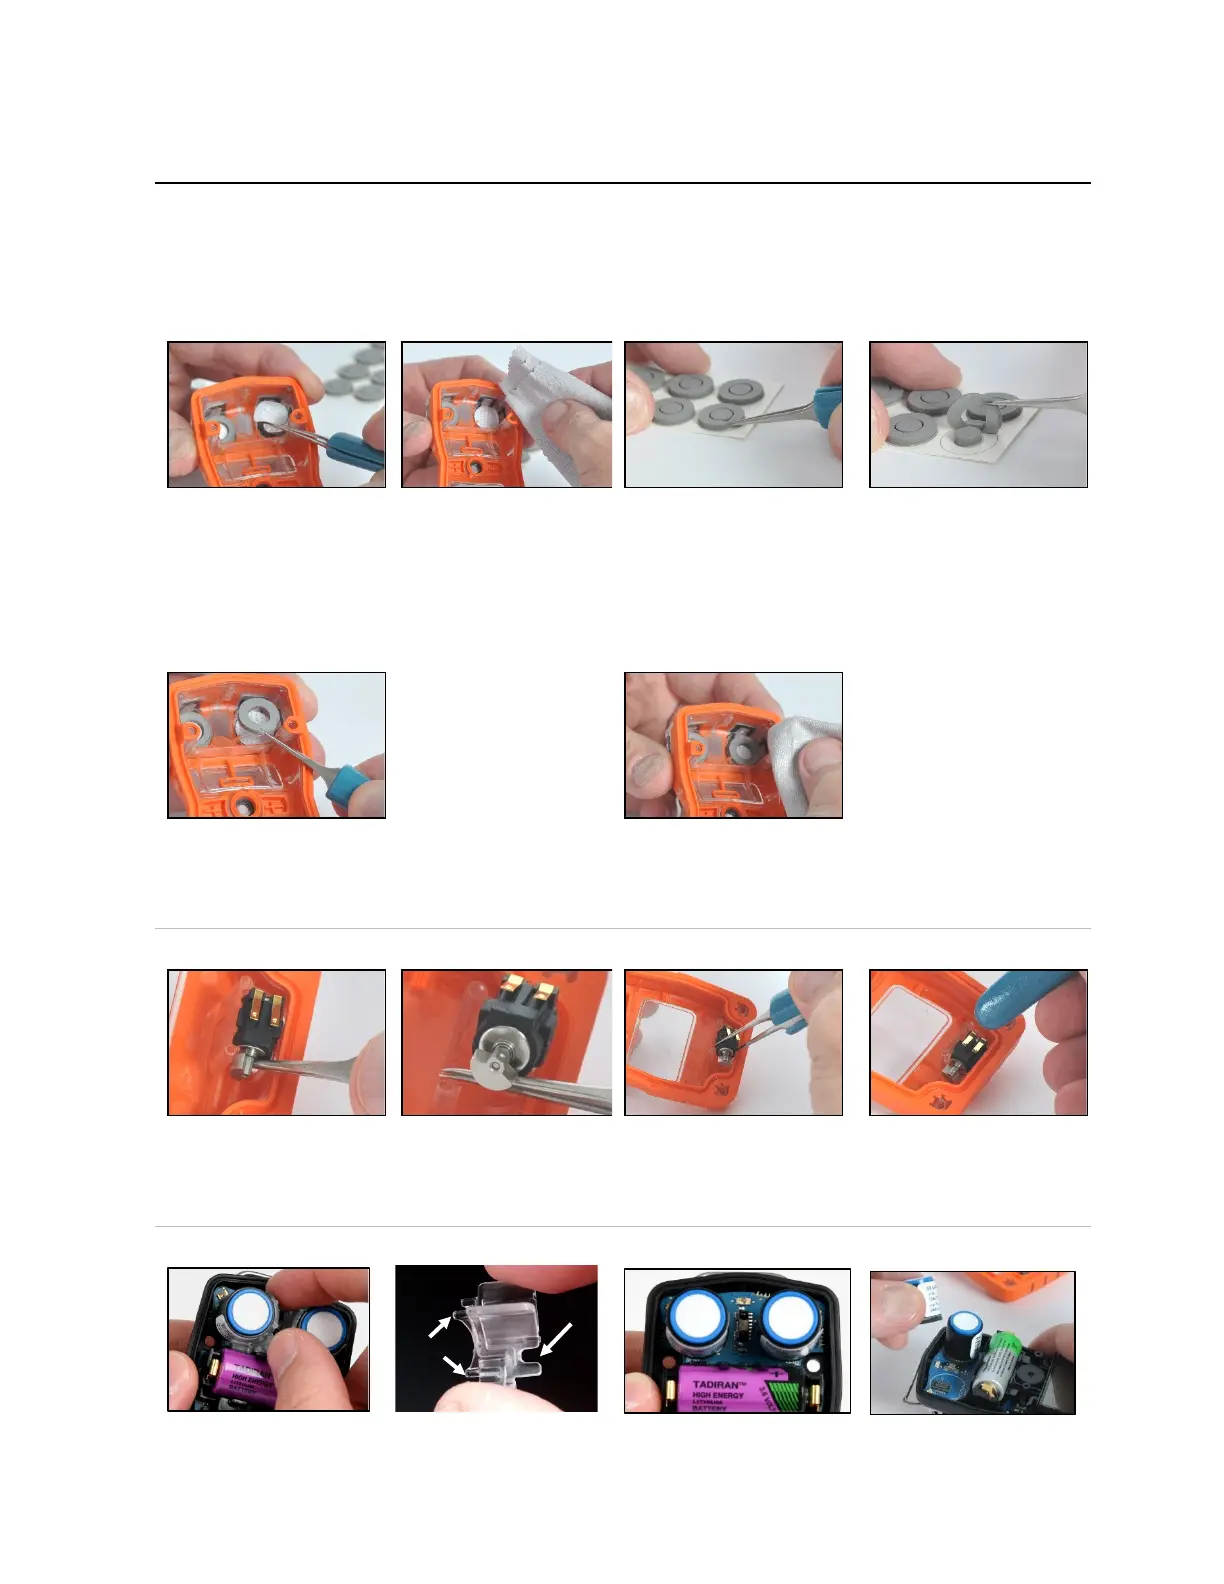
Inside the case top, grip the
gasket and underlying
sensor filter with the needle-
nose tweezers; peel to
remove.
Remove any remnants of
the adhesive, filter, or
gasket.
Clear away any dirt, dust,
or debris.
Place the filter sheet on the work surface.
Using tweezers, scrape lightly across the paper to the filter's
edge; gently lift to expose a portion of the adhesive back.
Grip the filter lightly with the tweezers; peel the filter from the
sheet.
Guide the new filter—
adhesive side down—into
the filter opening.
For proper placement, take
care to ensure the filter edge
meets the inner edge of the
filter opening.
Using a clean, soft cloth,
press gently around the
filter edge; hold for five
seconds to activate the
adhesive.
Place the gasket sheet on the work surface.
Using the tweezers, scrape lightly across the paper to the
gasket ring's edge; gently lift to expose a portion of the
adhesive back.
Grip the gasket ring lightly with the tweezers; peel the gasket
ring from the sheet.
—
—
Guide the gasket—adhesive side down—into the filter
opening, placing it on top of the filter.
Ensure the gasket ring edge meets the outer edge of the
filter opening and fully covers the white filter membrane.
Using a clean, soft cloth, press gently around the gasket edge;
hold for five seconds to activate the adhesive.
Vibrating alarm motor replacement
Insert the tweezers between the case top and the motor.
Pry up to remove.
Using the tweezers, gently grip the new motor.
Place the new motor—contact side up—into the case top.
Without touching the motor's contacts, use the tweezer handle
to press the item into place.
Sensor support and sensor replacement