52
Table 6.2 Service tasks
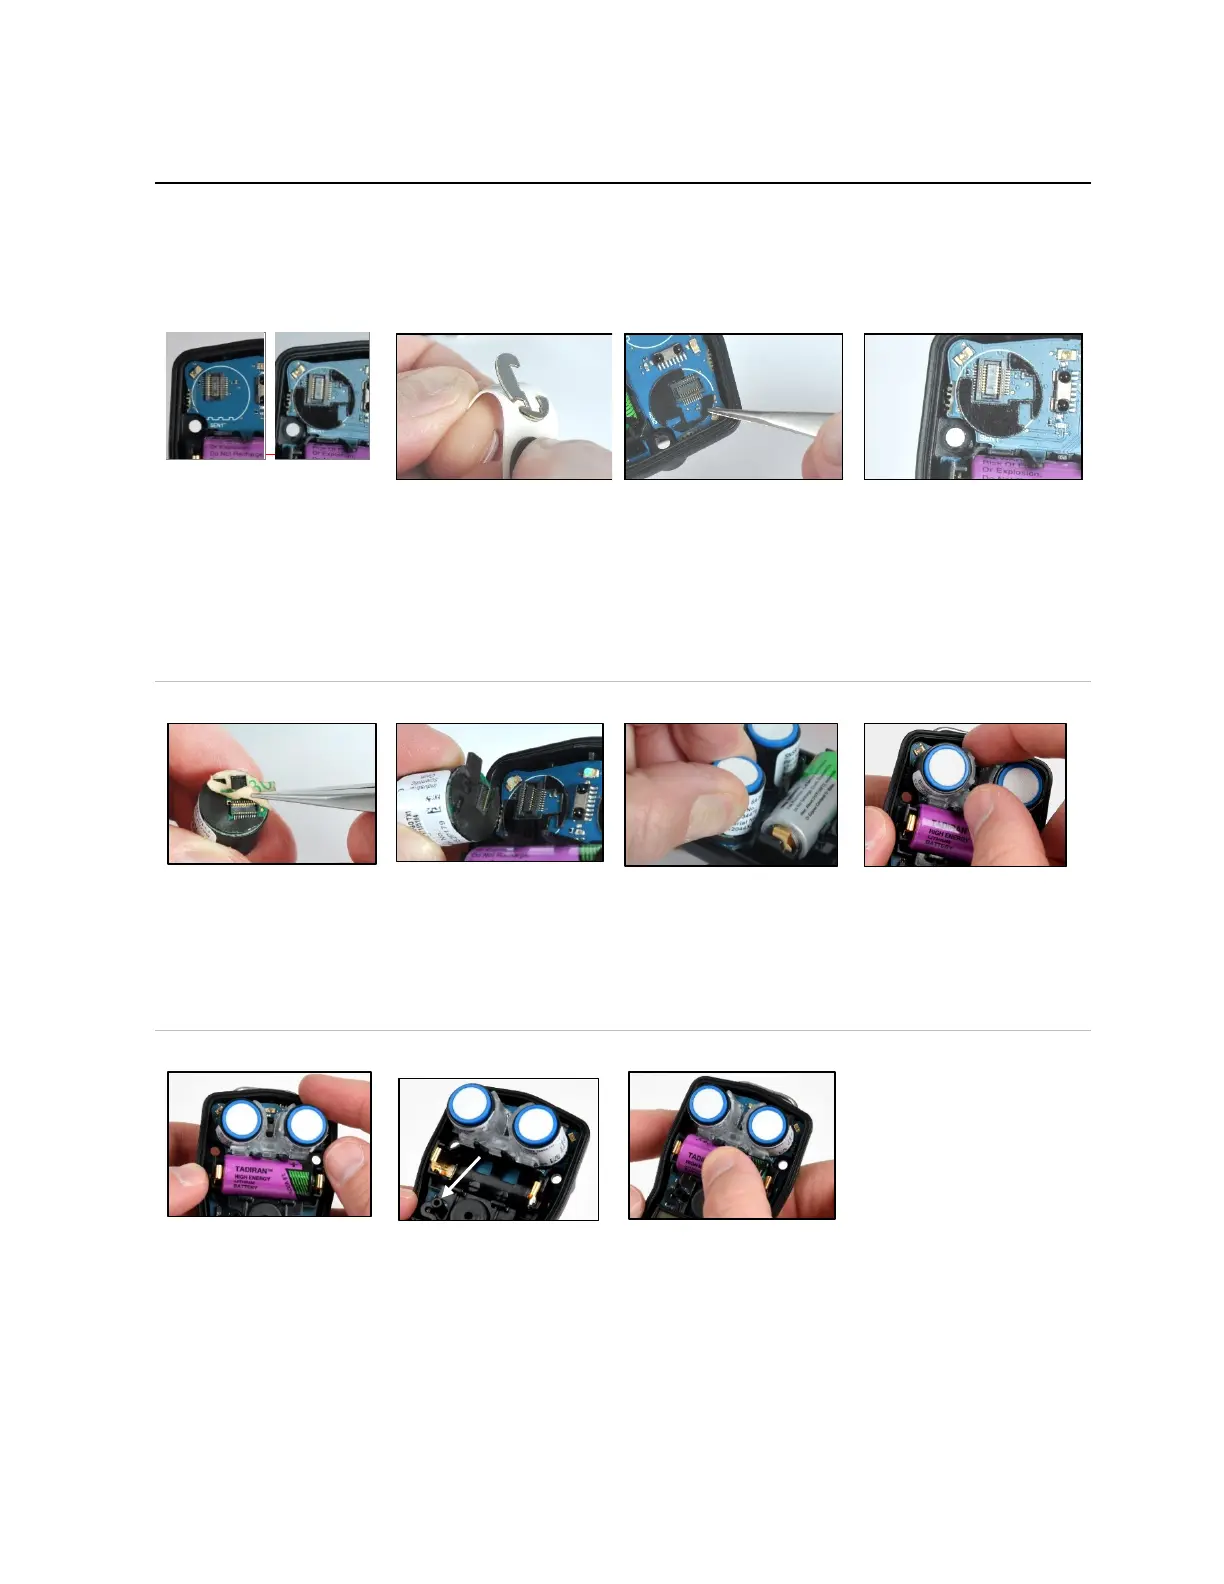
Using your thumb and index
finger, gently grasp the top
and bottom of the sensor
support and remove it. The
top of the support is
narrower than the bottom.
The sensor support rests
between the two sensors,
with the legs of the support
contacting the circuit board
and the notches (on top)
closer to the battery.
Lift a sensor by the sides to remove it (shown in right image,
above)—Avoid touching the top of any sensor.
Some sensors may have an adhesive backing holding them in
place; use gentle pressure to lift and remove sensors. Set
aside for future use or dispose of according to company policy.
Check the circuit board for a
black polycarbonate plate in
each sensor position.
The plate is absent in the
left image. The right image
shows the plate. If both
plates are present, skip to
sensor placement, below.
The plates are affixed to a paper backing. Bend the paper
backing to separate the plate.
Lightly grip the plate near its top with tweezers; gently lift to
completely remove from paper backing.
Guide the plate—adhesive side down—for correct placement
on the circuit board as shown above (right). Take care to
Using a clean, soft cloth,
press gently into place.
Sensor placement and sensor support reinstall
tweezers to remove the
paper liner from the bottom
of the sensor and expose
the adhesive backing.
Position the sensor to align
with its connector on the
circuit board.
Note: Replace DualSense
sensors as a pair.
Secure sensor by applying gentle pressure to the sides of the
sensor case. Do not touch the sensor's white membrane.
You will feel a slight connection impact when the sensor is
secured in place.
Reinstall sensor support: Legs down, notches toward battery.
Battery replacement
—
Lift the battery up from its
cradle.
Dispose of according to
company policy.
The interior power button is
located below the battery
cradle to the left of the
speaker (see arrow above).
Press and hold this button
for two seconds, then
release it.
Orient the replacement battery so the positive and negative
ends align with the "+" and "−" cradle markings, respectively.
Place the new battery into the cradle negative end first.
Press down on the battery to secure it in the cradle.
IMPORTANT: Before removing the battery, power down the Tango. If this is not done, the instrument data log will be lost.