2 – Starting out with the timecode : Setup
TASCAM DM Automation Guide 7
Make the initial settings
9 Operate your recorder and navigate and oper-
ate the TASCAM DM as you normally would
during a mix. You are not writing mix moves
yet! The TASCAM DM’s automation system
stores control settings as you change them.
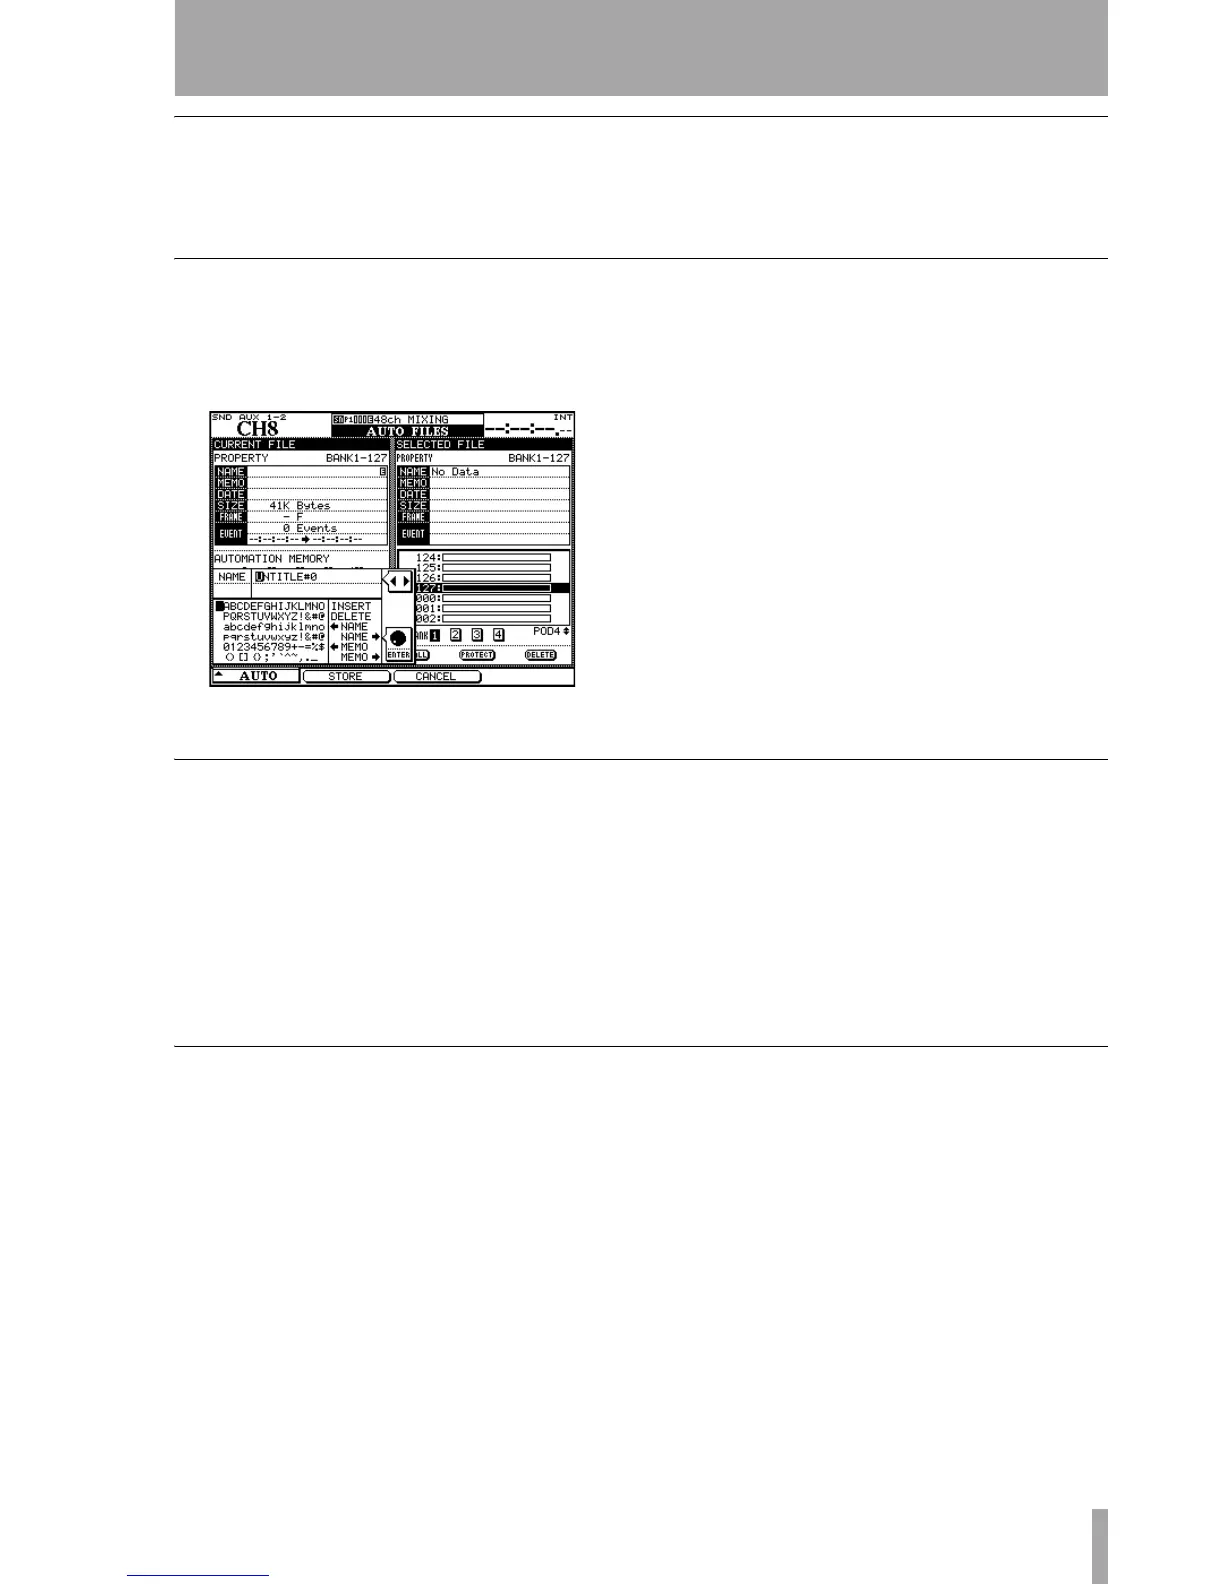
Store the current settings
10 Store the current mix data using the AUTO
FILES
display, and pressing the POD 2 switch
(
STORE AS
).
Use the cursor keys, number keys,
CLR key,
and the data wheel and the
ENTER key to
name your mix.
See the Owner’s Manual section on libraries
for further details of naming and editing
library entries.
This automation data will be stored as part of
the current project (and will be time-stamped
for future reference).
Write some fader moves
11 Once you have the mix basically set up, write
some fader moves:
• With timecode running, press the
WRITE key.
• Touch a fader with your finger and move it up
or down.
• Release the fader when your mix move is com-
plete. When you release the fader, it automati-
cally returns to its previous setting.
• Rewind the recorder and play the section
again. The TASCAM DM plays back the
moves you just wrote.
• You can press the
WRITE key, and touch and
move the faders to write new mix moves at
will.
Write some mute moves
12 Now write some mutes (these are Switch
Events):
• With timecode running, press the
WRITE key.
• Press some
MUTE keys to change the mute set-
tings on and off.
• Rewind the recorder and play the sections
again. The TASCAM DM plays back the
Switch Events you just wrote to the
MUTE
keys (in other words, the
MUTE indicators and
status will change in sync with the incoming
timecode).
Figure 4: Naming a mix
 Loading...