29
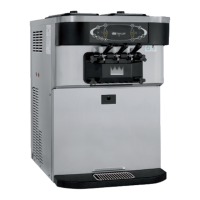
Model C713 Operating Procedures
Hopper Cleaning
Note: Failure to follow these steps will result in
milk-stone build-up.
Step 1
Prepare an approved 100 PPM cleaning solution
(examples: 2-1/2 gal. [9.5 liters] of Kay-5R or 2
gal. [7.6 liters] of Stera-SheenR). USE WARM
WATER AND FOLLOW THE MANUFACTURER'S
SPECIFICATIONS.
Step 2
Push the prime plug down. Pour the cleaning
solution into the hopper and allow it to flow into the
freezing cylinder.
Step 3
Using the white hopper brush, clean the mix hopper
and the mix level sensing probes. Using the double
ended brush, clean the mix inlet hole.
Note: Do not brush clean the mix inlet hole while
the machine is in the WASH mode.
Step 4
Touch the WASH symbol
. This will cause the
cleaning solution in the freezing cylinder to come in
contact with all areas of the freezing cylinder.
Step 5
Place an empty pail beneath the door spouts and
raise the prime plug.
Step 6
When a steady stream of cleaning solution is flowing
from the prime plug opening in the bottom of the
freezer door, open the draw valve. Draw off all the
solution.
Step 7
Once the cleaning solution stops flowing from the
door spout, close the draw valve and touch the
WASH symbol
, cancelling the Wash mode.
Repeat these steps on the other side of the
machine.
Disassembly
Step 1
Place the power switch in the OFF position.
Step 2
Remove the handscrews, freezer door, beater and
scraper blades, and drive shaft with drive shaft seal
from the freezing cylinder.
Step 3
Remove the scraper blades from the beater
assembly.
Step 4
Remove the drive shaft seal from the drive shaft.
Step 5
Remove the freezer door gasket, front bearing, pivot
pin, draw handle, draw valve, prime plugs and
design caps. Remove the three o-rings from the
draw valve.
Repeat these steps on the other side of the
machine.
Step 6
Remove the front drip tray and splash shield.
Step 7
Remove all drip pans. Take them to the sink for
cleaning.
Figure 53
Note: If the drip pans are filled with an excessive
amount of mix, it is an indication that the drive shaft
seal(s), or o-ring(s) should be replaced or properly
lubricated.
 Loading...