21 GO XLR User Manual
9. Setting Up GO XLR with
XSplit /OBS
This section will show you how to set up audio for OBS (Open Broadcaster
Software) and XSplit.
Both programs are very similar, so these instructions for XSplit should also work
for OBS.
9.1 Setup Recommendations
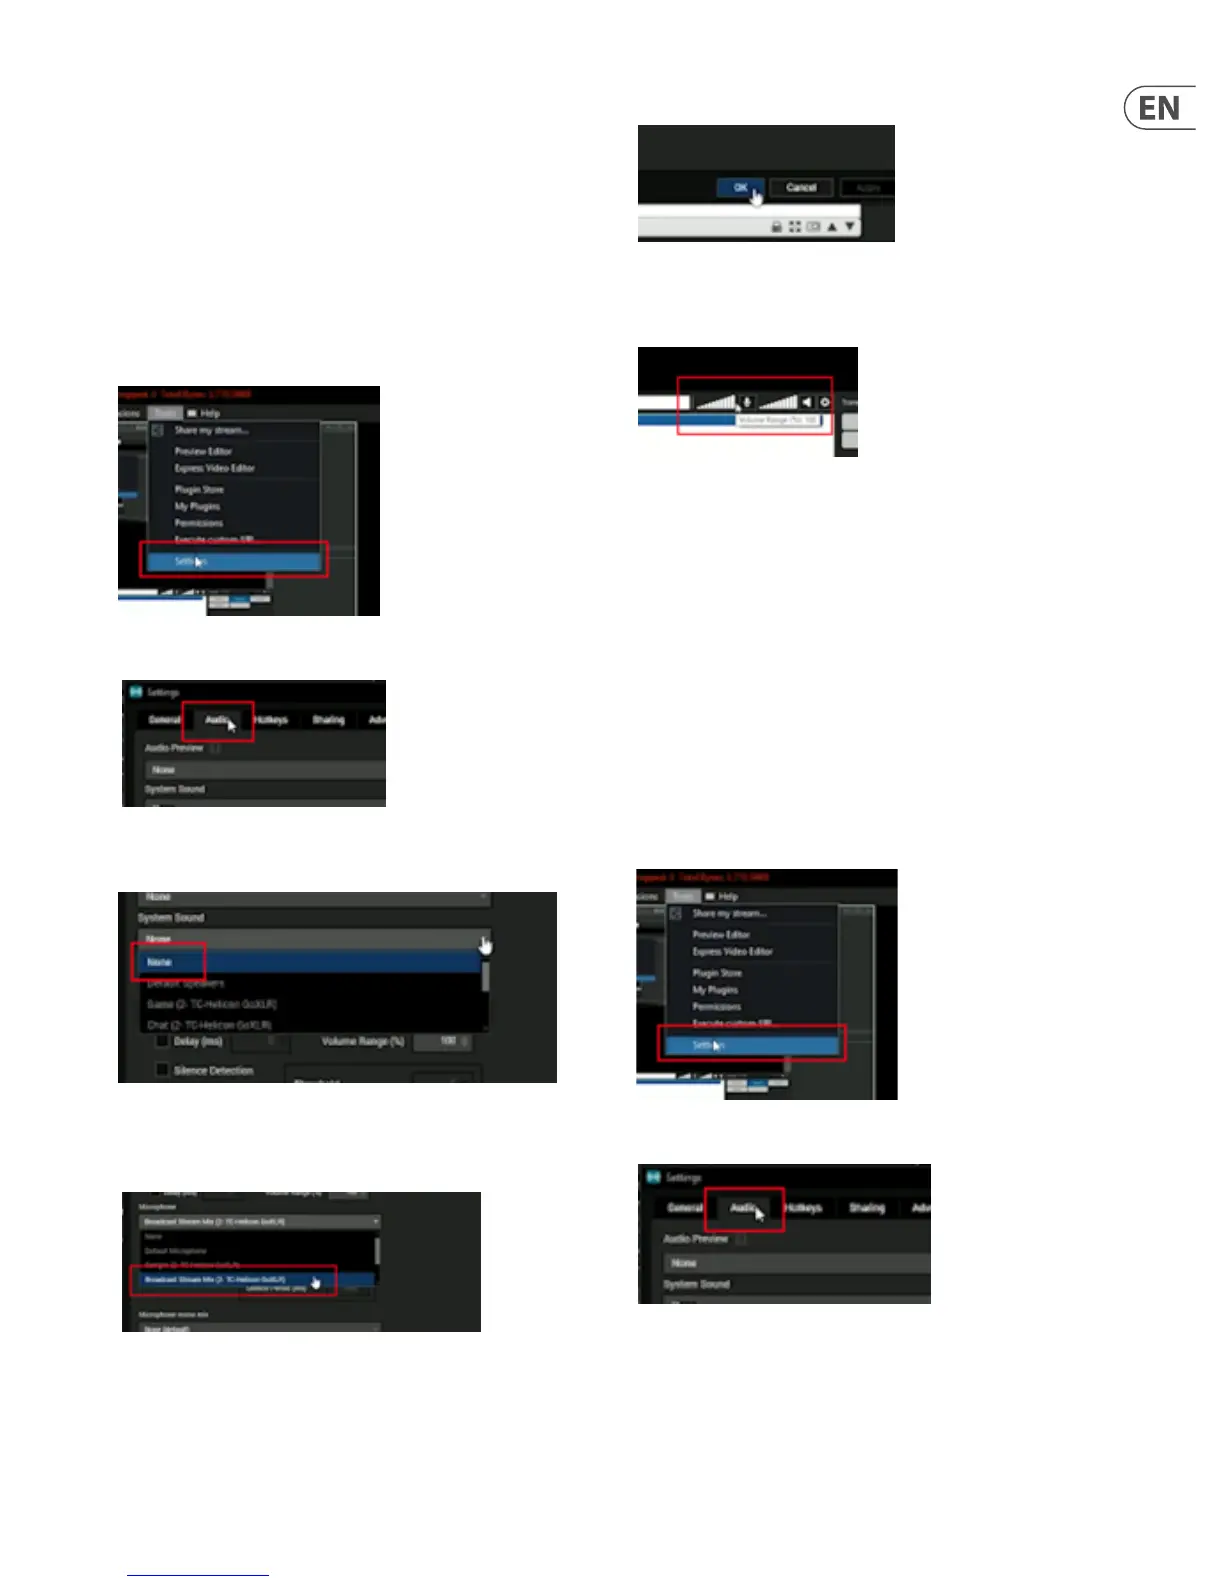
Open up XSplit and follow these setup instructions:
1. Click on the Tools pulldown menu and select “Settings” to open the
Settings window.
2. Go to the Audio tab in the Settings window.
3. Set “System Sound” to “None” by using the pulldown menu. You will not
want any other audio streams going in to XSplit.
4. Set “Microphone” to “Broadcast Stream Mix” by using the pulldown menu.
Choosing “Broadcast Stream Mix” will ensure that all audio going into XSplit
has been processed and mixed in GO XLR exactly how you want it.
5. Click “OK” to exit the Settings window.
6. Set your livestream audio to 100% by maximizing the level bars next to the
XSplit microphone icon. Your GO XLR audio should now play into XSplit
without any clipping or distortion
9.2 Advanced: Audio Delay for Video
Playback Sync
Sometimes, your livestream audio in XSplit and OBS will need to be delayed by
a few milliseconds to remain in sync with your video. Video in your XSplit/OBS
livestream will often need some time to encode, and this small delay can cause
your audio to fall out of sync with the video.
The XSplit “Delay (ms)” function (called “Oset” in OBS) can be used to x this
synchronization problem by delaying the audio ever so slightly so that the audio
can re-sync with the video.
To deploy the Delay function for audio sync, follow these instructions:
1. Record a short video of yourself clapping and then play the video back over
XSplit. The slight delay for video encoding should cause the sound of the clap
to fall out of sync and happen a split second before you see the clap on video.
2. Click on the Tools pulldown menu and select “Settings” to open the
Settings window.
3. Go to the Audio tab in the Settings window.
 Loading...