8 GO XLR User Manual
3. Setting Up Your Mic
Once you have your microphone connected to GO XLR, you will need to go into
the GO XLR app and set up the input levels and processing for your microphone.
3.1 Setting the Input Level
After plugging your microphone into GO XLR, you will rst need to set the input
level by following these instructions:
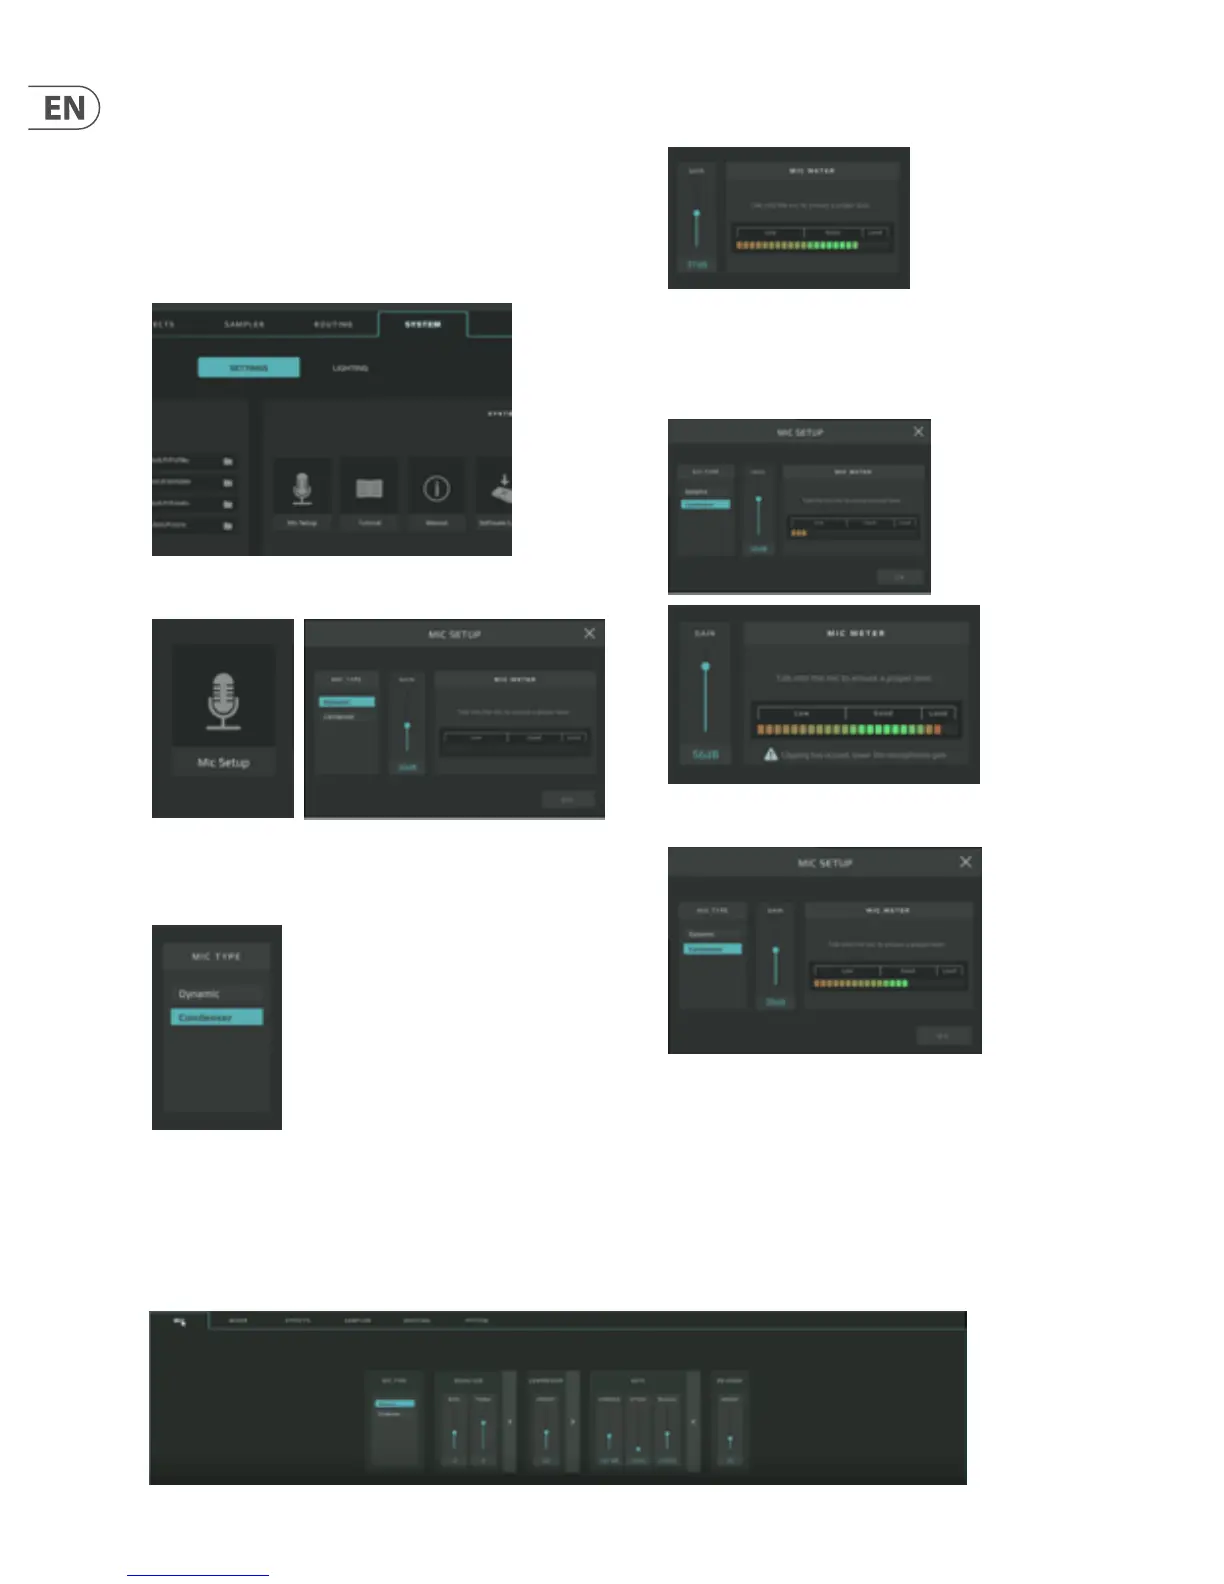
1. Go to the System tab in the lower half of the GO XLR app window.
2. Under Settings, click on Mic Setup. The system will launch a dialogue box.
3. Choose between Dynamic and Condenser settings. If your microphone is a
condenser mic, you will need to use the Condenser setting so that GO XLR
transmits the “phantom power” required to run the microphone.
4. While talking into the microphone at a regular level, watch the level in the
Mic Meter.
5. Adjust the Gain control until the signal peaks in the Good portion of the
meter, with occasional peaks in the Loud range. If the level peaks in the Low
range, increase the gain. If the meter peaks too consistently in the Loud
range, reduce the gain.
6. Once you have an acceptable signal level, click on OK to exit.
3.2 Setting Microphone Processing
Once you have set an acceptable level for your microphone, now it’s time add some equalization, compression, gating, and if necessary, de-essing. These processing
eects will help you nd that “pro” sound for your vocals.
To add basic processing to your mic signal, follow these instructions:
1. Go to the Mic tab in the lower half of the GO XLR app’s screen.
 Loading...