EasyManua.ls Logo

Teac A-2340 - Capstan Motor

Teac A-2340
68 pages
Print Icon
To Next Page IconTo Next Page
To Previous Page IconTo Previous Page
Loading...
REMOVAL
OF
REMOVAL
OF
Te
2.
CAPSTAN
MOTOR
.
Remove
the
three
screws
hold-
ing
the
capstan
motor.
.
Unsolder
the
six
wire
connect-
ing
the
capstan
motor.
.
Remove
the
four
screws
holding
the
capstan
motor.
-
Loosen
the
two
set
screws
(hex
head)
in
pulley
and
lift
off
pulley.
M-o1at
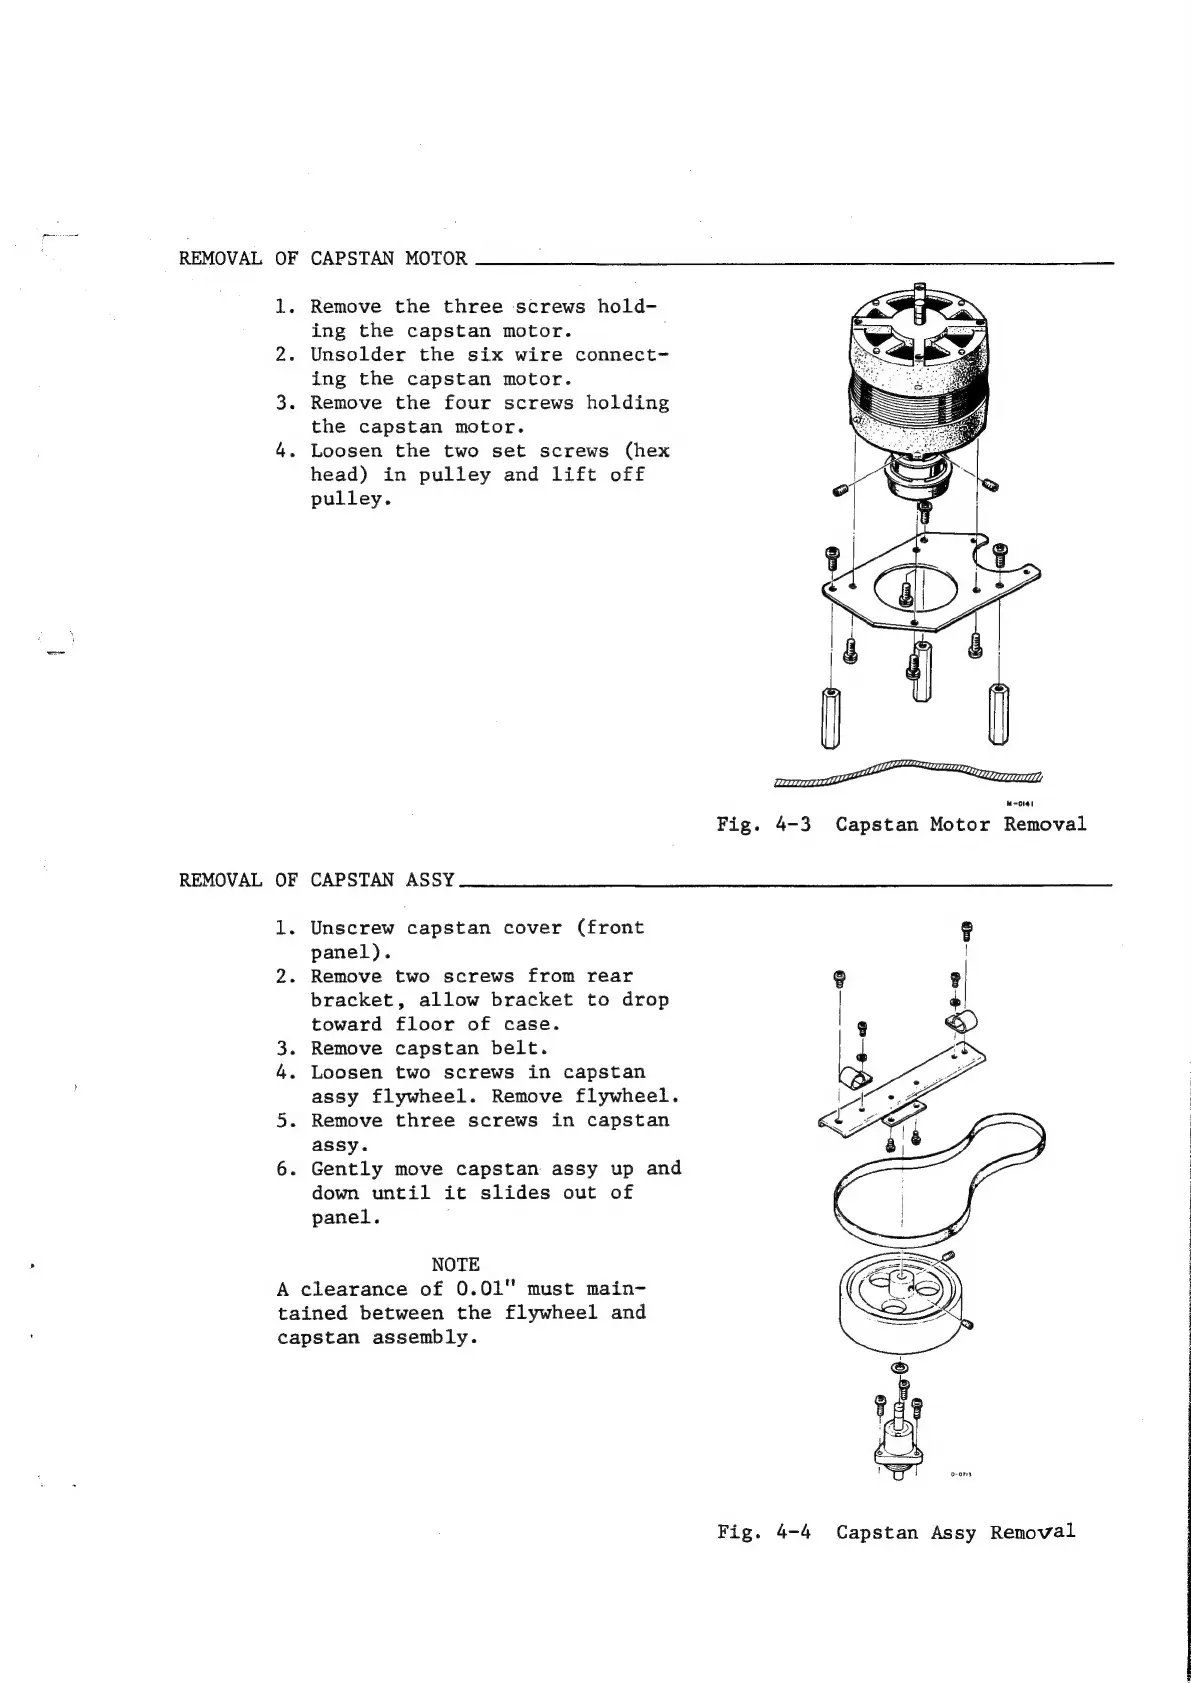
Fig.
4-3
Capstan
Motor
Removal
CAPSTAN
ASSY
Unscrew
capstan
cover
(front
panel).
Remove
two
screws
from
rear
bracket,
allow
bracket
to
drop
toward
floor
of
case.
Remove
capstan
belt.
Loosen
two
screws
in
capstan
assy
flywheel.
Remove
flywheel.
Remove
three
screws
in
capstan
assy.
.
Gently
move
capstan
assy
up
and
down
until
it
slides
out
of
panel.
NOTE
A
clearance
of
0.01"
must
main-
tained
between
the
flywheel
and
capstan
assembly.
Fig.
4-4
Capstan
Assy
Renoval