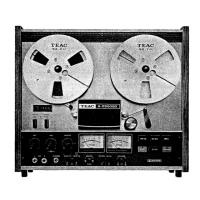
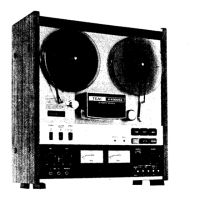
Do you have a question about the Teac A-2300SD and is the answer not in the manual?
Instructions for accessing internal components by removing side and rear panels.
Steps to remove the complete head assembly from the unit.
Procedure for detaching the capstan motor from its mounting plate.
Recommended fluids for cleaning and lubricating tape transport components.
Guide for replacing individual tape heads, including wiring.
Procedures for aligning erase, record, and playback heads for optimal performance.
Details on adjusting screws and connecting wiring for tape heads.
Explains common head misalignments (azimuth, height, tangency, tilt).
Method for measuring and adjusting pinch roller pressure.
Procedure for measuring and adjusting the torque of the brake bands.
Measurement and adjustment of tape back tension during playback.
Procedure for measuring and adjusting the take-up torque.
Steps to adjust reel height for proper tape path alignment.
How to measure and verify tape transport speed.
Measurement procedure for wow and flutter.
Instructions for changing the unit's voltage and frequency settings.
Overall functional block diagram of the tape deck circuitry.
Diagrams showing signal levels during playback and recording.
Identifies locations of adjustment potentiometers and components.
A chart outlining the order of electrical adjustments.
Procedure for checking and adjusting the power supply voltage.
Steps for coarse and fine adjustment of playback head azimuth.
Setting the standard reference output level for playback.
Adjusting the VU meter for accurate zero-level indication.
Measuring and adjusting playback frequency response.
Verifying the output level at the headphone jacks.
Setting the monitor amplifier input level.
Adjusting input controls to a specified reference level.
Checking the VU meter indication against set levels.
Adjusting the internal calibration tone oscillator level.
Verifying the input level for microphone signals.
Testing the response of the multiplex filter.
Adjusting the bias trap circuit for optimal performance.
Checking for unwanted bias signal leakage.
Adjusting record head azimuth for proper tape tracking.
Procedure for setting the bias current for recording.
Setting the record equalization level for Tape Type #1.
Measuring the deck's frequency response across its range.
Checking frequency response with Bias setting #2.
Setting the record equalization level for Tape Type #2.
Instructions for setting up and performing mono recording.
Measuring playback signal-to-noise ratio.
Measuring the overall signal-to-noise ratio of the unit.
Measuring rejection of signal bleed between adjacent tracks.
Measuring rejection of signal bleed between stereo channels.
Verifying the effectiveness of the erase head.
Testing the Dolby encoder circuit's playback function.
Testing the Dolby decoder circuit's performance.
Verifying the overall Dolby Noise Reduction system.
Exploded view and parts list for the main chassis assembly.
Exploded view and parts list for the motor chassis assembly.
Exploded view and parts list for the front panel components.
Exploded view and parts list for the rear panel components.
List of accessories provided with the unit.
Diagram and parts list for the Amplifier A PC board.
Diagram and parts list for the Control Relay PC board.
Diagram and parts list for the Amplifier B PC board.
Diagram and parts list for the Rear Panel PC board.
Diagram and parts list for the Dolby "B" Processor PC board.
Diagram and parts list for the Bias Oscillator PC board.
Diagram and parts list for the Muting PC board.
Diagram and parts list for the Control PC board.
Diagram and parts list for the SW Mounting PC board.