Balancing Relative Volumes among Speakers
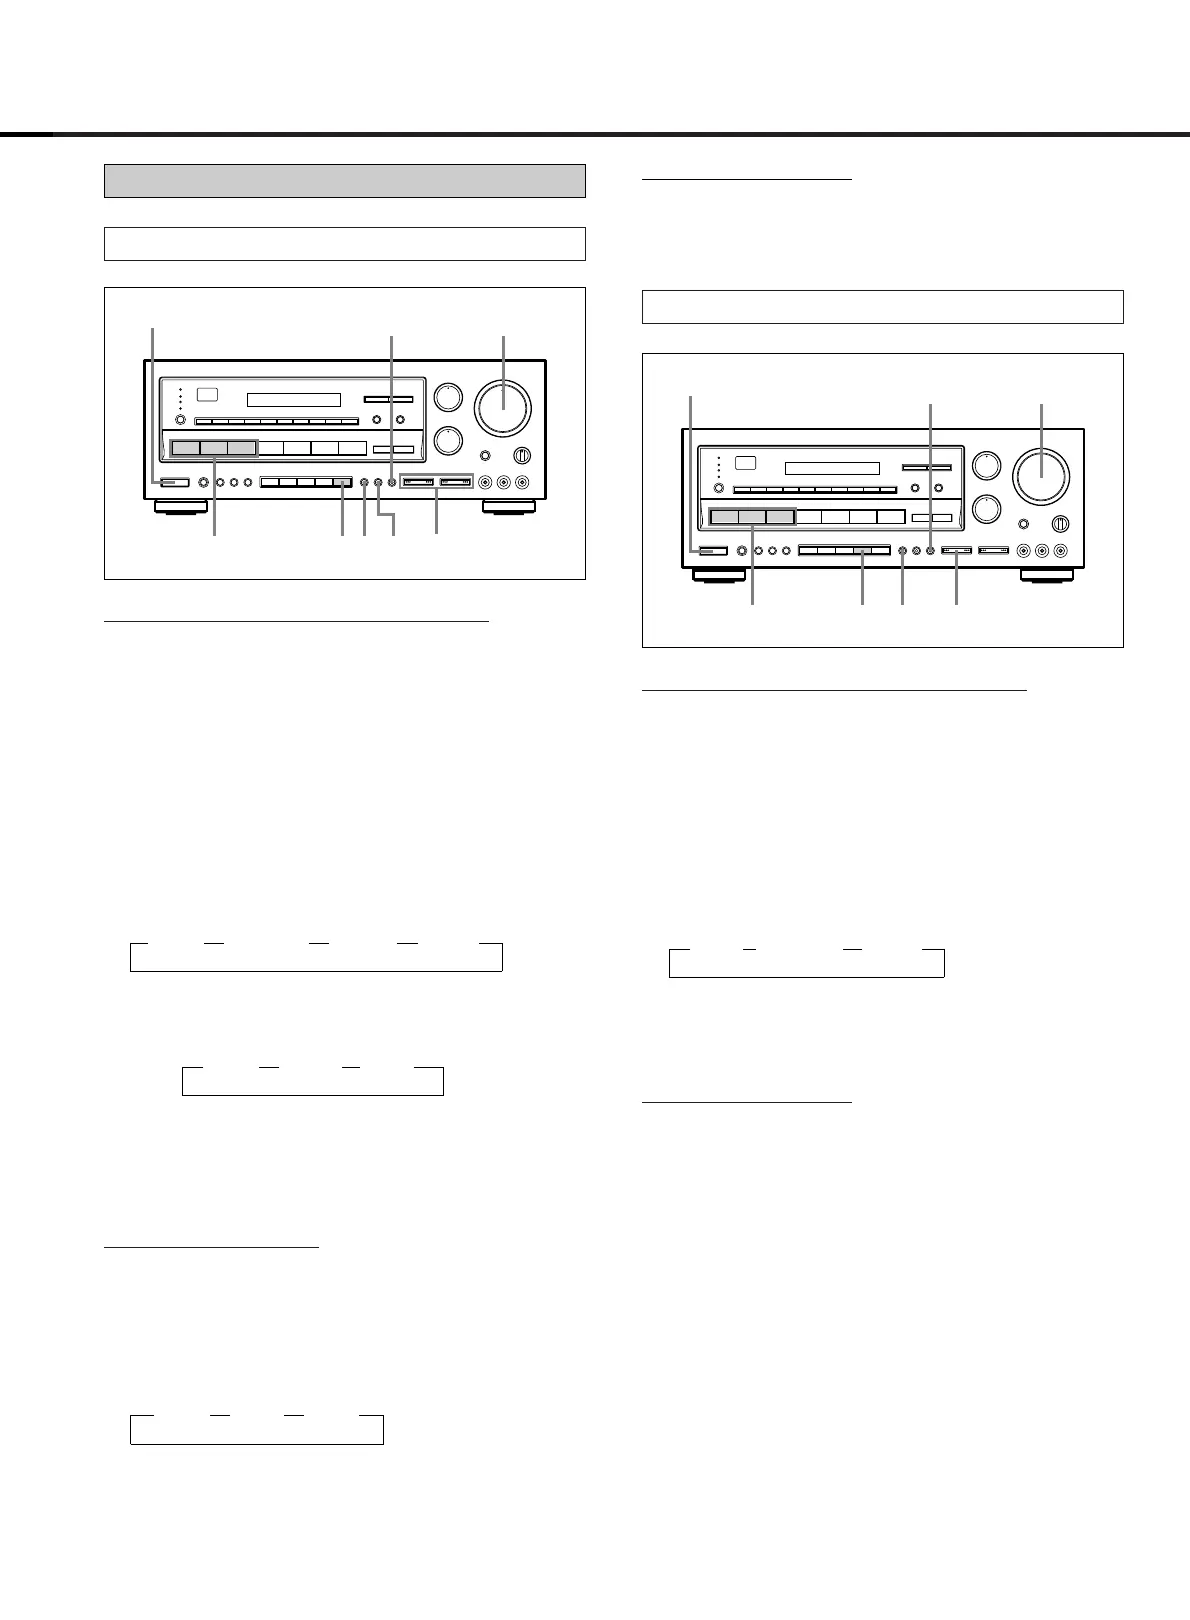
1. Press the DOLBY PRO LOGIC button.
2. Set the MASTER VOLUME control to the normal lis-
tening level.
3. Press the CENTER MODE button to select the center
speaker mode you desire, NORMAL, WIDE or PHAN-
TOM mode.
4. Press the TEST TONE button to send the test tone
signal to each speaker in succession as shown
below.
∑LEFT ∑ CENTER ∑ RIGHT ∑ REAR
Note: When the PHANTOM mode is selected in
step 3:
∑LEFT ∑RIGHT ∑REAR
5. Adjust the CENTER LEVEL and REAR LEVEL controls
so that test tone volumes are equal on all speakers.
6. Press the TEST TONE button to cease testing.
A
djusting the Delay Time
7. Play the video software with the DOLBY SURROUND
mark.
8. Adjust the delay time as desired in 3 steps by press-
ing DELAY TIME button:
∑15ms ∑20ms ∑30ms
20msec is standard.
DOLBY PRO LOGIC Surround
Playing Surround Sound
Playing Surround Sound
9. Adjust the MASTER VOLUME control for the most
appropriate overall volume.
– 19 –
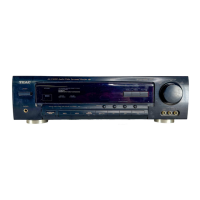
DOLBY 3 STEREO
Balancing Relative Volumes among Speakers
1. Press the DOLBY 3 STEREO button.
2. Set the MASTER VOLUME control to the normal lis-
tening level.
3. Press the CENTER MODE button to select the center
speaker mode you desire, NORMAL or WIDE mode.
4. Press the TEST TONE button to send the test tone sig-
nal to each speaker in succession as shown below.
∑LEFT ∑CENTER ∑RIGHT
5. Adjust the CENTER LEVEL controls so that the center
speaker sound level is equal to that of the left speak-
er and then to that of the right speaker.
6. Press the TEST TONE button to cease testing.
Pla
ying Surround Sound
7. Play the video software with the DOLBY SURROUND
mark.
8. Adjust the MASTER VOLUME control for the most
appropriate overall volume.