Do you have a question about the Teac SL-D920 and is the answer not in the manual?
Users must read, keep, heed, and follow all instructions and warnings in the manual for safe operation.
Proper installation, ventilation, and avoiding heat/moisture are essential for safe operation.
Protect power cords, use correct plugs, and refer servicing to qualified personnel.
Use specified accessories, handle with care, unplug during storms, and avoid water exposure.
Ensure proper ventilation, avoid direct sunlight, heat, dust, and vibrations for optimal placement.
Avoid moving the unit during playback to prevent disc damage.
Remove discs, turn off power, and disconnect cord before moving the unit.
Wipe with a soft cloth or diluted neutral cleaning liquid; avoid solvents.
Stabilize unit temperature to prevent internal condensation.
Follow national laws for proper treatment, recovery, and recycling of old products and batteries.
Unit plays commercial audio CDs and finalized CD-R/RW discs; compatibility may vary.
Handle discs by edges, clean radially with a dry cloth, avoid chemicals.
Store discs in cases, avoid sunlight, humidity, and heat to prevent warping.
Avoid stabilizers, non-standard shapes, and printable discs to prevent damage.
Press the RESET switch to resolve operational issues caused by electrical disturbances or system errors.
Details MP3/WMA file requirements, including sampling rate, bitrate, and format exclusions.
Explains display limitations for file names and requirements for correct display.
Covers file extensions, session closure, and compatibility issues for MP3/WMA media.
Lists conditions and file types that may cause playback errors or failures.
Connect headphones to PHONES and portable players to AUX IN for audio.
Connect USB memory for music playback and AC power cord for operation.
Position the FM antenna for optimal radio signal reception.
Install battery for clock and memory backup when unit is disconnected from AC.
Details connecting headphones and external audio players via PHONES and AUX IN jacks.
Explains connecting USB memory and positioning the FM antenna for optimal performance.
Covers AC power connection and battery installation/replacement for memory backup.
Provides guidelines for correct battery installation and handling to ensure safety.
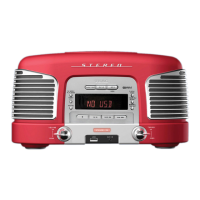
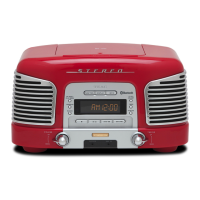
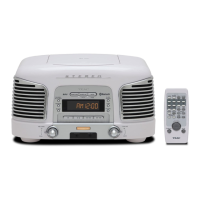
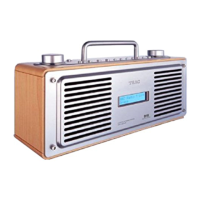
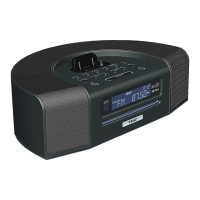
Identifies the disc compartment cover and snooze button on the unit's top panel.
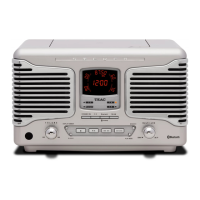
Details buttons and knobs on the front panel for functions, volume, tuning, and playback.
Lists and illustrates all buttons on the remote control for comprehensive operation.
Explains buttons for disc access, snooze, program, FM mode, play mode, and playback control.
Covers function selection, display functions, RDS information, and clock/timer settings.
Details AUX IN, USB connector, standby/on, volume, and recording functions.
Explains ERASE function for USB and TUNING knob for radio stations.
Controls for adjusting bass levels and setting the sleep timer for automatic shutdown.
Buttons for navigating MP3/WMA folders and selecting preset radio stations.
Buttons for switching between AM/FM bands and muting audio output.
Instructions for optimal remote control usage, including range and obstacle avoidance.
Step-by-step guide for inserting and replacing batteries in the remote control.
Provides guidelines for correct battery installation and handling to ensure safety.
Steps to turn the unit on and select audio sources like CD, Radio, or AUX.
How to adjust playback volume using the knob or remote control.
Adjusting the brightness of the front panel display using the SNOOZE button.
Setting the sleep timer to automatically turn off the unit after a specified period.
Temporarily silencing the sound using the MUTING button.
Steps to select CD mode, open compartment, load disc, and start playback.
Details display information for total tracks/time or folder/file counts.
Explains how playback begins and when it stops automatically.
Warnings against opening compartment during playback or placing multiple discs.
Steps to connect USB memory and select USB source for playback.
Information on USB loading time and starting playback from the first file.
How MP3/WMA files are handled in ROOT and other folders during playback.
How to temporarily pause or completely stop audio playback.
Instructions for skipping to the next/previous track or file, including search functionality.
Navigating tracks/files within programmed playback sequences.
How to hold SKIP buttons to find a specific part within a track or file.
Using number buttons on the remote to directly select and play tracks or files.
How to view file name, title, artist, album, and folder/file numbers.
Using buttons or the TUNING knob to skip to the next folder on MP3/WMA media.
Guide to selecting and programming up to 32 tracks/files for playback in a specific order.
How to initiate programmed playback, cancel it, and manage program memory.
Checking the sequence of programmed tracks/files by pressing the PROGRAM button.
Adding tracks/files to the end or replacing existing entries in the program.
Methods to clear programmed tracks/files, including using buttons or disconnecting power.
How to repeat all tracks, all files in a folder, or a single track/file.
Randomly play tracks/files or play only the beginnings of each track/file.
Conditions under which repeat, shuffle, or intro modes are automatically cancelled.
Using the TUNING knob or buttons to select radio stations.
Choosing between STEREO and MONO reception for FM broadcasts.
Tips for better AM and FM reception, including antenna adjustment and unplugging USB memory.
Procedure to tune to a station and store it as a preset channel using the PROGRAM button.
How to recall stored stations using number buttons or PRESET buttons on the remote.
Note that settings like presets are lost if power supply is interrupted and battery dies.
How to cycle through RDS data like PS, PTY, RT, and CT on the display.
Automatic clock adjustment using CT data from RDS stations and how to enable/disable it.
Steps to search for stations broadcasting a specific program type using PTY Search.
How the search operates, what happens if type is not found, and how to stop the search.
A list of program types (NEWS, AFFAIRS, SPORT, etc.) that can be searched for via RDS PTY.
How to connect a portable audio player to the AUX IN jack using a stereo mini-plug cable.
Guidance on adjusting volumes of both the external player and the unit for optimal sound.
Unit can record CDs, radio, AUX IN to USB as MP3 files.
Warnings about disconnecting during recording and notes on file naming and capacity.
Details on USB memory capacity, file limits per folder, and checking remaining capacity.
Connect the USB memory device to the unit's USB port before recording.
Choose the source (CD, AM, FM, AUX) for recording to USB.
Press the RECORD button to start recording from the selected source.
Press the RECORD button again to stop an ongoing recording process.
Notes on which controls are active during recording and limitations on USB devices.
Play the file you wish to delete from the USB memory device.
Press ERASE, then SKIP, then ERASE again within 10 seconds to delete the file.
Access clock setting by pressing CLOCK ADJ button for over 2 seconds.
Use SKIP buttons to set current hour and minute values.
Option to switch between 12 H and 24 H display modes.
Press CLOCK ADJ again to finalize the time setting.
Enter timer setting by pressing and holding TIMER button for over 2 seconds.
Use SKIP buttons to set the ON hour and minute, then press TIMER.
Use SKIP buttons to set the OFF hour and minute, then press TIMER.
Choose PLAY or REC mode for the timer using SKIP buttons.
Select the source (CD, USB, FM, AM) for timer playback or recording.
Adjust the volume level for timer playback using SKIP buttons.
Ensure the selected source (CD, USB, Tuner) is ready for timer operation.
Press STANDBY/ON to put the unit in standby for the timer to function.
Pressing the TIMER button activates or deactivates the timer function.
"ERROR" appears if ON and OFF times are the same; timer cannot be activated.
Cancel the timer function by pressing the TIMER button before OFF time is reached.
Frequency ranges, response, and wow/flutter for Tuner and CD player sections.
Speaker types, impedance, power, dimensions, weight, and power requirements.
List of items included with the unit, such as remote, batteries, and cables.
Solutions for no power, no sound, noisy sound, and remote control malfunctions.
Troubleshooting steps for discs not playing, including cleaning and disc type issues.
Causes and solutions for sound skipping, such as vibration and disc condition.
Problems with tuning, stereo sound, MP3/WMA playback, and display characters.
Solutions for recording failures, USB memory issues, and memory setting loss.