20
1. Press the RECORD button and a small record icon will appear beside the program name.
2. To finish, press EXIT.
NOTE: If the start time set on the scheduled recording has already elapsed, or if the
scheduled recording clashes with another, you will get an error message.
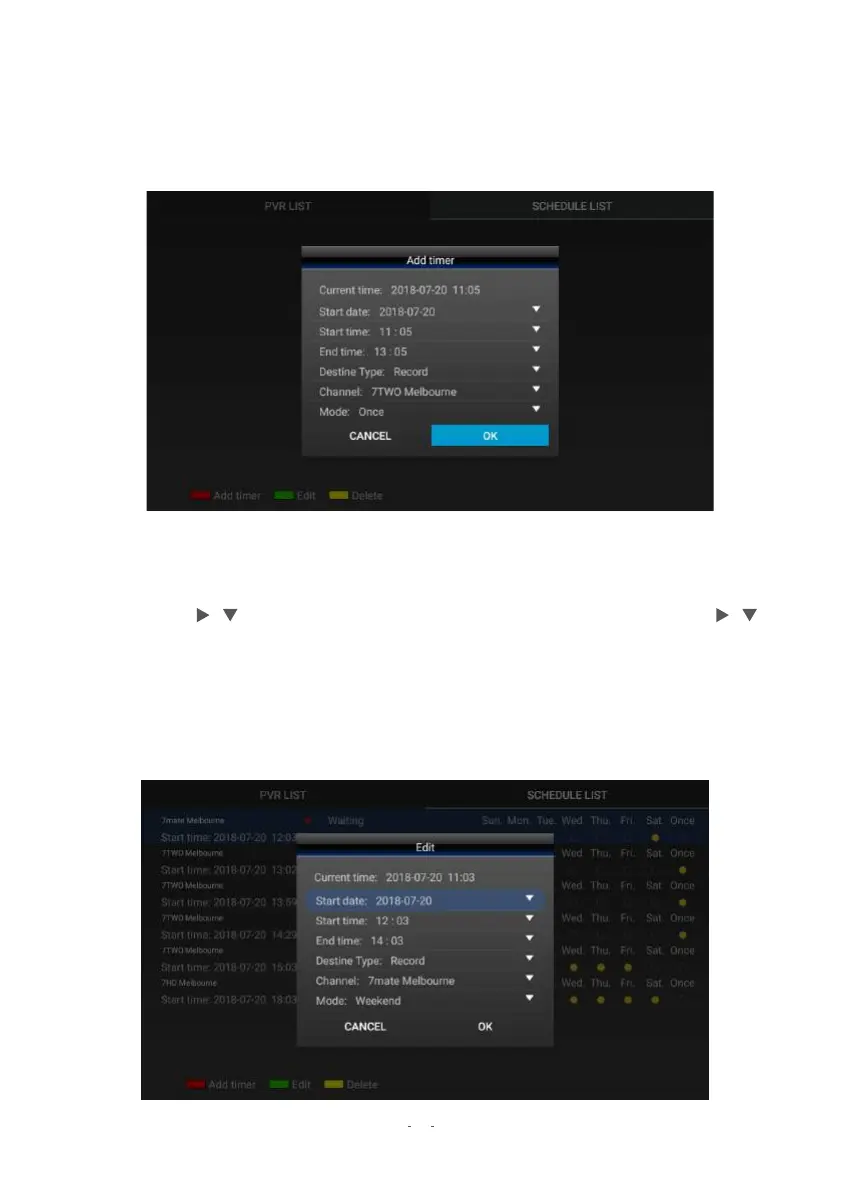
SCHEDULE MANUALLY
Use this method if you wish to manually set a start time and recording length for a scheduled
recording.
1.
Pres
s the SCHEDULE button, then the RED button.
2. The "Add timer" menu will now display. Customise each detail by highlighting them
with the / buttons, press OK, then pick a choice (where available) with the /
buttons. To set the date, use the NUMBER buttons to key in the time in YYYY-MM-DD
format. To set the start/end times, use the NUMBER buttons to key in the time in
24-hour format.
3. T
o finis
h, highlight OK at the bottom and press OK.
4. Exit this menu with EXIT/HOME.
EDIT SCHEDULED ITEMS
 Loading...