11
Procedure:
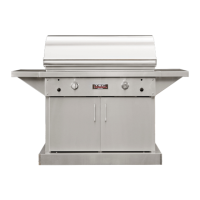
1. Open the Hood, ensure all valves are closed and that
the cooking surface of the grill is not covered.
2. For LP gas, open the Gas Cylinder Valve by turning
the Handwheel counter-clockwise. (See Figure 8.)
For Natural gas, open the gas valve in the main line.
3. Remove the right cooking grid. Ignite the match.
P
lace the match directly on the burner screen above
the right half of the burner.
4. Confirm that the match is still burning. Depress and
turn the right Burner Output Knob to (HIGH).
Once it is lit, depress and turn the left burner to
(HIGH). If either burner fails to ignite within 5
seconds, turn the Burner Output Knob of that burner
to OFF, wait five minutes, then repeat.
5. Operate on (HIGH) until the burners glow
uniformly, then turn the Burner Output Knobs to
desired cooking level.
6. To extinguish the flame, depress and rotate the Burner
Output Knobs and the Pilot Output Knob to OFF.
7. For LP gas, close the Gas Cylinder Valve by turning
the Handwheel clockwise. For Natural gas, close the
gas valve in the main line.
Low Heat Adjustment
WARNING: NEVER ADJUST THE BURNER SO LOW
THAT IT MAY GO OUT DURING USE. DO NOT OPERATE
GRILL WITH DISENGAGED LOW HEAT ADJUSTING
SCREW.
The Low Heat Adjusting Screw only applies to the burner
operation at the LOW setting. Other settings are not
affected by this adjustment. Any efforts to make
adjustments at another setting will produce no change in
the flame until the burner is turned to LOW. If the burner
is adjusted too low, it may involuntarily extinguish while
gas is still flowing. This condition is unsafe, therefore
adjustments should only be made with the Burner Output
Knobs positioned at the LOW setting while paying careful
attention to resulting changes in burner performance.
The burner’s LOW heat output is preset at the factory. If
your atmospheric conditions or altitude are significantly
different from those existing in our factory, the burners
may operate differently than they did at our factory. This
may warrant adjustment of the low heat settings. Also, you
may simply desire to change it because of your cooking
style. To complete the LOW Heat Adjustment, follow the
instructions below.
Procedure:
1. Follow the Burner Ignition procedures and operate the
grill for 5 minutes or until the burners glow uniformly
throughout.
2. Turn the Burner Output Knob of the burner to be
adjusted to the LOW position and wait until the
temperature drops and stabilizes.
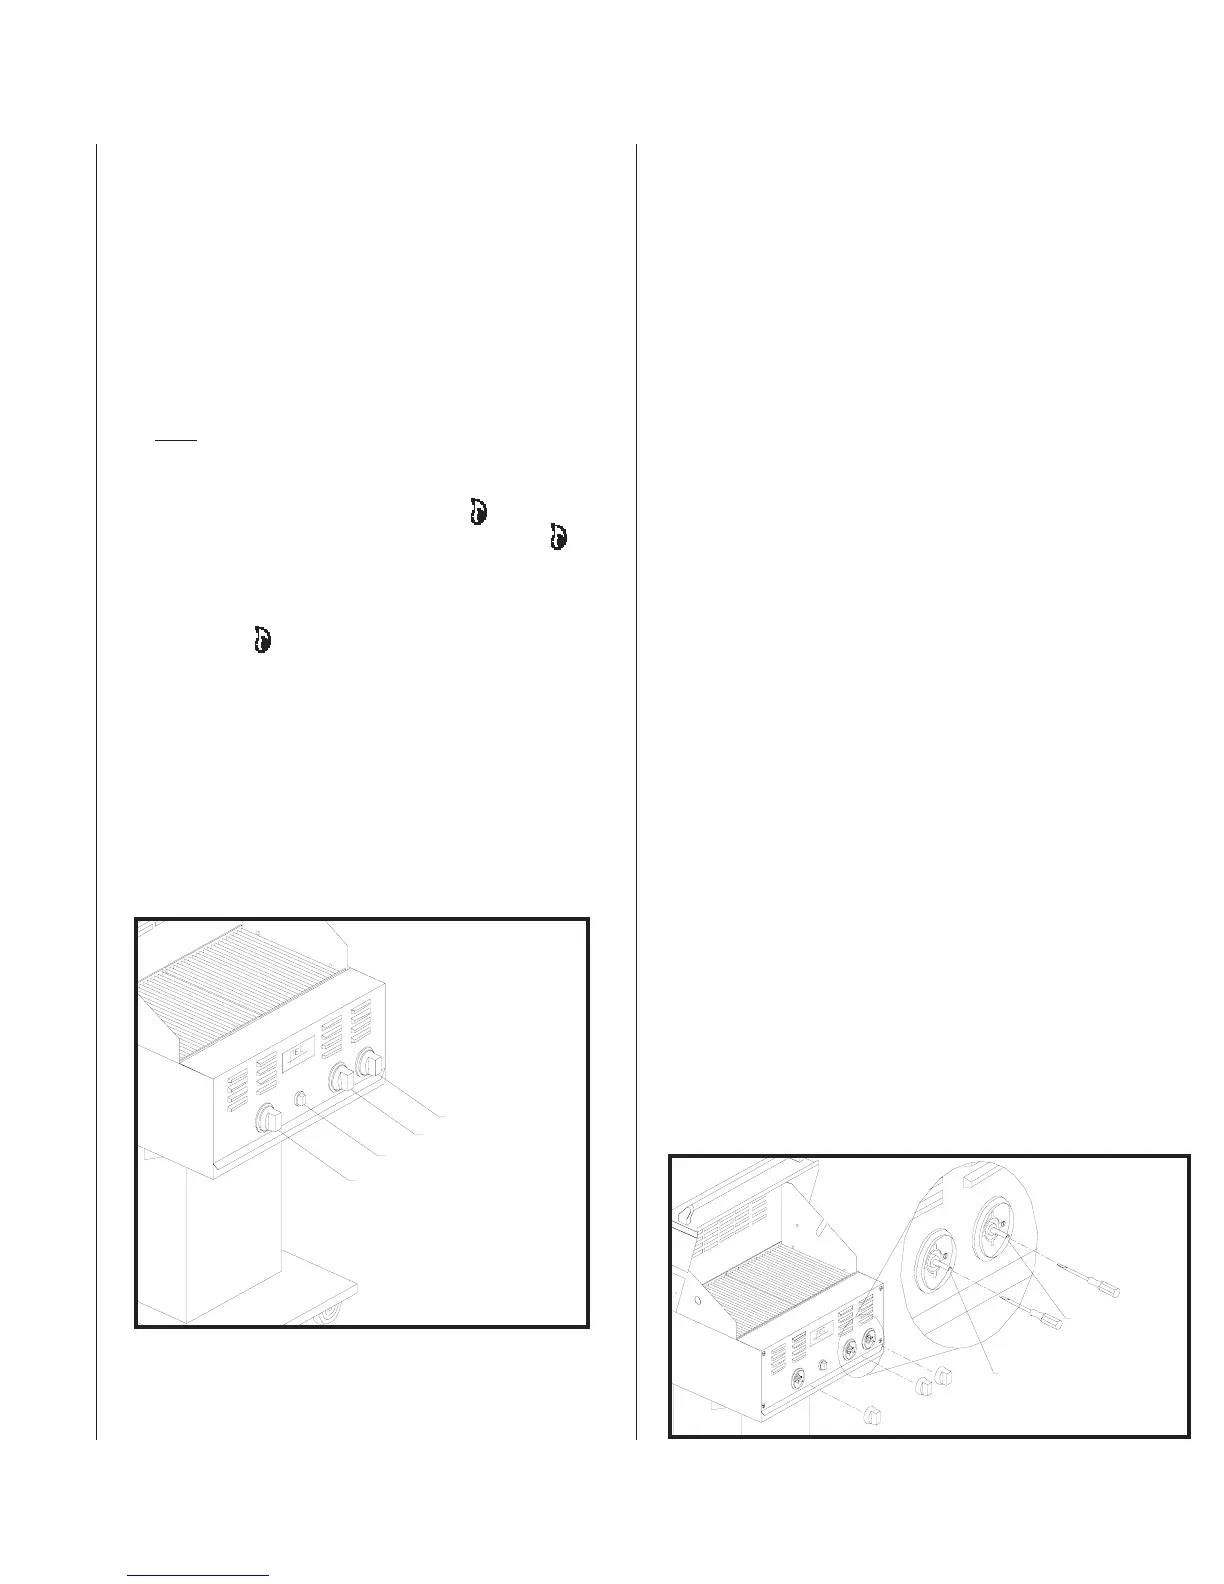
3. Remove the Burner Output Knob from the valve
stem. (See Figure 12.)
4. Insert a
1
/
8
” blade screwdriver into the valve stem.
5. Turn the Low Heat Adjusting Screw clockwise to
reduce the LOW heat intensity or counter-clockwise
to increase the LOW heat intensity.
Operation
continued
Figure 12a. Low Heat Adjustment
Pilot adjusting
screw
Low heat
adjusting screw
Figure 12. Burner and Pilot Output Knobs