20
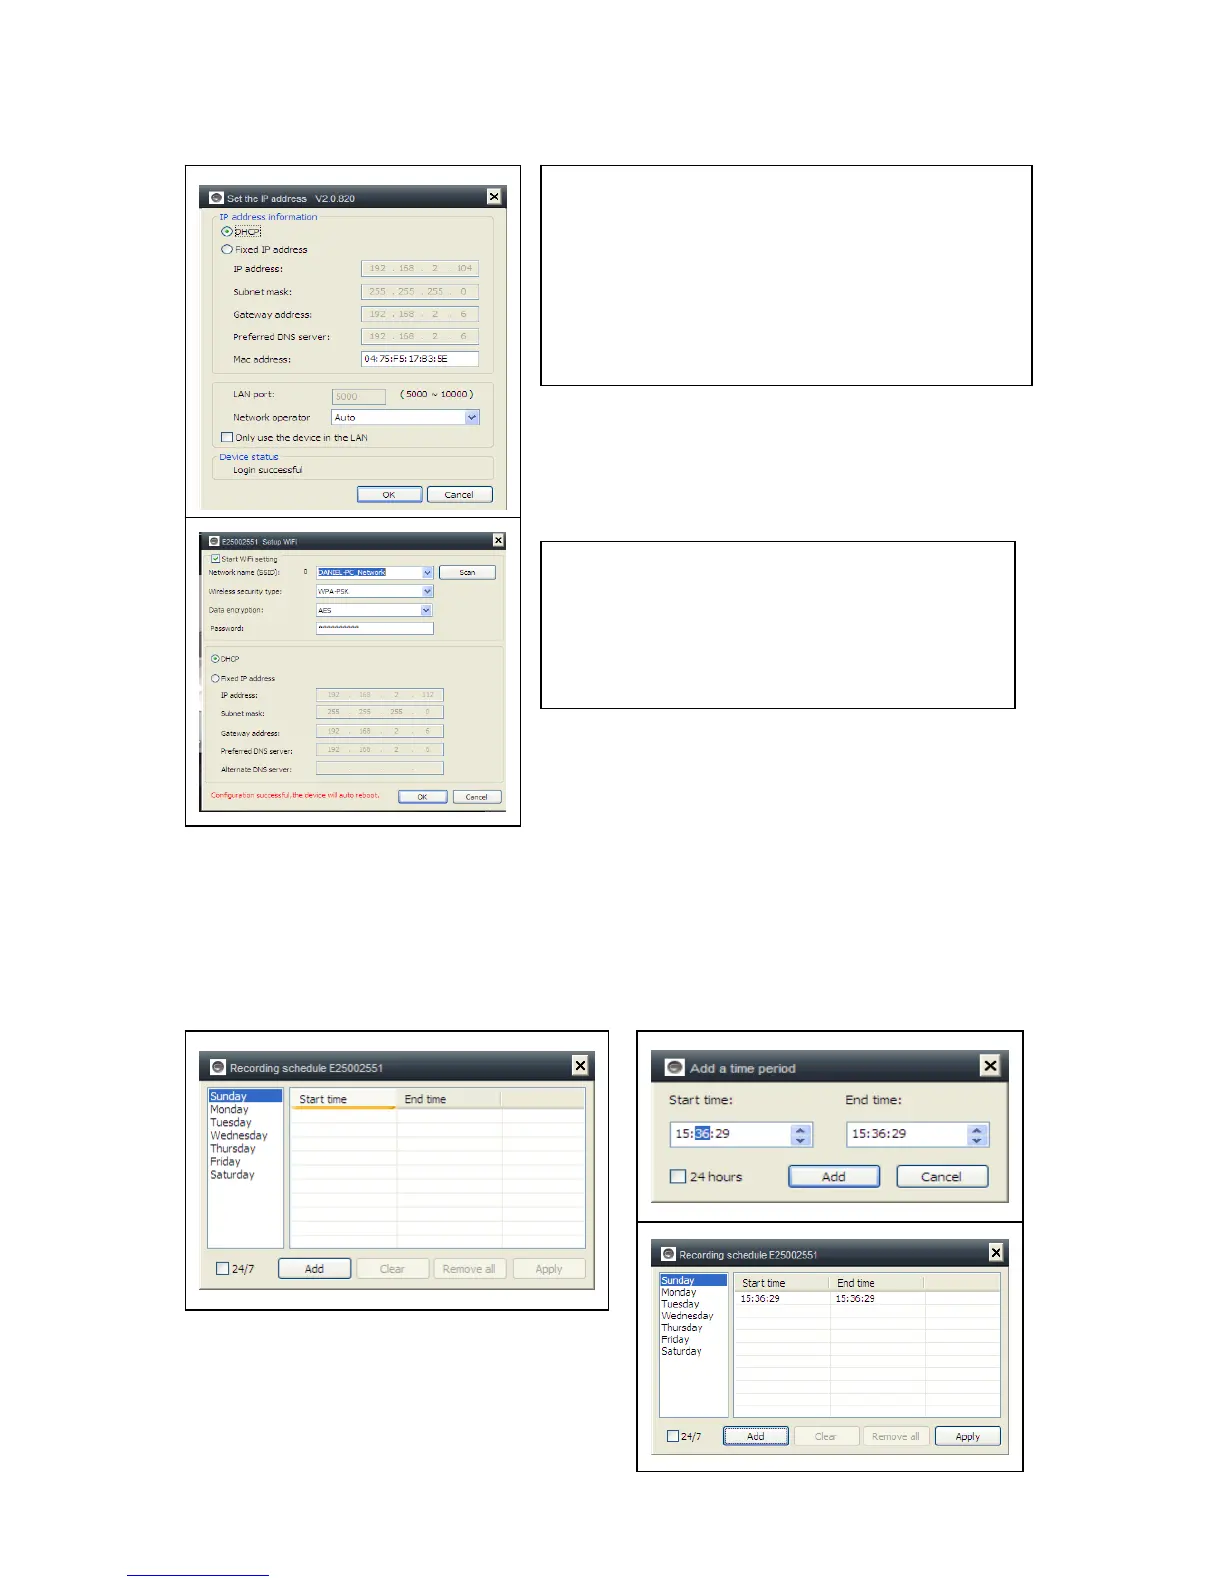
6.1.1. Set the IP address
6.1.2. Set WIFI connection
(refer to 4.2. WIFI connection)
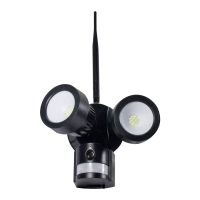
6.1.3. Set the local video plan
Set local video record plan, the software will auto record the camera schedule on the
computer after the My Secure is running, as shown below:
Enable “7 x 24” to record all the time from Sunday to Monday
Click “Add” to select the day it and set the start and End time for video recording
Click “Apply” to save the current video equipment plan settings.
The default setting is camera use DHCP.
Camera auto gets IP address from network
router.
It is a easy way for normal customer who do
not know how to set IP address manually.
Activate the „Start WiFi Setting“ and click on
Scan. Select your “Router” Network Name
and put the right password from your WiFi
router. Here no more changes! Then press
OK.